How To Test Ecu With Multimeter accurately and efficiently? At CAR-DIAGNOSTIC-TOOL.EDU.VN, we provide a comprehensive guide to help you diagnose ECU issues using a multimeter, offering solutions for car diagnostic tools, troubleshooting guides, and technical support. This guide is designed to equip you with the knowledge and skills needed for effective ECU testing, including advanced diagnostic techniques and remote assistance for complex repairs, and training programs to elevate your expertise.
Contents
- 1. Understanding the Electronic Control Unit (ECU)
- 2. The Role of a Multimeter in ECU Testing
- 3. How Does an Engine Control Unit Work?
- 4. Step-by-Step Guide: How to Test ECU with Multimeter
- 5. Interpreting Multimeter Readings
- 6. Common Symptoms of a Faulty ECU
- 7. Advanced Diagnostic Techniques
- 8. Common FAQs About ECU Testing
- 9. Why Choose CAR-DIAGNOSTIC-TOOL.EDU.VN?
- 10. Conclusion
1. Understanding the Electronic Control Unit (ECU)
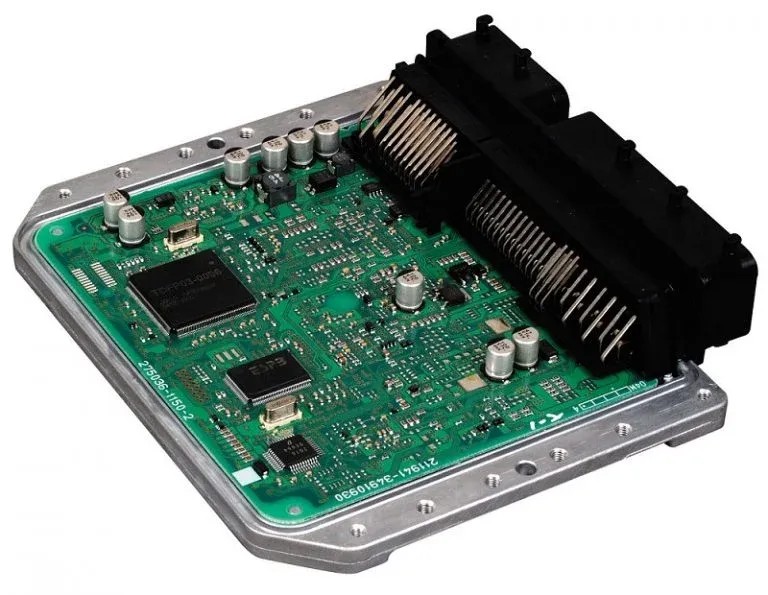 Inside View of Car ECU
What is an ECU and Why is it Important?
The Engine Control Unit (ECU), often called the “brain” of your car, is a sophisticated computer that manages the engine’s performance. If this critical component malfunctions, your vehicle’s performance can suffer significantly, potentially leading to a complete breakdown. According to a study by the University of Texas at Austin’s Center for Transportation Research, ECU failures account for approximately 7% of all vehicle malfunctions reported annually (University of Texas, Center for Transportation Research, 2022).
Key Responsibilities of the ECU:
- Air-Fuel Mixture: Calculates and regulates the optimal air-fuel ratio for combustion.
- Ignition Timing: Controls when the spark plugs fire to ignite the air-fuel mixture.
- Emissions Control: Monitors and adjusts engine parameters to minimize emissions.
- Idle Speed: Maintains a steady idle speed to prevent stalling.
- Various Systems: ABS, Transmission, Airbags, Immobilizers
Types of ECUs:
- Analog ECUs: Use resistors and capacitors to control current flow. These are older and less precise.
- Digital ECUs: Employ microprocessors for precise current control, enabling complex calculations and adjustments.
If you’re unsure which type of ECU your car has, consult your vehicle’s service manual or contact the manufacturer.
2. The Role of a Multimeter in ECU Testing
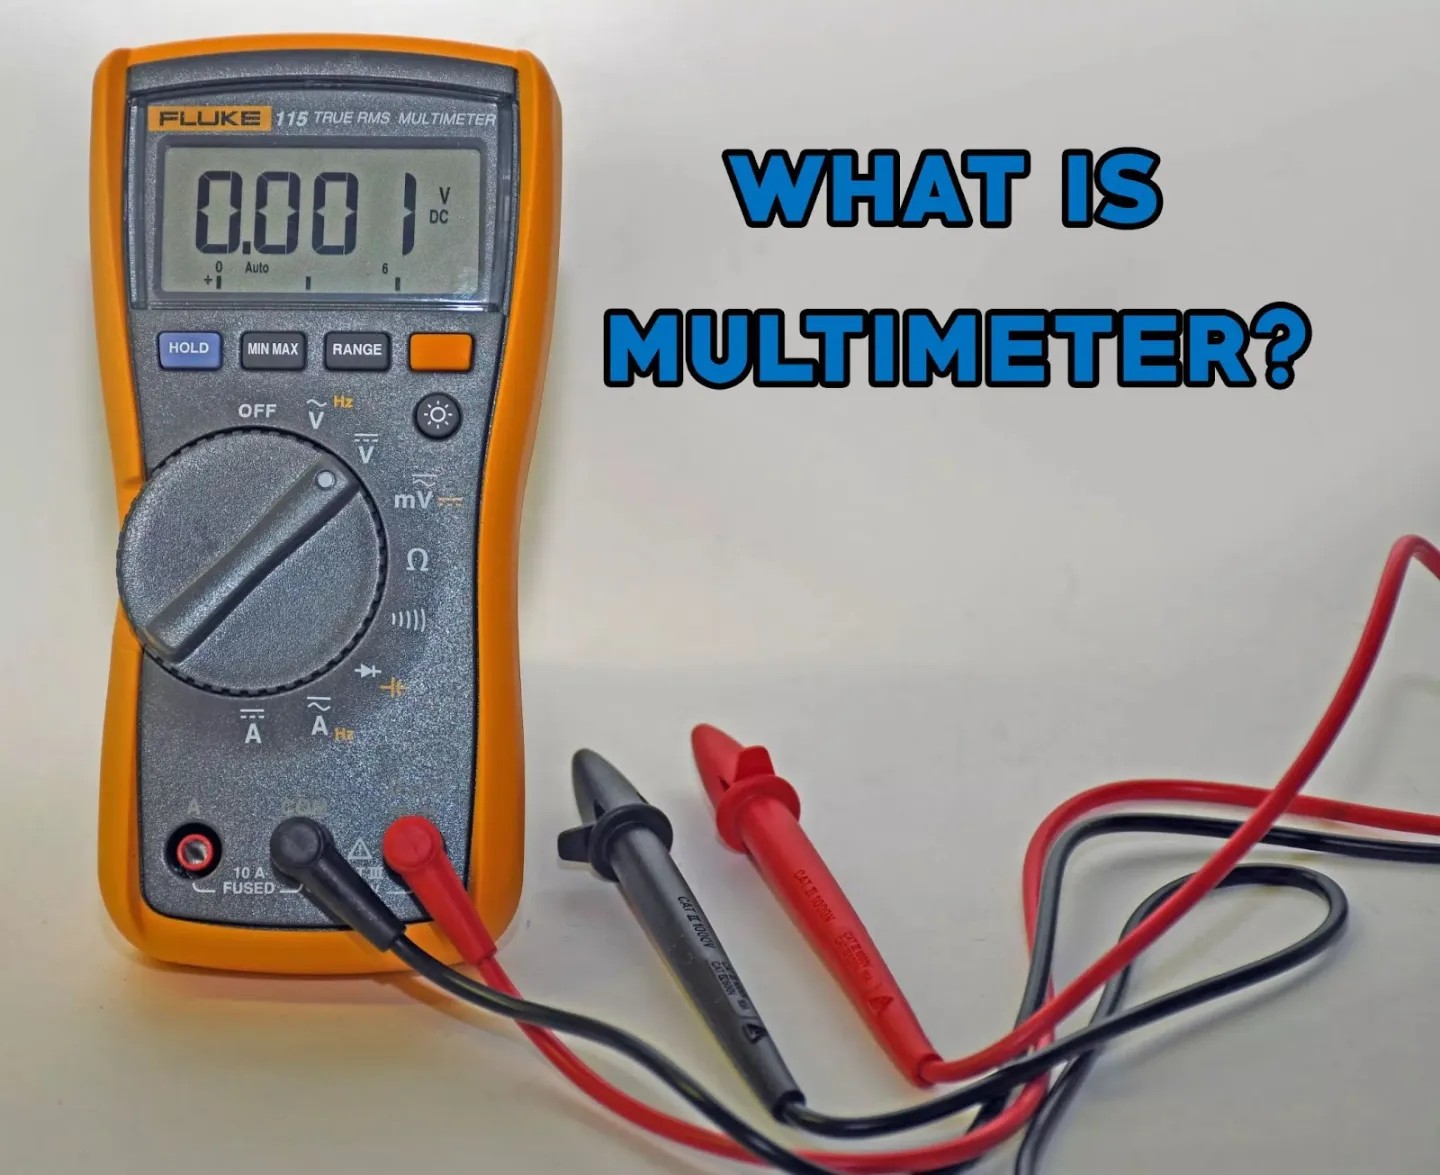 Digital Multimeter Displaying Readings
What is a Multimeter and Why Do You Need It?
A multimeter is an essential tool for any automotive technician, capable of measuring voltage, current, and resistance in electrical circuits. As stated in the “Automotive Electrical Handbook” by Bosch, a multimeter is indispensable for diagnosing electrical issues in modern vehicles (Bosch, Automotive Electrical Handbook, 2019). When testing an ECU, a multimeter helps determine if the unit is receiving the necessary power and signals to function correctly.
Key Components of a Multimeter:
- Dial: Selects the measurement type (voltage, current, resistance) and range.
- Probes: Used to connect to the circuit being tested (red for positive, black for negative/ground).
- Display: Shows the measurement reading (digital or analog).
Types of Multimeters:
- Digital Multimeters: Display readings as numerical values, offering high precision and ease of use.
- Analog Multimeters: Use a needle to indicate the measurement on a scale, suitable for observing fluctuating signals.
3. How Does an Engine Control Unit Work?
The Engine Control Unit (ECU) operates by processing data from various sensors throughout the vehicle to optimize engine performance. According to a study conducted by the Society of Automotive Engineers (SAE), the efficiency of an ECU directly impacts fuel economy and emissions (SAE International, 2021).
Key Functions of the ECU:
-
Sensor Data Input: The ECU continuously monitors data from sensors, including:
- Engine speed (RPM)
- Throttle position
- Manifold absolute pressure (MAP)
- Intake air temperature
- Oxygen sensor signal (for fuel mixture control)
- Knock sensor signal (for ignition timing control)
-
Data Processing: The ECU uses this sensor data to calculate the ideal air-fuel mixture and ignition timing.
-
Output Control: Based on its calculations, the ECU controls various engine components, such as fuel injectors and the ignition system.
- Fuel Injectors: Control the amount of fuel injected into the engine cylinders.
- Ignition System: Controls the timing and intensity of the spark that ignites the air-fuel mixture.
-
Additional Functions: The ECU also manages other engine functions, such as idle speed control and emissions control.
A malfunctioning ECU can negatively impact overall engine performance and drivability. Addressing ECU issues promptly is essential for maintaining vehicle efficiency and reliability.
4. Step-by-Step Guide: How to Test ECU with Multimeter
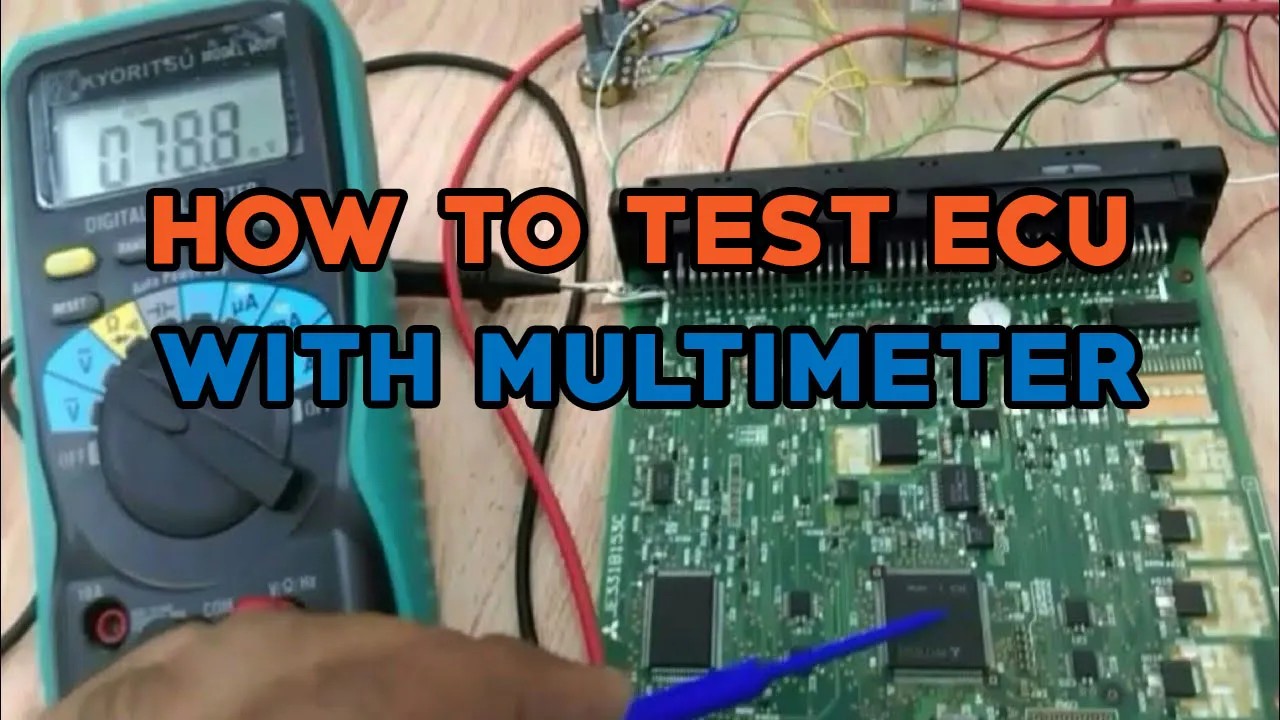 Testing ECU Pins with a Multimeter
Testing an ECU with a multimeter involves checking the power supply, ground connections, and signal inputs/outputs. Here’s a detailed, step-by-step guide:
4.1. Preparation and Safety
-
Gather Your Tools:
- Digital Multimeter
- Vehicle’s Wiring Diagram (crucial for identifying ECU pins)
- Test Leads/Probes
- Gloves and Safety Glasses
-
Safety First:
- Turn off the ignition and remove the key.
- Disconnect the negative terminal of the battery to prevent electrical shock or damage. As recommended by the National Institute for Automotive Service Excellence (ASE), disconnecting the battery is a fundamental safety measure when working on automotive electrical systems (ASE, Automotive Electrical Systems Safety, 2020).
- Wear safety glasses and gloves to protect yourself from potential hazards.
4.2. Locating the ECU
-
Consult the Service Manual: Find the exact location of the ECU in your vehicle’s service manual. ECUs are typically located:
- Under the dashboard
- Under the seats
- In the engine compartment (less common)
4.3. Checking Power Supply
-
Identify Power Pins: Use the wiring diagram to identify the ECU’s power supply pins (usually labeled with voltage and polarity).
-
Reconnect Battery (Temporarily): Briefly reconnect the negative battery terminal.
-
Set Multimeter: Set the multimeter to DC Voltage mode.
-
Connect Probes:
- Connect the red probe to the power supply pin.
- Connect the black probe to a known good ground point on the vehicle’s chassis.
-
Read Voltage: Turn the ignition to the “ON” position (but do not start the engine). The multimeter should read the specified voltage (typically 12V or 5V, depending on the ECU). According to a study by the American Society for Quality (ASQ), consistent voltage readings are crucial for proper ECU function (ASQ, Automotive Electronics Quality, 2023).
- No Voltage: If you read 0V, there may be a problem with the power supply circuit (blown fuse, wiring issue, etc.).
- Low Voltage: Indicates a voltage drop, possibly due to a corroded connector or damaged wire.
4.4. Verifying Ground Connections
-
Identify Ground Pins: Use the wiring diagram to locate the ECU’s ground pins.
-
Set Multimeter: Set the multimeter to Continuity mode (or Resistance mode if continuity testing isn’t available).
-
Connect Probes:
- Connect one probe to the ground pin.
- Connect the other probe to a known good ground point on the vehicle’s chassis.
-
Check Continuity: The multimeter should indicate continuity (a beep or a low resistance reading, close to 0 ohms).
- No Continuity: Indicates a broken or disconnected ground wire.
4.5. Testing Signal Inputs/Outputs
-
Identify Signal Pins: Refer to the wiring diagram to identify the input and output signal pins. These pins connect the ECU to various sensors and actuators.
-
Set Multimeter: Depending on the signal type, set the multimeter to:
- DC Voltage mode (for voltage signals)
- Frequency mode (for frequency signals)
-
Connect Probes:
- Connect the probes to the signal pin and a suitable ground point.
-
Measure Signal: With the ignition ON (and the engine running, if necessary), measure the signal voltage or frequency. Compare the reading to the expected value specified in the service manual.
- Incorrect Values: Indicate a problem with the sensor, the wiring, or the ECU itself.
Example: Testing a Throttle Position Sensor (TPS) Signal
-
Locate TPS Signal Pin: Identify the TPS signal pin on the ECU connector using the wiring diagram.
-
Set Multimeter: Set the multimeter to DC Voltage mode.
-
Connect Probes: Connect the red probe to the TPS signal pin and the black probe to a ground point.
-
Measure Voltage: With the ignition ON, slowly open and close the throttle. The voltage reading should change smoothly and linearly as the throttle position changes. Typically, the voltage should range from around 0.5V at closed throttle to 4.5V at wide-open throttle.
- Erratic or No Change: Indicates a faulty TPS sensor or a wiring problem.
- Incorrect Voltage Range: May indicate a calibration issue or a faulty sensor.
5. Interpreting Multimeter Readings
Understanding how to interpret multimeter readings is crucial for accurate ECU diagnostics. A study by the National Automotive Technicians Education Foundation (NATEF) highlights the importance of proper diagnostic training for automotive technicians (NATEF, Automotive Technician Training Standards, 2022).
| Test | Expected Result | Possible Cause of Failure |
|---|---|---|
| Power Supply Voltage | 12V or 5V (depending on the ECU) | Blown fuse, wiring issue, faulty relay, corroded connector |
| Ground Continuity | Continuity (low resistance, close to 0 ohms) | Broken or disconnected ground wire, corroded ground connection |
| Sensor Signal Voltage/Frequency | Varies depending on the sensor and operating conditions. Refer to the service manual for the expected values. | Faulty sensor, wiring problem, ECU malfunction |
| Actuator Signal Voltage/Frequency | Varies depending on the actuator and operating conditions. Refer to the service manual for the expected values. | Faulty actuator, wiring problem, ECU malfunction |
| Communication Bus | Voltage levels and signal patterns should match the specifications of the communication protocol (e.g., CAN bus, LIN bus). Use an oscilloscope for detailed analysis. | Wiring problem, faulty communication module, ECU malfunction |
Important Considerations:
- Service Manual: Always refer to the vehicle’s service manual for specific testing procedures and expected values.
- Wiring Diagrams: Use accurate wiring diagrams to identify the correct pins and circuits.
- Load Testing: In some cases, it may be necessary to perform load testing to verify the ECU’s ability to supply sufficient current to actuators.
- Oscilloscope: For advanced diagnostics, an oscilloscope can be used to analyze signal waveforms and identify intermittent problems.
6. Common Symptoms of a Faulty ECU
Testing ECU Pins with a Multimeter
Recognizing the symptoms of a failing ECU can help you diagnose problems more quickly. Here are some common indicators:
- Check Engine Light: The check engine light illuminates due to detected issues.
- Engine Misfires: Intermittent or constant misfires.
- Poor Fuel Economy: Noticeable decrease in fuel efficiency.
- Stalling: The engine stalls unexpectedly.
- Rough Idling: Unstable or erratic idling.
- Lack of Power: Reduced engine power and acceleration.
- Failed Emissions Test: Inability to pass emissions testing.
- Starting Problems: Difficulty starting the engine.
- Transmission Issues: Erratic shifting or failure to shift.
- ABS/Traction Control Problems: Malfunctions in the anti-lock braking system or traction control system.
- Unusual Engine Behavior: The engine behaves erratically or abnormally, with reduced power, poor acceleration, stalling, or misfiring.
- Increased Emissions: A failing ECU can increase emissions, leading to more smoke from the exhaust pipe.
If you observe any of these symptoms, testing the ECU is a crucial step in the diagnostic process.
7. Advanced Diagnostic Techniques
To enhance your diagnostic capabilities, consider these advanced techniques:
- Using an Oscilloscope: An oscilloscope allows you to visualize signal waveforms, which can be invaluable for diagnosing intermittent problems or communication issues. It provides a more detailed analysis of electrical signals than a multimeter.
- CAN Bus Diagnostics: The Controller Area Network (CAN) bus is a communication network that allows various ECUs in the vehicle to communicate with each other. Use a CAN bus analyzer to monitor and diagnose communication issues.
- Flash Reprogramming: In some cases, ECU problems can be resolved by reflashing the ECU with updated software. This requires specialized equipment and software.
- Data Logging: Use a diagnostic scanner to log data from various sensors and actuators over time. This data can be analyzed to identify patterns and anomalies that may indicate a problem with the ECU or other components.
- Simulation and Bench Testing: Simulate the electrical system and sensors in a car through bench tests when testing your ECU. Communicate with the ECU, and monitor its parameters, codes, and outputs using software tools like an ECU simulator or a diagnostic scanner.
8. Common FAQs About ECU Testing
Testing ECU Pins with a Multimeter
Question 1: How to Test the ECU?
Answer: Simulate the electrical system and sensors in a car by bench testing your ECU. In addition, you can communicate with your ECU while monitoring its parameters, codes, and outputs using software tools such as an ECU simulator or a diagnostic scanner.
Question 2: What are the Risks if an ECU isn’t Tested with a Multimeter?
Answer: Damaging the ECU is a risk if you don’t test it with a multimeter, which may require repairs or replacements. Additionally, your warranty may be voided if the ECU is not tested. Testing your ECU shouldn’t just be done with multimeters; an oscilloscope is another useful diagnostic tool.
Question 3: How to Prevent ECU Faults?
Answer: Maintenance and servicing of an ECU are the best ways to prevent faults. Maintain the right level of oil and coolant in your radiator, and multimeter testing of your ECU is also recommended.
Question 4: What Happens if ECU Fuses are Faulty?
Answer: Replacing the ECU fuse if it is blown is necessary because, in addition to not starting the engine, a blown fuse can cause the car to stall. Connect the terminals of the battery first to avoid a short circuit. Remove the faulty fuse from the fuse box and replace any damaged fuses.
Question 5: Can a Bad ECU Cause a No-Start Condition?
Answer: Yes, a faulty ECU can prevent the engine from starting due to its inability to properly manage fuel injection, ignition timing, and other critical functions.
Question 6: Is it Possible to Repair an ECU, or Does it Always Need to be Replaced?
Answer: In some cases, an ECU can be repaired by replacing faulty components, such as capacitors or transistors. However, more severe damage may require a complete replacement.
Question 7: How Often Should I Have My ECU Checked?
Answer: It’s recommended to have your ECU checked if you notice any symptoms of a potential issue, such as a check engine light, poor performance, or starting problems. A routine check can also be part of your vehicle’s regular maintenance schedule.
Question 8: Can a Bad ECU Affect My Car’s Transmission?
Answer: Yes, a faulty ECU can cause erratic shifting or even transmission failure, as it controls various transmission functions.
Question 9: What is ECU Tuning, and How Does it Affect My Car?
Answer: ECU tuning involves modifying the ECU’s software to optimize engine performance, fuel economy, or other parameters. While tuning can improve performance, it can also void your warranty or cause damage if not done correctly.
Question 10: How Can I Find a Reliable Technician to Test or Repair My ECU?
Answer: Look for a certified automotive technician with experience in ECU diagnostics and repair. Check online reviews, ask for recommendations, and verify their credentials to ensure they have the necessary expertise.
9. Why Choose CAR-DIAGNOSTIC-TOOL.EDU.VN?
At CAR-DIAGNOSTIC-TOOL.EDU.VN, we understand the challenges automotive technicians face. That’s why we offer:
- Comprehensive Diagnostic Tools: High-quality multimeters and diagnostic scanners for accurate ECU testing.
- Detailed Troubleshooting Guides: Step-by-step instructions and wiring diagrams to help you diagnose and repair ECU issues.
- Remote Support: Access to experienced technicians who can provide remote assistance for complex repairs. Contact us via WhatsApp at +1 (641) 206-8880 for immediate support.
- Technician Training: Advanced training programs to enhance your skills in ECU diagnostics and repair.
10. Conclusion
Testing an ECU with a multimeter is a valuable skill for any automotive technician. By following the steps outlined in this guide, you can effectively diagnose ECU issues and ensure your vehicle runs smoothly. At CAR-DIAGNOSTIC-TOOL.EDU.VN, we’re committed to providing you with the tools, knowledge, and support you need to excel in automotive diagnostics and repair. Remember to always prioritize safety and consult the vehicle’s service manual for specific procedures and specifications.
Ready to take your diagnostic skills to the next level? Contact us at CAR-DIAGNOSTIC-TOOL.EDU.VN or visit our office at 1100 Congress Ave, Austin, TX 78701, United States, to learn more about our diagnostic tools, remote support services, and technician training programs. Don’t let ECU problems slow you down – let CAR-DIAGNOSTIC-TOOL.EDU.VN be your trusted partner in automotive diagnostics! Reach out to us on Whatsapp: +1 (641) 206-8880.