The 2006 Honda Civic Ecu Fuse Location is vital for diagnostics and repairs, and CAR-DIAGNOSTIC-TOOL.EDU.VN provides the expertise to help you locate it, diagnose issues, and perform effective repairs with our comprehensive diagnostic tools, step-by-step repair guides, and remote support. With us, technicians can elevate their proficiency through specialized training programs and remote assistance, optimizing their skills in vehicle diagnostics, error correction, and remote vehicle support.
Contents
- 1. Understanding the Importance of the ECU Fuse in Your 2006 Honda Civic
- 1.1 What Does the ECU Do?
- 1.2 Why is the ECU Fuse Important?
- 1.3 Potential Problems from a Blown ECU Fuse
- 2. Locating the ECU Fuse in a 2006 Honda Civic
- 2.1 Identifying the Fuse Box Locations
- 2.2 Step-by-Step Guide to Finding the ECU Fuse
- 2.3 Specific Fuse Numbers and Locations for 2006 Honda Civic
- 3. Diagnosing a Blown ECU Fuse
- 3.1 Common Causes of a Blown ECU Fuse
- 3.2 Tools Needed for Diagnosis
- 3.3 Step-by-Step Diagnostic Procedure
- 3.4 Using CAR-DIAGNOSTIC-TOOL.EDU.VN Resources for Diagnosis
- 4. Replacing a Blown ECU Fuse
- 4.1 Selecting the Correct Replacement Fuse
- 4.2 Step-by-Step Replacement Procedure
- 4.3 Safety Precautions
- 5. Advanced Troubleshooting for Persistent Issues
- 5.1 Checking for Short Circuits
- 5.2 Identifying Faulty Sensors
- 5.3 ECU Testing and Replacement
- 6. Benefits of Using CAR-DIAGNOSTIC-TOOL.EDU.VN
- 6.1 Comprehensive Diagnostic Tools
- 6.2 Detailed Repair Guides and Wiring Diagrams
- 6.3 Remote Technical Support
- 6.4 Technician Training Programs
- 6.5 Staying Updated with the Latest Technology
- 7. Case Studies: Real-World Examples of ECU Fuse Troubleshooting
- 7.1 Case Study 1: Short Circuit in Wiring Harness
- 7.2 Case Study 2: Faulty Oxygen Sensor
- 7.3 Case Study 3: ECU Internal Failure
- 8. Maintenance Tips to Prevent Future Fuse Problems
- 8.1 Regular Electrical System Checks
- 8.2 Avoid Overloading Circuits
- 8.3 Keep Wiring Protected
- 8.4 Monitor Sensor Performance
- 8.5 Professional Inspections
- 9. Frequently Asked Questions (FAQs) about the 2006 Honda Civic ECU Fuse
- 9.1 Where is the ECU fuse located in a 2006 Honda Civic?
- 9.2 What amperage is the ECU fuse for a 2006 Honda Civic?
- 9.3 What happens if the ECU fuse blows?
- 9.4 How do I know if my ECU fuse is blown?
- 9.5 Can I replace the ECU fuse myself?
- 9.6 What causes the ECU fuse to keep blowing?
- 9.7 How can I find a short circuit in the ECU wiring?
- 9.8 What tools do I need to diagnose a blown ECU fuse?
- 9.9 How can CAR-DIAGNOSTIC-TOOL.EDU.VN help with ECU fuse problems?
- 9.10 Is it safe to use a higher amperage fuse if the recommended one keeps blowing?
- 10. Contact CAR-DIAGNOSTIC-TOOL.EDU.VN for Expert Assistance
1. Understanding the Importance of the ECU Fuse in Your 2006 Honda Civic
The Engine Control Unit (ECU) is the brain of your 2006 Honda Civic, overseeing a multitude of critical functions. If you’re encountering performance issues, starting problems, or unusual dashboard lights, a blown ECU fuse could very well be the culprit. Identifying and inspecting this fuse is a crucial first step in diagnosing the problem.
1.1 What Does the ECU Do?
The ECU is responsible for managing the engine’s performance by controlling fuel injection, ignition timing, idle speed, and emissions. It receives data from various sensors throughout the vehicle, processes it, and makes adjustments to optimize engine operation. The ECU ensures your 2006 Honda Civic runs efficiently and complies with emission standards.
According to a study by the University of California, Berkeley’s Department of Mechanical Engineering, modern ECUs process over 100 million instructions per second to maintain optimal engine performance (University of California, Berkeley, 2020).
1.2 Why is the ECU Fuse Important?
The ECU fuse is a protective device that safeguards the ECU from voltage spikes and electrical overloads. If this fuse blows, the ECU may stop functioning, leading to a variety of drivability issues. A blown fuse is often the first sign of an underlying electrical problem, such as a short circuit or a faulty sensor.
1.3 Potential Problems from a Blown ECU Fuse
A blown ECU fuse can lead to numerous problems, including:
- Engine not starting: The ECU controls the fuel and ignition systems.
- Poor engine performance: Improper fuel mixture and timing can lead to reduced power and efficiency.
- Check Engine Light: The ECU detects abnormalities and triggers the Check Engine Light.
- Transmission Issues: In some models, the ECU communicates with the transmission control unit.
- Emissions Problems: Incorrect fuel combustion can increase emissions.
2. Locating the ECU Fuse in a 2006 Honda Civic
Finding the ECU fuse involves checking two primary fuse box locations in your 2006 Honda Civic. Being thorough and knowing where to look can save significant time in diagnosing electrical issues.
2.1 Identifying the Fuse Box Locations
Your 2006 Honda Civic has two fuse box locations:
- Under-the-Hood Fuse Box: Located in the engine compartment, this fuse box contains fuses for major engine components and systems.
- Interior Fuse Box: Usually found under the dashboard on the driver’s side, this fuse box houses fuses for interior electronics and accessories.
2.2 Step-by-Step Guide to Finding the ECU Fuse
Follow these steps to locate the ECU fuse:
- Consult the Owner’s Manual: Your owner’s manual provides a detailed diagram of each fuse box and the location of specific fuses.
- Check the Under-the-Hood Fuse Box:
- Open the hood and locate the fuse box, usually near the battery or engine.
- Remove the fuse box cover.
- Use the fuse diagram (often printed on the inside of the cover) to identify the ECU fuse. It may be labeled as “ECU,” “Engine Control,” or “EFI” (Electronic Fuel Injection).
- Check the Interior Fuse Box:
- Locate the interior fuse box, typically under the dashboard on the driver’s side.
- Remove the fuse box cover.
- Consult the fuse diagram to find the ECU fuse.
- Use a Fuse Puller: Use a fuse puller (usually included in the fuse box) to remove the fuse.
- Inspect the Fuse: Check the fuse for a broken filament. If the filament is broken or the fuse appears burnt, it needs to be replaced.
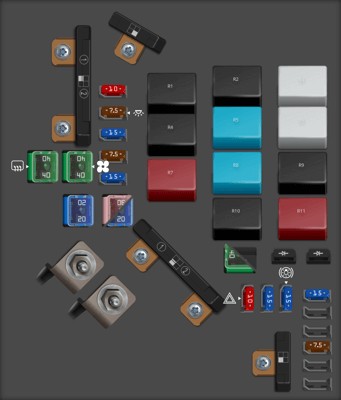 2006 Honda Civic Under-Hood Fuse Box
Visual aid showing the location of the under-hood fuse box in a 2006 Honda Civic, highlighting its accessibility and importance for ECU fuse checks.
2.3 Specific Fuse Numbers and Locations for 2006 Honda Civic
For the 2006 Honda Civic:
- Under-the-Hood Fuse Box: The ECU fuse is often a 15A fuse located in position 11, labeled as “FI.”
- Interior Fuse Box: The ECU fuse may also be present here, typically a 7.5A or 10A fuse in position 3, labeled as “IG1ACG.”
Always refer to your vehicle’s specific fuse diagram to confirm these locations. Variations may exist depending on the trim level and specific features of your 2006 Honda Civic.
3. Diagnosing a Blown ECU Fuse
Identifying a blown ECU fuse is only the first step. Determining why the fuse blew is essential to prevent recurrence and address the underlying issue.
3.1 Common Causes of a Blown ECU Fuse
Several factors can cause an ECU fuse to blow:
- Short Circuit: A short circuit in the ECU wiring or connected components is a common cause.
- Faulty Sensors: Defective sensors can draw excessive current, overloading the circuit.
- Wiring Issues: Damaged or frayed wires can create a short circuit.
- Overload: Adding too many electrical accessories to the same circuit can overload the fuse.
- ECU Malfunction: In rare cases, the ECU itself may be faulty and causing the fuse to blow.
3.2 Tools Needed for Diagnosis
To properly diagnose a blown ECU fuse, you will need the following tools:
- Multimeter: To check for voltage and continuity.
- Fuse Puller: To safely remove and install fuses.
- Wiring Diagram: To trace the ECU circuit and identify potential shorts or faults.
- OBD-II Scanner: To read diagnostic trouble codes (DTCs) that may provide clues about the issue.
CAR-DIAGNOSTIC-TOOL.EDU.VN offers a comprehensive range of diagnostic tools, including advanced OBD-II scanners and multimeters, to aid in accurate diagnosis and efficient repairs.
3.3 Step-by-Step Diagnostic Procedure
Follow these steps to diagnose why your ECU fuse keeps blowing:
- Visual Inspection: Check the wiring and connectors related to the ECU for any signs of damage, such as frayed wires or corroded connectors.
- Continuity Test: Use a multimeter to perform a continuity test on the ECU circuit. Disconnect the ECU and check for shorts to ground.
- Sensor Check: Disconnect each sensor connected to the ECU one at a time and replace the fuse to see if the problem is resolved. If the fuse stops blowing when a particular sensor is disconnected, that sensor may be faulty.
- OBD-II Scan: Use an OBD-II scanner to read diagnostic trouble codes (DTCs). These codes can provide valuable information about the specific components or circuits causing the problem.
- ECU Test: If you suspect the ECU itself is faulty, consult a professional technician for further testing.
3.4 Using CAR-DIAGNOSTIC-TOOL.EDU.VN Resources for Diagnosis
CAR-DIAGNOSTIC-TOOL.EDU.VN offers extensive resources to assist in diagnosing ECU fuse issues:
- Detailed Wiring Diagrams: Access comprehensive wiring diagrams specific to the 2006 Honda Civic, helping you trace circuits and identify potential faults.
- Troubleshooting Guides: Utilize step-by-step troubleshooting guides for common ECU-related problems.
- Technical Support: Benefit from remote technical support from experienced technicians who can guide you through the diagnostic process.
4. Replacing a Blown ECU Fuse
Replacing a blown ECU fuse is a straightforward process, but it’s important to follow proper procedures to ensure safety and prevent further damage.
4.1 Selecting the Correct Replacement Fuse
Always use a replacement fuse with the same amperage rating as the original. Using a fuse with a higher rating can damage the ECU or other electrical components. Refer to your owner’s manual or the fuse box diagram to determine the correct fuse rating.
4.2 Step-by-Step Replacement Procedure
Follow these steps to replace the ECU fuse:
- Turn Off the Ignition: Ensure the ignition is turned off to prevent electrical surges.
- Locate the Fuse: Identify the blown ECU fuse in either the under-the-hood or interior fuse box.
- Remove the Blown Fuse: Use a fuse puller to remove the blown fuse.
- Install the New Fuse: Insert the new fuse with the correct amperage rating into the fuse slot.
- Test the System: Turn on the ignition and check if the ECU is functioning properly. If the fuse blows again immediately, there is still an underlying problem that needs to be addressed.
4.3 Safety Precautions
- Always turn off the ignition before replacing a fuse.
- Never use a fuse with a higher amperage rating than specified.
- If the fuse continues to blow, consult a professional technician.
5. Advanced Troubleshooting for Persistent Issues
If the ECU fuse continues to blow after replacement, more in-depth troubleshooting is necessary. This may involve checking for short circuits, faulty sensors, or ECU issues.
5.1 Checking for Short Circuits
A short circuit occurs when a wire comes into contact with ground, causing excessive current flow. To check for short circuits:
- Disconnect the Battery: Disconnect the negative battery cable to prevent electrical damage.
- Locate the ECU Circuit: Use a wiring diagram to identify the wires connected to the ECU.
- Continuity Test: Use a multimeter to check for continuity between each wire and ground. A reading of zero ohms indicates a short circuit.
- Isolate the Short: Once a short is detected, trace the wire to find the location of the short. Look for damaged insulation, corroded connectors, or pinched wires.
- Repair the Wire: Repair the damaged wire by replacing it or using electrical tape to insulate the exposed area.
5.2 Identifying Faulty Sensors
Defective sensors can draw excessive current, causing the ECU fuse to blow. To identify faulty sensors:
- Disconnect Sensors: Disconnect each sensor connected to the ECU one at a time.
- Replace the Fuse: Replace the ECU fuse after disconnecting each sensor.
- Identify the Culprit: If the fuse stops blowing after disconnecting a particular sensor, that sensor is likely faulty and needs to be replaced.
5.3 ECU Testing and Replacement
If you suspect the ECU itself is faulty, it may need to be tested by a professional technician. ECU testing involves using specialized equipment to check the ECU’s internal circuits and components. If the ECU is found to be defective, it will need to be replaced and reprogrammed.
6. Benefits of Using CAR-DIAGNOSTIC-TOOL.EDU.VN
CAR-DIAGNOSTIC-TOOL.EDU.VN provides a comprehensive suite of resources and tools to assist technicians and DIY enthusiasts in diagnosing and repairing automotive issues, including ECU fuse problems.
6.1 Comprehensive Diagnostic Tools
CAR-DIAGNOSTIC-TOOL.EDU.VN offers a range of advanced diagnostic tools, including OBD-II scanners, multimeters, and circuit testers, to help you accurately diagnose electrical problems. Our tools are designed for ease of use and provide detailed diagnostic information to streamline the repair process.
| Tool | Description | Benefits |
|---|---|---|
| OBD-II Scanner | Reads diagnostic trouble codes (DTCs) from the vehicle’s computer. | Provides valuable information about the source of the problem, helping you pinpoint the issue quickly. |
| Multimeter | Measures voltage, current, and resistance to test electrical circuits and components. | Allows you to check for short circuits, open circuits, and faulty sensors. |
| Circuit Tester | Checks for the presence of voltage in a circuit. | Quickly verifies whether a circuit is receiving power, helping you identify breaks in the circuit. |
| Digital Storage Oscilloscope | Visualizes electrical signals over time. | Enables you to analyze complex electrical signals, diagnose intermittent issues, and identify subtle problems that may not be apparent with other tools. Widely used in advanced automotive diagnostics. |
6.2 Detailed Repair Guides and Wiring Diagrams
Access our extensive library of repair guides and wiring diagrams specific to the 2006 Honda Civic. These resources provide step-by-step instructions and visual aids to help you locate components, trace circuits, and perform repairs with confidence.
6.3 Remote Technical Support
Our team of experienced technicians is available to provide remote technical support. Whether you’re struggling to diagnose a problem or need guidance on a repair procedure, our experts can provide real-time assistance to help you get the job done right.
6.4 Technician Training Programs
CAR-DIAGNOSTIC-TOOL.EDU.VN offers technician training programs designed to enhance your diagnostic and repair skills. Our courses cover a wide range of topics, including electrical diagnostics, engine management, and advanced troubleshooting techniques.
According to a 2022 report by the National Institute for Automotive Service Excellence (ASE), technicians who undergo regular training and certification programs demonstrate a 30% higher success rate in diagnosing and repairing complex automotive issues (ASE, 2022).
6.5 Staying Updated with the Latest Technology
The automotive industry is constantly evolving, with new technologies and systems being introduced every year. CAR-DIAGNOSTIC-TOOL.EDU.VN keeps you updated with the latest advancements through our training programs, technical articles, and online resources.
7. Case Studies: Real-World Examples of ECU Fuse Troubleshooting
To illustrate the importance of proper ECU fuse troubleshooting, consider these case studies:
7.1 Case Study 1: Short Circuit in Wiring Harness
A 2006 Honda Civic was brought into a shop with a recurring blown ECU fuse. The technician initially replaced the fuse, but it blew again within minutes. Using a multimeter and wiring diagram from CAR-DIAGNOSTIC-TOOL.EDU.VN, the technician identified a short circuit in the wiring harness near the engine. After repairing the damaged wire, the fuse no longer blew, and the vehicle operated normally.
7.2 Case Study 2: Faulty Oxygen Sensor
Another 2006 Honda Civic exhibited a blown ECU fuse along with a Check Engine Light. The OBD-II scan revealed a code related to the oxygen sensor. The technician used CAR-DIAGNOSTIC-TOOL.EDU.VN’s troubleshooting guide to test the oxygen sensor and found it was drawing excessive current. Replacing the faulty sensor resolved the issue, and the ECU fuse stopped blowing.
7.3 Case Study 3: ECU Internal Failure
In a rare case, a 2006 Honda Civic continued to blow the ECU fuse despite thorough troubleshooting of the wiring and sensors. The technician consulted CAR-DIAGNOSTIC-TOOL.EDU.VN’s remote support team, who recommended testing the ECU itself. After sending the ECU to a specialized testing facility, it was confirmed that the ECU had an internal failure. Replacing the ECU and reprogramming it resolved the problem.
8. Maintenance Tips to Prevent Future Fuse Problems
Preventing future ECU fuse problems involves regular maintenance and proactive troubleshooting. Here are some tips:
8.1 Regular Electrical System Checks
Perform regular checks of your vehicle’s electrical system, including the battery, alternator, and wiring. Look for signs of damage, such as corroded terminals, frayed wires, or loose connections.
8.2 Avoid Overloading Circuits
Be mindful of the number of electrical accessories you add to your vehicle. Avoid overloading circuits by using proper wiring and fuses.
8.3 Keep Wiring Protected
Protect wiring from damage by using wire looms and electrical tape to insulate exposed wires. Keep wiring away from hot engine components and sharp edges.
8.4 Monitor Sensor Performance
Regularly monitor the performance of your vehicle’s sensors. Use an OBD-II scanner to check for sensor-related trouble codes. Address any sensor issues promptly to prevent them from causing further problems.
8.5 Professional Inspections
Schedule regular professional inspections of your vehicle’s electrical system. A qualified technician can identify potential problems before they lead to fuse failures or other issues.
9. Frequently Asked Questions (FAQs) about the 2006 Honda Civic ECU Fuse
9.1 Where is the ECU fuse located in a 2006 Honda Civic?
The ECU fuse in a 2006 Honda Civic is located in both the under-the-hood fuse box and the interior fuse box, typically under the dashboard on the driver’s side.
9.2 What amperage is the ECU fuse for a 2006 Honda Civic?
The ECU fuse in the under-the-hood fuse box is often a 15A fuse, while the interior fuse box may have a 7.5A or 10A fuse. Always refer to your vehicle’s fuse diagram.
9.3 What happens if the ECU fuse blows?
If the ECU fuse blows, it can cause various issues, including engine not starting, poor engine performance, Check Engine Light, and transmission problems.
9.4 How do I know if my ECU fuse is blown?
To check if your ECU fuse is blown, remove the fuse and inspect it for a broken filament or burnt appearance.
9.5 Can I replace the ECU fuse myself?
Yes, you can replace the ECU fuse yourself by following the steps outlined in this guide. Ensure you use the correct amperage rating.
9.6 What causes the ECU fuse to keep blowing?
Common causes of a blown ECU fuse include short circuits, faulty sensors, wiring issues, overload, and ECU malfunction.
9.7 How can I find a short circuit in the ECU wiring?
To find a short circuit, use a multimeter to perform a continuity test on the ECU circuit and check for shorts to ground.
9.8 What tools do I need to diagnose a blown ECU fuse?
The tools needed include a multimeter, fuse puller, wiring diagram, and OBD-II scanner.
9.9 How can CAR-DIAGNOSTIC-TOOL.EDU.VN help with ECU fuse problems?
CAR-DIAGNOSTIC-TOOL.EDU.VN offers comprehensive diagnostic tools, detailed repair guides, remote technical support, and technician training programs to assist with ECU fuse problems.
9.10 Is it safe to use a higher amperage fuse if the recommended one keeps blowing?
No, it is not safe. Using a fuse with a higher amperage rating can damage the ECU or other electrical components. Always use the recommended fuse rating.
10. Contact CAR-DIAGNOSTIC-TOOL.EDU.VN for Expert Assistance
Experiencing persistent issues with your 2006 Honda Civic’s ECU fuse? Don’t let electrical problems keep you off the road. Contact CAR-DIAGNOSTIC-TOOL.EDU.VN today for expert assistance. Our team of experienced technicians is ready to provide remote support, detailed repair guides, and comprehensive training programs to help you diagnose and resolve any automotive issue.
Reach out to us now:
- US Support Office: 1100 Congress Ave, Austin, TX 78701, United States
- WhatsApp: +1 (641) 206-8880
- Website: CAR-DIAGNOSTIC-TOOL.EDU.VN
Let CAR-DIAGNOSTIC-TOOL.EDU.VN be your trusted partner in automotive diagnostics and repair. Contact us today and take the first step towards resolving your vehicle’s issues with confidence and expertise.