How To Check The Ecu for faults and ensure optimal performance? Checking the Engine Control Unit (ECU) is crucial for diagnosing various automotive issues. At CAR-DIAGNOSTIC-TOOL.EDU.VN, we provide the expert guidance, diagnostic tools, and remote support needed to expertly assess your ECU, ensuring accurate diagnoses and efficient repairs. We also offer advanced technician training programs and remote support services that will elevate your skills and guarantee precision in every diagnostic procedure. Contact us via Whatsapp at +1 (641) 206-8880.
Contents
- 1. What is an ECU and Why is it Important?
- 2. Common Symptoms of a Failing ECU
- 3. Tools Needed to Check an ECU
- 4. Step-by-Step Guide: How to Check the ECU with a Multimeter
- Step 1: Preparation
- Step 2: Visual Inspection
- Step 3: Testing Power and Ground Connections
- Step 4: Testing Sensor Signals
- Step 5: Testing Output Signals
- Step 6: Document and Interpret Results
- 5. Using a Diagnostic Scanner to Check the ECU
- Step 1: Connect the Scanner
- Step 2: Retrieve Diagnostic Trouble Codes (DTCs)
- Step 3: Monitor Live Data
- Step 4: Clear Codes (If Necessary)
- 6. Advanced ECU Diagnostics
- 7. Preventing ECU Problems
- 8. Understanding ECU Fault Codes
- 9. The Role of CAR-DIAGNOSTIC-TOOL.EDU.VN in ECU Diagnostics
- 10. Frequently Asked Questions (FAQs) about Checking the ECU
- Question 1: How do I know if my ECU is bad?
- Question 2: Can I test my ECU myself?
- Question 3: How much does it cost to replace an ECU?
- Question 4: Can a bad ECU cause transmission problems?
- Question 5: Is it possible to repair an ECU?
- Question 6: What does ECU reprogramming involve?
- Question 7: How often should I check my ECU?
- Question 8: Can a diagnostic scanner damage my ECU?
- Question 9: What are the risks of not testing the ECU with a multimeter?
- Question 10: Where can I get reliable training on ECU diagnostics?
- Conclusion
1. What is an ECU and Why is it Important?
The Engine Control Unit (ECU), often referred to as the car’s “brain,” manages and optimizes engine performance. According to a 2022 report by the National Institute for Automotive Service Excellence (ASE), approximately 60% of all vehicle issues are related to electronic systems, with the ECU playing a central role. This makes understanding and being able to check the ECU critical for modern automotive technicians.
The ECU gathers data from various sensors throughout the vehicle, including:
- Engine Speed (RPM): Measures how fast the engine is running.
- Throttle Position: Indicates how much the driver is accelerating.
- Manifold Absolute Pressure (MAP): Measures the pressure inside the intake manifold.
- Intake Air Temperature: Monitors the temperature of the air entering the engine.
- Oxygen Sensor: Analyzes the oxygen content in the exhaust to optimize fuel mixture.
- Knock Sensor: Detects engine knocking or pinging to adjust ignition timing.
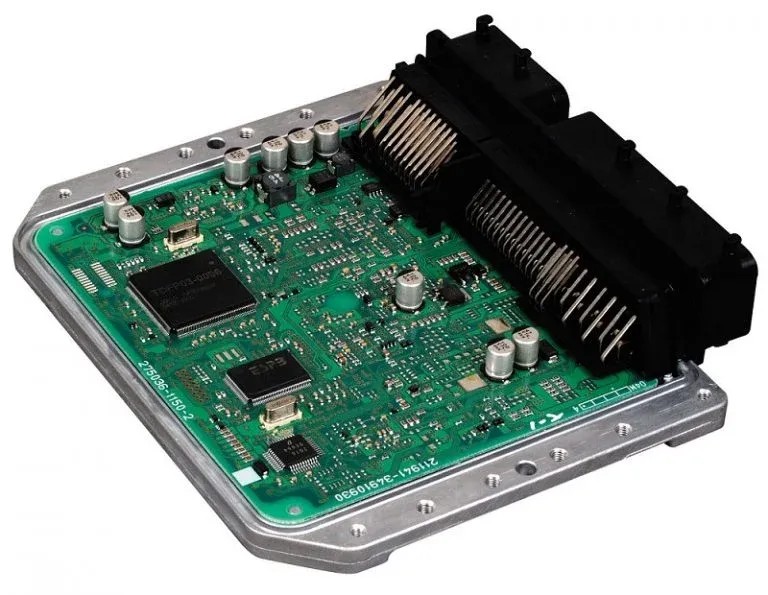 Engine Control Unit ECU
Based on this information, the ECU controls critical engine functions such as:
- Fuel Injection: Adjusts the amount of fuel delivered to the engine cylinders.
- Ignition Timing: Controls when the spark plugs fire to ignite the air-fuel mixture.
- Idle Speed: Regulates the engine speed when the vehicle is idling.
- Emissions Control: Manages systems that reduce harmful emissions.
A malfunctioning ECU can lead to a variety of drivability issues, reduced performance, and increased emissions, according to the California Bureau of Automotive Repair. Regular checks and maintenance can help prevent these problems.
2. Common Symptoms of a Failing ECU
Recognizing the symptoms of a failing ECU is the first step in diagnosing potential problems. Here are some common signs:
-
Check Engine Light Illumination:
The check engine light is a common indicator of ECU issues. According to a study by AAA, approximately 40% of check engine lights are related to issues within the engine control system, including the ECU. The light may flash or remain constantly lit, signaling that the ECU has detected an anomaly.
-
Engine Misfires:
Engine misfires occur when one or more cylinders fail to ignite the air-fuel mixture properly. This can be caused by incorrect ignition timing or fuel delivery, both of which are controlled by the ECU.
-
Poor Fuel Economy:
A failing ECU may cause the engine to run inefficiently, leading to a noticeable decrease in fuel economy. This can be due to incorrect air-fuel mixtures or improper combustion.
-
Stalling or Rough Idling:
If the ECU is unable to maintain a stable idle speed, the engine may stall or idle roughly. This can be caused by faulty sensor readings or incorrect adjustments made by the ECU.
-
Difficulty Starting:
A malfunctioning ECU can prevent the engine from starting, as it may not properly control the fuel and ignition systems needed for combustion.
-
Reduced Engine Performance:
A failing ECU can limit engine power and acceleration, resulting in sluggish performance. This can be caused by incorrect fuel delivery or ignition timing.
-
Increased Emissions:
A faulty ECU may cause the engine to produce excessive emissions, leading to failed emissions tests. This can be due to improper combustion or malfunctioning emissions control systems.
3. Tools Needed to Check an ECU
To effectively check an ECU, you’ll need a few essential tools:
-
Multimeter:
A multimeter is a versatile tool used to measure voltage, current, and resistance in electrical circuits. It’s essential for checking the power supply and ground connections to the ECU, as well as testing the integrity of various sensor signals.
-
Diagnostic Scanner:
A diagnostic scanner, also known as an OBD-II scanner, is used to read diagnostic trouble codes (DTCs) stored in the ECU’s memory. These codes can provide valuable information about the nature and location of the problem.
-
Wiring Diagrams:
Wiring diagrams are essential for understanding the ECU’s connections to various sensors and components. They help you identify the correct pins and wires to test, ensuring accurate diagnostics. You can find these diagrams in service manuals or online databases.
-
Test Leads and Connectors:
Test leads and connectors are used to make secure connections to the ECU’s pins and wires. They allow you to perform tests without damaging the ECU or its connectors.
-
ECU Breakout Box (Optional):
An ECU breakout box provides a convenient way to access all of the ECU’s pins and wires. It allows you to perform tests and measurements without having to probe the ECU’s connectors directly, reducing the risk of damage.
4. Step-by-Step Guide: How to Check the ECU with a Multimeter
Checking the ECU with a multimeter involves testing various electrical parameters to ensure they are within the specified ranges. Here’s a detailed step-by-step guide:
Step 1: Preparation
- Safety First: Disconnect the negative terminal of the car battery to prevent electrical shorts or damage during testing.
- Locate the ECU: The ECU is typically located under the dashboard, under a seat, or in the engine compartment. Consult your vehicle’s service manual to find its exact location.
- Gather Necessary Information: Obtain the wiring diagram for your vehicle’s ECU. This diagram will provide essential information about the pin assignments and expected voltage levels for various sensors and components.
Step 2: Visual Inspection
- Check for Physical Damage: Inspect the ECU for any signs of physical damage, such as cracks, corrosion, or burnt components.
- Inspect Connectors: Examine the connectors for corrosion, bent pins, or loose connections. Clean the connectors with electrical contact cleaner if necessary.
Step 3: Testing Power and Ground Connections
- Connect the Multimeter: Set your multimeter to the DC voltage setting (usually 20V).
- Test Power Supply:
- Locate the power supply pins on the ECU connector using the wiring diagram.
- Connect the red lead of the multimeter to the power supply pin and the black lead to a known good ground point on the vehicle’s chassis.
- Turn the ignition key to the “ON” position (but do not start the engine).
- Check the voltage reading on the multimeter. It should be close to the battery voltage (typically 12-14V).
- Test Ground Connections:
- Locate the ground pins on the ECU connector using the wiring diagram.
- Connect the black lead of the multimeter to the ground pin and the red lead to the positive terminal of the battery.
- Check the voltage reading on the multimeter. It should be close to 0V.
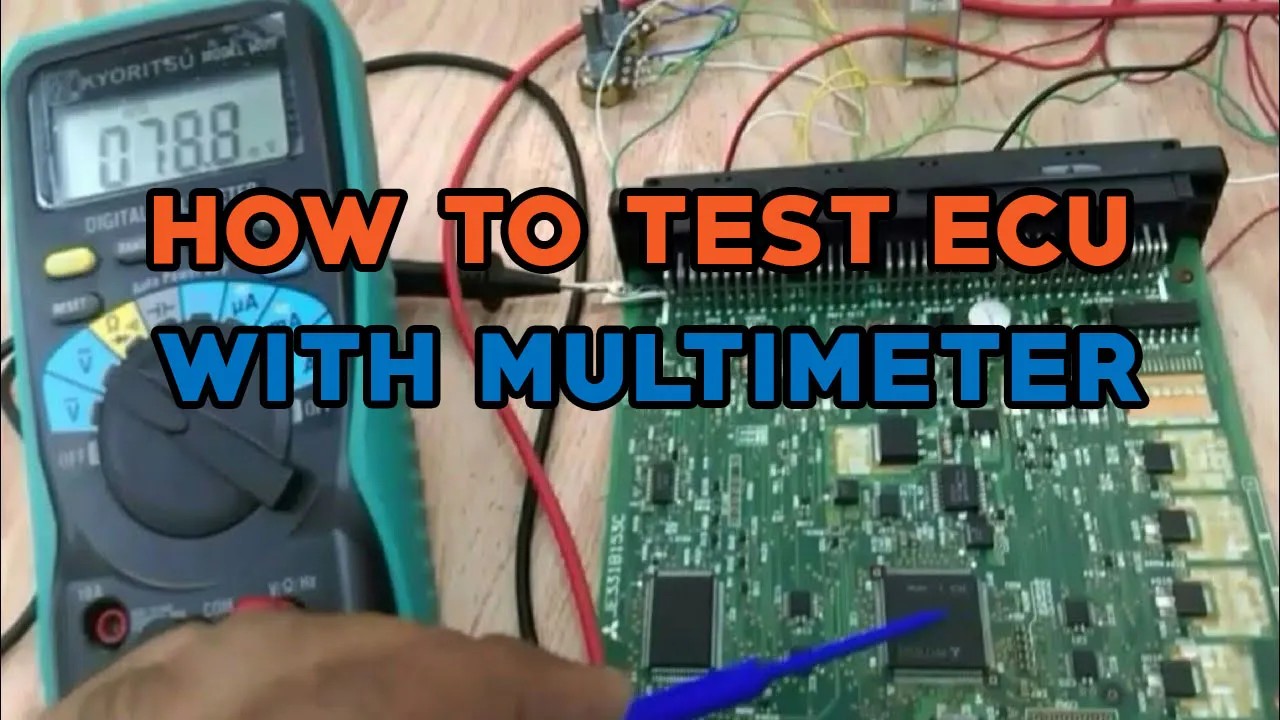 How to Test ECU with Multimeter
Step 4: Testing Sensor Signals
- Identify Sensor Signals: Use the wiring diagram to identify the pins corresponding to various sensor signals, such as the throttle position sensor (TPS), mass airflow sensor (MAF), and oxygen sensor.
- Connect the Multimeter:
- Connect the red lead of the multimeter to the sensor signal pin and the black lead to a known good ground point on the vehicle’s chassis.
- Turn the ignition key to the “ON” position (but do not start the engine).
- Check Voltage Levels:
- Check the voltage reading on the multimeter. Compare the reading to the expected voltage range specified in the service manual or wiring diagram.
- Vary the input to the sensor (e.g., open and close the throttle) and observe the change in voltage. The voltage should change smoothly and proportionally to the input.
Step 5: Testing Output Signals
- Identify Output Signals: Use the wiring diagram to identify the pins corresponding to various output signals, such as the fuel injector control signals and ignition control signals.
- Connect the Multimeter:
- Connect the red lead of the multimeter to the output signal pin and the black lead to a known good ground point on the vehicle’s chassis.
- Start the engine.
- Check Signal Characteristics:
- Check the voltage or waveform of the output signal using the multimeter or an oscilloscope. Compare the signal characteristics to the expected values specified in the service manual or wiring diagram.
- Observe the signal as the engine operates under different conditions (e.g., idle, acceleration) to ensure it is functioning correctly.
Step 6: Document and Interpret Results
- Record Measurements: Record all voltage and resistance measurements for future reference.
- Compare to Specifications: Compare your measurements to the specifications in the service manual or wiring diagram.
- Interpret Results: If any measurements are outside the specified range, it could indicate a problem with the ECU, the sensor, the wiring, or the component being controlled.
5. Using a Diagnostic Scanner to Check the ECU
A diagnostic scanner is a powerful tool for retrieving diagnostic trouble codes (DTCs) and monitoring live data from the ECU. Here’s how to use it:
Step 1: Connect the Scanner
- Locate the OBD-II Port: The OBD-II port is typically located under the dashboard, near the steering column.
- Plug in the Scanner: Plug the diagnostic scanner into the OBD-II port.
- Turn on the Ignition: Turn the ignition key to the “ON” position (but do not start the engine).
Step 2: Retrieve Diagnostic Trouble Codes (DTCs)
- Navigate the Scanner Menu: Follow the scanner’s instructions to navigate to the “Read Codes” or “Diagnostic Codes” menu.
- Read DTCs: The scanner will display any DTCs stored in the ECU’s memory. Record the codes and their descriptions.
- Interpret DTCs: Use a DTC lookup tool or consult a service manual to understand the meaning of each code. The codes will provide information about the nature and location of the problem.
Step 3: Monitor Live Data
- Navigate the Scanner Menu: Follow the scanner’s instructions to navigate to the “Live Data” or “Data Stream” menu.
- Select Parameters: Select the parameters you want to monitor, such as engine speed, throttle position, mass airflow, and oxygen sensor voltage.
- Monitor Data: The scanner will display the real-time values of the selected parameters. Observe the data as the engine operates under different conditions.
- Analyze Data: Compare the data to the expected values specified in the service manual or wiring diagram. Look for any abnormalities or inconsistencies that could indicate a problem.
Step 4: Clear Codes (If Necessary)
- Repair the Problem: After diagnosing and repairing the problem, clear the DTCs from the ECU’s memory.
- Navigate the Scanner Menu: Follow the scanner’s instructions to navigate to the “Clear Codes” or “Erase Codes” menu.
- Clear DTCs: The scanner will erase the DTCs from the ECU’s memory.
- Verify Repair: After clearing the codes, start the engine and monitor the system to ensure the problem has been resolved and the DTCs do not return.
6. Advanced ECU Diagnostics
For more complex ECU issues, advanced diagnostic techniques may be necessary:
- Oscilloscope Testing: An oscilloscope can be used to visualize the waveforms of sensor and actuator signals. This can help identify intermittent problems or subtle anomalies that may not be apparent with a multimeter.
- ECU Reprogramming: In some cases, the ECU’s software may become corrupted or outdated. Reprogramming the ECU with the latest software can resolve these issues. However, this should only be done by qualified technicians with the proper equipment and training.
- ECU Cloning: If the ECU is beyond repair, it may be necessary to replace it with a new or used unit. ECU cloning involves transferring the data from the old ECU to the new one, ensuring that the vehicle’s systems continue to function correctly.
7. Preventing ECU Problems
Preventive maintenance is key to avoiding ECU problems. Here are some tips:
- Keep the Battery in Good Condition: A weak or failing battery can cause voltage fluctuations that can damage the ECU.
- Maintain Clean Electrical Connections: Corroded or loose electrical connections can cause intermittent problems and damage the ECU.
- Protect the ECU from Moisture and Heat: Moisture and excessive heat can damage the ECU’s internal components.
- Follow Recommended Maintenance Schedules: Adhere to the vehicle manufacturer’s recommended maintenance schedules to ensure that sensors and other components are functioning correctly.
8. Understanding ECU Fault Codes
Diagnostic Trouble Codes (DTCs) are codes stored in the ECU that indicate a specific problem. These codes are standardized, but understanding them is crucial for effective diagnosis. For example:
- P0101: Mass Airflow (MAF) Sensor Circuit Range/Performance
- P0171: System Too Lean (Bank 1)
- P0300: Random/Multiple Cylinder Misfire Detected
Each code corresponds to a specific issue, and knowing what they mean can significantly speed up the diagnostic process. Resources like the CAR-DIAGNOSTIC-TOOL.EDU.VN database and professional diagnostic tools provide detailed explanations and troubleshooting steps for each code.
9. The Role of CAR-DIAGNOSTIC-TOOL.EDU.VN in ECU Diagnostics
At CAR-DIAGNOSTIC-TOOL.EDU.VN, we understand the challenges faced by automotive technicians in diagnosing and repairing complex ECU-related issues. That’s why we offer a range of services and resources to help you succeed:
-
Advanced Diagnostic Tools: We provide state-of-the-art diagnostic scanners, multimeters, oscilloscopes, and ECU breakout boxes to help you accurately diagnose ECU problems.
-
Comprehensive Training Programs: Our training programs cover ECU diagnostics, repair, and reprogramming techniques. Taught by experienced instructors, these programs provide you with the knowledge and skills you need to excel in the field.
-
Remote Support: Our team of expert technicians is available to provide remote support and guidance. Whether you’re struggling to diagnose a complex problem or need help with ECU reprogramming, we’re here to assist you every step of the way.
Address of our Support Office in the USA: 1100 Congress Ave, Austin, TX 78701, United States.
-
Extensive Database: We maintain an extensive database of ECU wiring diagrams, technical specifications, and troubleshooting guides. This database is constantly updated with the latest information to ensure you have access to the resources you need.
By partnering with CAR-DIAGNOSTIC-TOOL.EDU.VN, you can enhance your diagnostic capabilities, improve your efficiency, and provide your customers with the highest quality service.
10. Frequently Asked Questions (FAQs) about Checking the ECU
Here are some frequently asked questions about checking the ECU:
Question 1: How do I know if my ECU is bad?
Answer: Common symptoms of a bad ECU include a check engine light, engine misfires, poor fuel economy, stalling, difficulty starting, reduced engine performance, and increased emissions.
Question 2: Can I test my ECU myself?
Answer: Yes, you can test your ECU yourself using a multimeter, diagnostic scanner, and wiring diagrams. However, advanced diagnostic techniques may require specialized equipment and training.
Question 3: How much does it cost to replace an ECU?
Answer: The cost to replace an ECU can vary widely depending on the vehicle make and model, as well as the source of the replacement unit. It can range from several hundred to over a thousand dollars.
Question 4: Can a bad ECU cause transmission problems?
Answer: Yes, a bad ECU can cause transmission problems, as the ECU controls many of the transmission’s functions.
Question 5: Is it possible to repair an ECU?
Answer: In some cases, it is possible to repair an ECU. However, this requires specialized knowledge and equipment. It is often more cost-effective to replace the ECU.
Question 6: What does ECU reprogramming involve?
Answer: ECU reprogramming involves updating or replacing the software on the ECU. This can be done to improve performance, fix bugs, or adapt the ECU to new components.
Question 7: How often should I check my ECU?
Answer: You should check your ECU whenever you experience any symptoms of a potential problem. Regular preventive maintenance can also help identify potential issues before they become major problems.
Question 8: Can a diagnostic scanner damage my ECU?
Answer: No, a diagnostic scanner will not damage your ECU as long as it is used correctly. However, it is important to follow the manufacturer’s instructions and avoid making any unauthorized changes to the ECU’s programming.
Question 9: What are the risks of not testing the ECU with a multimeter?
Answer: Failing to test the ECU with a multimeter can lead to misdiagnosis, incorrect repairs, and potential damage to the ECU.
Question 10: Where can I get reliable training on ECU diagnostics?
Answer: CAR-DIAGNOSTIC-TOOL.EDU.VN offers comprehensive training programs on ECU diagnostics, repair, and reprogramming techniques. Our programs are taught by experienced instructors and provide you with the knowledge and skills you need to excel in the field.
Conclusion
Checking the ECU is a critical part of automotive diagnostics. With the right tools, knowledge, and support, you can accurately diagnose ECU-related issues and keep vehicles running smoothly. CAR-DIAGNOSTIC-TOOL.EDU.VN is dedicated to providing you with the resources and training you need to succeed in this challenging field.
Don’t let ECU diagnostics intimidate you. With CAR-DIAGNOSTIC-TOOL.EDU.VN, you can confidently tackle any ECU-related issue. Contact us today via Whatsapp at +1 (641) 206-8880 or visit our website CAR-DIAGNOSTIC-TOOL.EDU.VN to learn more about our tools, training programs, and remote support services. Take control of your automotive career and become an ECU diagnostics expert. Act now, and let us help you drive your success. We are conveniently located at 1100 Congress Ave, Austin, TX 78701, United States, ready to provide the support you need. Let’s work together to enhance your skills and ensure precision in every diagnostic procedure.