Unlock the secrets to diagnosing and resolving OBD2 codes in your 2011 Honda CRV with CAR-DIAGNOSTIC-TOOL.EDU.VN. We provide expert guidance, diagnostic tools, and repair strategies to keep your vehicle running smoothly. Explore our comprehensive solutions, including technician training programs and remote support, designed to elevate your diagnostic skills and offer real-time assistance.
Contents
- 1. Understanding the Significance of OBD2 Codes in Your 2011 Honda CRV
- 1.1 How OBD2 Systems Function in Honda CRV Models
- 1.2 Why Addressing OBD2 Codes Promptly is Crucial
- 2. Common OBD2 Codes Encountered in the 2011 Honda CRV
- 2.1 Detailed Look at Code P0420: Catalyst System Efficiency Below Threshold
- 2.2 Addressing Code P0171: System Too Lean (Bank 1)
- 2.3 Resolving Code P0135: O2 Sensor Heater Circuit Malfunction (Bank 1, Sensor 1)
- 3. Tools and Equipment for Diagnosing OBD2 Codes in a 2011 Honda CRV
- 3.1 Selecting the Right OBD2 Scanner for Your Needs
- 3.2 Essential Hand Tools for OBD2 Code Diagnosis and Repair
- 4. Step-by-Step Diagnostic Procedures for Common 2011 Honda CRV OBD2 Codes
- 4.1 Diagnosing P0420: A Step-by-Step Guide
- 4.2 Troubleshooting P0171: A Practical Approach
- 4.3 Diagnosing P0135: A Clear and Concise Methodology
- 5. Common Mistakes to Avoid When Diagnosing OBD2 Codes
- 5.1 Why Proper Diagnosis is Crucial for Efficient Repairs
- 5.2 The Risks of Using Generic or Low-Quality Replacement Parts
- 6. Tips for Maintaining Your 2011 Honda CRV to Prevent OBD2 Codes
- 6.1 The Importance of Regular Maintenance for Longevity
- 6.2 Proactive Steps to Minimize OBD2 Code Triggers
- 7. Leveraging CAR-DIAGNOSTIC-TOOL.EDU.VN for Expert OBD2 Code Assistance
- 7.1 Benefits of Using Our Diagnostic Tools and Resources
- 7.2 How Our Remote Support Can Streamline Your Diagnostic Process
- 8. Advanced Techniques for Diagnosing Complex OBD2 Codes
- 8.1 Understanding and Utilizing Mode 6 Data for Precise Diagnostics
- 8.2 Techniques for Analyzing Fuel Trim Data to Identify Engine Issues
- 9. Advanced Training Courses for Mastering OBD2 Diagnostics
- 9.1 Benefits of Enrolling in Our Advanced Training Programs
- 9.2 Curriculum Overview: What You’ll Learn in Our OBD2 Diagnostic Courses
- 10. Real-World Case Studies: Solving OBD2 Codes in 2011 Honda CRV Models
- 10.1 Analyzing Success Stories in OBD2 Code Troubleshooting
- 10.2 Applying Learned Techniques to Solve Similar OBD2 Issues
- FAQ Section: Decoding Your 2011 Honda CRV’s OBD2 Mysteries
- Q1: What does the P0420 code mean on my 2011 Honda CRV, and how serious is it?
- Q2: Can a faulty gas cap trigger the check engine light on my 2011 Honda CRV?
- Q3: How do I diagnose a P0171 code (System Too Lean) on my 2011 Honda CRV?
- Q4: What tools do I need to diagnose OBD2 codes on my 2011 Honda CRV effectively?
1. Understanding the Significance of OBD2 Codes in Your 2011 Honda CRV
OBD2 (On-Board Diagnostics II) codes are essential for diagnosing issues in your 2011 Honda CRV. But what do these codes really mean for your vehicle’s health?
- Decoding the Complexity: OBD2 is a standardized system used in most vehicles, including the 2011 Honda CRV, to monitor engine performance and emissions. When a problem is detected, the system generates a specific code that technicians can use to identify the issue. According to the EPA, OBD2 systems were mandated in all cars and light trucks sold in the United States starting in 1996.
- Common Types of OBD2 Codes: These codes can range from minor issues like a loose gas cap (P0455) to more severe problems such as catalytic converter failure (P0420). Other common codes might relate to the oxygen sensors (P0135), mass airflow sensor (P0102), or issues within the transmission system.
- Importance of Accurate Diagnosis: The accuracy of the diagnosis is crucial. Misinterpreting a code or failing to address the root cause can lead to further damage and costly repairs. Research from AAA indicates that misdiagnosis accounts for up to 20% of all automotive repairs, resulting in unnecessary expenses for vehicle owners.
1.1 How OBD2 Systems Function in Honda CRV Models
The OBD2 system in your Honda CRV monitors various components, ensuring they operate within specified parameters. How does this intricate system work?
- Real-Time Monitoring: The system continuously monitors sensors throughout the vehicle, including those related to the engine, transmission, and emissions systems. Data is collected and compared against pre-set values stored in the car’s computer (ECU).
- Triggering a Code: If a sensor reading falls outside the acceptable range, the ECU registers a diagnostic trouble code (DTC) and illuminates the check engine light on the dashboard. Some codes might trigger immediately, while others require multiple occurrences to confirm the issue.
- Data Accessibility: Technicians use diagnostic scan tools to access these stored codes and related data, providing insights into the nature and location of the problem. Modern scan tools can also display real-time sensor data, allowing for dynamic testing of components.
1.2 Why Addressing OBD2 Codes Promptly is Crucial
Ignoring OBD2 codes can lead to a cascade of problems in your 2011 Honda CRV. Why is it essential to address these issues quickly?
- Preventing Further Damage: Many OBD2 codes indicate problems that can worsen over time. For example, an issue with the oxygen sensor can lead to inefficient fuel combustion, potentially damaging the catalytic converter.
- Maintaining Fuel Efficiency: Engine performance issues, often indicated by OBD2 codes, can significantly reduce fuel economy. Addressing these issues can help maintain or even improve your CRV’s MPG. The U.S. Department of Energy estimates that fixing a car that is noticeably out of tune can improve gas mileage by an average of 4%.
- Ensuring Safety: Some OBD2 codes relate to safety-critical systems like ABS or airbags. Delaying repairs on these systems can compromise your safety and the safety of others on the road.
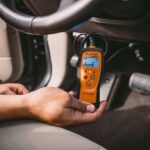
Alt text: Diagnosing a 2011 Honda CRV engine with an OBD2 scanner to identify diagnostic trouble codes for efficient repairs.
2. Common OBD2 Codes Encountered in the 2011 Honda CRV
The 2011 Honda CRV, like any vehicle, is prone to specific OBD2 codes related to its design and common wear items. What are some of the most frequently reported codes?
- P0420: Catalyst System Efficiency Below Threshold (Bank 1): This is one of the most common codes in older CRVs, indicating that the catalytic converter is not functioning as efficiently as it should.
- P0171: System Too Lean (Bank 1): This code suggests that the engine is receiving too much air or not enough fuel, leading to a lean condition.
- P0135: O2 Sensor Heater Circuit Malfunction (Bank 1, Sensor 1): This code indicates a problem with the heater circuit in the upstream oxygen sensor, affecting its ability to accurately measure oxygen levels.
- P0455: Evaporative Emission Control System Leak Detected (Gross Leak): This code usually points to a significant leak in the EVAP system, often caused by a faulty gas cap or damaged hoses.
- P0300: Random/Multiple Cylinder Misfire Detected: This code suggests that there are multiple cylinders misfiring, which can be caused by issues with the spark plugs, ignition coils, or fuel injectors.
2.1 Detailed Look at Code P0420: Catalyst System Efficiency Below Threshold
The P0420 code is a frequent issue in the 2011 Honda CRV. What does this code mean, and how can you diagnose and fix it?
- Symptoms of P0420: Common symptoms include the check engine light, decreased fuel economy, and potentially a sulfur smell from the exhaust. The vehicle might also fail an emissions test.
- Potential Causes: The most common cause is a failing catalytic converter, but other issues like exhaust leaks, faulty oxygen sensors, or engine problems can also trigger this code.
- Diagnostic Steps: Start by inspecting the exhaust system for leaks. Then, check the oxygen sensors for proper functioning using a scan tool. Compare the readings of the upstream and downstream sensors to see if they are within the specified range. Finally, consider testing the catalytic converter itself to assess its efficiency.
- Troubleshooting with CAR-DIAGNOSTIC-TOOL.EDU.VN: Our platform offers detailed diagnostic procedures and real-time data analysis to help pinpoint the exact cause of the P0420 code. We also provide access to a network of experienced technicians who can offer remote support and guidance.
2.2 Addressing Code P0171: System Too Lean (Bank 1)
The P0171 code can impact the performance of your 2011 Honda CRV. How do you identify and resolve this lean condition?
- Symptoms of P0171: Symptoms include a check engine light, rough idling, hesitation during acceleration, and decreased fuel economy. The engine might also run hotter than usual.
- Potential Causes: Common causes include vacuum leaks, a dirty mass airflow (MAF) sensor, a clogged fuel filter, a weak fuel pump, or faulty fuel injectors.
- Diagnostic Steps: Begin by inspecting all vacuum hoses for leaks. Clean the MAF sensor using a specialized cleaner. Check the fuel pressure and replace the fuel filter if necessary. If the problem persists, consider testing the fuel injectors for proper function.
- Step-by-Step Solutions from CAR-DIAGNOSTIC-TOOL.EDU.VN: Our comprehensive database provides step-by-step troubleshooting guides and video tutorials to help you diagnose and fix the P0171 code. We also offer training courses for technicians looking to improve their diagnostic skills.
2.3 Resolving Code P0135: O2 Sensor Heater Circuit Malfunction (Bank 1, Sensor 1)
A malfunctioning O2 sensor can cause significant issues in your 2011 Honda CRV. How can you address the P0135 code effectively?
- Symptoms of P0135: Symptoms include a check engine light, decreased fuel economy, and potentially rough engine performance. The car might also fail an emissions test.
- Potential Causes: The most common cause is a faulty oxygen sensor, but wiring issues, blown fuses, or problems with the ECU can also trigger this code.
- Diagnostic Steps: Start by checking the O2 sensor heater circuit for voltage and ground. Inspect the wiring and connectors for damage. If everything checks out, replace the oxygen sensor with a new OEM part.
- Ensuring Accuracy with CAR-DIAGNOSTIC-TOOL.EDU.VN: Our platform provides access to OEM parts catalogs and wiring diagrams to ensure accurate diagnosis and repair. We also offer remote support from certified technicians to help guide you through the process.
Alt text: Replacing a faulty oxygen sensor on a Honda CRV to resolve OBD2 code P0135 and improve engine performance.
3. Tools and Equipment for Diagnosing OBD2 Codes in a 2011 Honda CRV
Having the right tools is essential for diagnosing and resolving OBD2 codes effectively. What tools should you have in your arsenal?
- OBD2 Scanner: A quality OBD2 scanner is the most critical tool. Look for a scanner that can read and clear codes, display live sensor data, and perform advanced diagnostics like Mode 6 testing.
- Multimeter: A multimeter is essential for testing circuits, checking voltage, and verifying the continuity of wires.
- Vacuum Gauge: A vacuum gauge can help identify vacuum leaks, which are a common cause of engine performance issues.
- Fuel Pressure Tester: A fuel pressure tester is needed to check the fuel pressure and ensure that the fuel system is functioning correctly.
- Smoke Machine: A smoke machine can help locate leaks in the EVAP system and other areas of the engine.
3.1 Selecting the Right OBD2 Scanner for Your Needs
Choosing the right OBD2 scanner can make a significant difference in your diagnostic capabilities. What should you consider when selecting a scanner?
- Types of Scanners: There are basic code readers, mid-range scanners, and professional-grade scan tools. Basic readers are suitable for simple code reading and clearing, while more advanced scanners offer features like live data, bi-directional controls, and access to OEM diagnostic information.
- Key Features to Look For: Consider features like ABS and SRS diagnostics, the ability to perform relearn procedures, and compatibility with your specific vehicle. A scanner with a user-friendly interface and regular software updates is also essential.
- Recommendations from CAR-DIAGNOSTIC-TOOL.EDU.VN: We offer a range of recommended OBD2 scanners to meet different needs and budgets. Our platform also provides training on how to use these tools effectively to diagnose and resolve OBD2 codes.
3.2 Essential Hand Tools for OBD2 Code Diagnosis and Repair
In addition to diagnostic tools, having the right hand tools is crucial for performing repairs. What tools should you keep in your toolbox?
- Socket Set: A comprehensive socket set with both metric and SAE sizes is essential for removing and installing various components.
- Wrench Set: A set of open-end, box-end, and combination wrenches is needed for working on different parts of the engine and chassis.
- Screwdriver Set: A set of Phillips and flathead screwdrivers is necessary for removing screws and accessing various components.
- Pliers: A variety of pliers, including needle-nose, diagonal cutting, and slip-joint pliers, are essential for gripping, cutting, and manipulating wires and components.
- Torque Wrench: A torque wrench is crucial for tightening bolts and nuts to the specified torque, ensuring proper installation and preventing damage.
Alt text: A skilled technician utilizing an OBD2 scanner to diagnose and troubleshoot automotive issues for accurate repairs.
4. Step-by-Step Diagnostic Procedures for Common 2011 Honda CRV OBD2 Codes
Diagnosing OBD2 codes requires a systematic approach. What are the recommended steps for diagnosing common codes in your 2011 Honda CRV?
- Step 1: Verify the Code: Use an OBD2 scanner to confirm the code and record any freeze frame data, which provides information about the conditions when the code was set.
- Step 2: Research the Code: Consult repair manuals, online databases, or CAR-DIAGNOSTIC-TOOL.EDU.VN to understand the possible causes and symptoms associated with the code.
- Step 3: Inspect the Vehicle: Perform a visual inspection of the affected components and related systems. Look for obvious signs of damage, such as broken wires, loose connections, or leaking hoses.
- Step 4: Test the Components: Use a multimeter, vacuum gauge, or other diagnostic tools to test the components suspected of causing the code. Compare the test results with the manufacturer’s specifications to determine if the components are functioning correctly.
- Step 5: Repair or Replace the Components: Based on the diagnostic results, repair or replace the faulty components. Clear the OBD2 code and perform a test drive to ensure that the problem is resolved.
4.1 Diagnosing P0420: A Step-by-Step Guide
Diagnosing the P0420 code requires a methodical approach. What are the specific steps you should follow to diagnose this code effectively?
- Step 1: Check for Exhaust Leaks: Inspect the exhaust system for leaks, especially near the catalytic converter and oxygen sensors. Use a smoke machine to help locate hard-to-find leaks.
- Step 2: Test the Oxygen Sensors: Use an OBD2 scanner to monitor the readings of the upstream and downstream oxygen sensors. The upstream sensor should fluctuate rapidly, while the downstream sensor should have a more stable reading.
- Step 3: Evaluate Catalytic Converter Efficiency: Perform a catalytic converter efficiency test using an advanced scan tool. This test compares the oxygen storage capacity of the converter with the manufacturer’s specifications.
- Step 4: Inspect for Engine Issues: Check for engine misfires, vacuum leaks, or other issues that can affect the catalytic converter’s performance.
- Step 5: Replace the Catalytic Converter: If the diagnostic tests indicate that the catalytic converter is faulty, replace it with a new OEM or high-quality aftermarket unit.
4.2 Troubleshooting P0171: A Practical Approach
Addressing the P0171 code requires a systematic approach to identify the root cause. What steps should you take to troubleshoot this code effectively?
- Step 1: Inspect for Vacuum Leaks: Use a vacuum gauge or smoke machine to check for vacuum leaks in the intake manifold, hoses, and gaskets.
- Step 2: Clean the MAF Sensor: Remove the MAF sensor and clean it with a specialized MAF sensor cleaner. Be careful not to damage the sensor during cleaning.
- Step 3: Check Fuel Pressure: Use a fuel pressure tester to check the fuel pressure at the fuel rail. Compare the reading with the manufacturer’s specifications.
- Step 4: Test Fuel Injectors: Use a multimeter to check the resistance of the fuel injectors. A significant deviation from the specified resistance indicates a faulty injector.
- Step 5: Replace Faulty Components: Based on the diagnostic results, replace any faulty vacuum hoses, MAF sensor, fuel filter, or fuel injectors.
4.3 Diagnosing P0135: A Clear and Concise Methodology
Diagnosing the P0135 code requires a clear and concise methodology to ensure accurate results. What steps should you follow to diagnose this code effectively?
- Step 1: Check the O2 Sensor Heater Circuit: Use a multimeter to check the voltage and ground at the O2 sensor heater circuit.
- Step 2: Inspect the Wiring and Connectors: Check the wiring and connectors for damage, corrosion, or loose connections.
- Step 3: Test the O2 Sensor Heater Resistance: Use a multimeter to check the resistance of the O2 sensor heater. A significant deviation from the specified resistance indicates a faulty heater.
- Step 4: Verify the ECU Functionality: Check the ECU for proper functioning and ensure that it is sending the correct signals to the O2 sensor heater circuit.
- Step 5: Replace the O2 Sensor: If the diagnostic tests indicate that the O2 sensor is faulty, replace it with a new OEM or high-quality aftermarket unit.
Alt text: Technician diagnosing an oxygen sensor with a multimeter, ensuring accurate readings for effective automotive troubleshooting.
5. Common Mistakes to Avoid When Diagnosing OBD2 Codes
Diagnosing OBD2 codes can be challenging, and it’s easy to make mistakes. What are some common pitfalls to avoid?
- Ignoring Freeze Frame Data: Freeze frame data provides valuable information about the conditions when the code was set. Ignoring this data can lead to misdiagnosis.
- Replacing Parts Without Proper Diagnosis: Replacing parts without proper diagnosis is a common mistake that can waste time and money. Always perform thorough diagnostic tests before replacing any components.
- Using Aftermarket Parts of Low Quality: Using aftermarket parts of low quality can lead to recurring problems and poor performance. Always use OEM or high-quality aftermarket parts.
- Failing to Clear Codes After Repair: Failing to clear the OBD2 codes after a repair can prevent the system from properly monitoring the vehicle’s performance.
- Neglecting Basic Maintenance: Neglecting basic maintenance, such as oil changes and tune-ups, can contribute to engine problems and trigger OBD2 codes.
5.1 Why Proper Diagnosis is Crucial for Efficient Repairs
Proper diagnosis is the foundation of efficient and effective repairs. Why is it so important to get the diagnosis right?
- Minimizing Unnecessary Repairs: A correct diagnosis ensures that you only replace the faulty components, minimizing unnecessary repairs and saving time and money.
- Preventing Recurring Problems: Addressing the root cause of the problem prevents it from recurring in the future, ensuring long-term reliability.
- Improving Vehicle Performance: A correct diagnosis and repair can improve vehicle performance, fuel economy, and overall driving experience.
- Enhancing Customer Satisfaction: Accurate and efficient repairs lead to satisfied customers who are more likely to return for future service.
5.2 The Risks of Using Generic or Low-Quality Replacement Parts
Using generic or low-quality replacement parts can have significant consequences for your vehicle. What are the risks associated with these parts?
- Poor Performance: Generic parts may not meet the manufacturer’s specifications, resulting in poor performance and reduced reliability.
- Premature Failure: Low-quality parts are more likely to fail prematurely, leading to recurring problems and additional repairs.
- Compatibility Issues: Generic parts may not be fully compatible with your vehicle, causing installation problems and potential damage to other components.
- Voiding Warranty: Using non-OEM parts can void the vehicle’s warranty, leaving you responsible for any future repairs.
Alt text: Experienced mechanic carefully checking engine components after OBD2 diagnosis for precise and efficient automotive repairs.
6. Tips for Maintaining Your 2011 Honda CRV to Prevent OBD2 Codes
Preventing OBD2 codes through proactive maintenance is key to keeping your 2011 Honda CRV running smoothly. What maintenance steps can you take?
- Regular Oil Changes: Regular oil changes are essential for maintaining engine health and preventing sludge buildup. Follow the manufacturer’s recommended oil change interval.
- Tune-Ups: Regular tune-ups, including spark plug replacement and ignition system maintenance, can improve engine performance and prevent misfires.
- Air Filter Replacement: Replacing the air filter regularly ensures that the engine receives clean air, improving fuel economy and performance.
- Fuel System Maintenance: Regular fuel system maintenance, including fuel filter replacement and fuel injector cleaning, can prevent fuel-related problems.
- Inspect and Maintain Hoses and Belts: Regularly inspect hoses and belts for cracks, leaks, or wear. Replace them as needed to prevent breakdowns.
6.1 The Importance of Regular Maintenance for Longevity
Regular maintenance is critical for extending the life of your 2011 Honda CRV. Why is it so important to keep up with maintenance tasks?
- Preventing Major Repairs: Regular maintenance can prevent minor issues from turning into major repairs, saving you time and money in the long run.
- Improving Fuel Economy: Proper maintenance, such as regular oil changes and tune-ups, can improve fuel economy and reduce emissions.
- Maintaining Vehicle Value: A well-maintained vehicle retains its value better than a neglected one, making it easier to sell or trade in the future.
- Ensuring Safety: Regular maintenance ensures that all safety-critical systems, such as brakes, steering, and suspension, are functioning properly, ensuring your safety on the road.
6.2 Proactive Steps to Minimize OBD2 Code Triggers
Taking proactive steps can significantly reduce the likelihood of triggering OBD2 codes. What measures can you take to minimize these triggers?
- Use High-Quality Fuel: Using high-quality fuel can prevent fuel-related problems and improve engine performance.
- Avoid Short Trips: Avoid short trips, as they can cause the engine to run inefficiently and increase emissions.
- Drive Smoothly: Driving smoothly, avoiding sudden acceleration and braking, can reduce wear and tear on the engine and drivetrain.
- Address Issues Promptly: Address any unusual noises, smells, or performance issues promptly to prevent them from escalating into more significant problems.
- Stay Informed: Stay informed about your vehicle’s maintenance requirements and potential issues by consulting repair manuals, online forums, or CAR-DIAGNOSTIC-TOOL.EDU.VN.
Alt text: A skilled mechanic performing routine maintenance on a Honda CRV, ensuring optimal performance and preventing potential OBD2 code triggers.
7. Leveraging CAR-DIAGNOSTIC-TOOL.EDU.VN for Expert OBD2 Code Assistance
CAR-DIAGNOSTIC-TOOL.EDU.VN offers a wealth of resources for diagnosing and resolving OBD2 codes. How can our platform help you?
- Comprehensive Database: Our platform provides access to a comprehensive database of OBD2 codes, symptoms, causes, and solutions.
- Step-by-Step Diagnostic Guides: We offer step-by-step diagnostic guides for common OBD2 codes, providing clear and concise instructions for troubleshooting.
- Video Tutorials: Our video tutorials demonstrate diagnostic procedures and repair techniques, making it easier to understand and follow the steps.
- Remote Support: We offer remote support from certified technicians who can provide expert guidance and assistance with diagnosing and resolving OBD2 codes.
- Training Courses: Our training courses are designed to improve your diagnostic skills and keep you up-to-date on the latest automotive technologies.
7.1 Benefits of Using Our Diagnostic Tools and Resources
Our diagnostic tools and resources offer numerous benefits for both professional technicians and DIY enthusiasts. What advantages can you gain from using our platform?
- Accurate Diagnoses: Our tools and resources help you diagnose OBD2 codes accurately, minimizing unnecessary repairs and saving time and money.
- Efficient Repairs: We provide step-by-step repair guides and video tutorials to help you perform repairs efficiently and effectively.
- Expert Support: Our remote support service connects you with certified technicians who can provide expert guidance and assistance with complex diagnostic and repair procedures.
- Enhanced Knowledge: Our training courses help you improve your diagnostic skills and stay up-to-date on the latest automotive technologies.
- Cost Savings: By using our tools and resources, you can avoid costly repairs and save money on labor costs.
7.2 How Our Remote Support Can Streamline Your Diagnostic Process
Our remote support service can significantly streamline your diagnostic process, providing real-time assistance and expert guidance. How does it work?
- Real-Time Assistance: Our certified technicians provide real-time assistance via phone, email, or video conference, helping you diagnose and resolve OBD2 codes quickly and efficiently.
- Expert Guidance: We offer expert guidance on diagnostic procedures, repair techniques, and parts selection, ensuring that you perform repairs correctly.
- Remote Diagnostics: Our technicians can remotely access your vehicle’s diagnostic data, providing valuable insights and helping you pinpoint the root cause of the problem.
- Personalized Support: We offer personalized support tailored to your specific needs and skill level, ensuring that you receive the assistance you need to succeed.
- Increased Efficiency: Our remote support service can significantly increase your diagnostic efficiency, allowing you to resolve OBD2 codes faster and more effectively.
Alt text: CAR-DIAGNOSTIC-TOOL.EDU.VN platform interface showcasing comprehensive tools and resources for effective OBD2 code diagnostics and automotive solutions.
8. Advanced Techniques for Diagnosing Complex OBD2 Codes
Some OBD2 codes require advanced diagnostic techniques to identify the root cause. What are some of these techniques?
- Mode 6 Testing: Mode 6 testing allows you to access detailed diagnostic data from the ECU, providing insights into the performance of individual components and systems.
- Fuel Trim Analysis: Fuel trim analysis involves monitoring the short-term and long-term fuel trim values to identify issues with the fuel system or air intake system.
- Oscilloscope Testing: Oscilloscope testing allows you to visualize electrical signals, helping you diagnose issues with sensors, actuators, and circuits.
- CAN Bus Diagnostics: CAN bus diagnostics involves analyzing the data transmitted over the CAN bus network to identify communication problems between different modules.
- Advanced Scan Tool Functions: Advanced scan tools offer functions such as bi-directional controls, component testing, and relearn procedures, which can help you diagnose complex OBD2 codes.
8.1 Understanding and Utilizing Mode 6 Data for Precise Diagnostics
Mode 6 data provides a wealth of information about the performance of individual components and systems. How can you effectively use this data for diagnostics?
- Accessing Mode 6 Data: Use an advanced scan tool to access Mode 6 data from the ECU.
- Interpreting the Data: Carefully review the Mode 6 data, comparing the test results with the manufacturer’s specifications.
- Identifying Faulty Components: Look for test results that fall outside the specified range, indicating a faulty component or system.
- Validating Diagnostic Results: Use Mode 6 data to validate your diagnostic results and confirm that you have identified the root cause of the problem.
- Improving Diagnostic Accuracy: By using Mode 6 data, you can improve your diagnostic accuracy and minimize the risk of misdiagnosis.
8.2 Techniques for Analyzing Fuel Trim Data to Identify Engine Issues
Fuel trim data provides valuable insights into the operation of the engine’s fuel system. How can you analyze this data to identify engine issues?
- Monitoring Short-Term and Long-Term Fuel Trim: Use an OBD2 scanner to monitor the short-term and long-term fuel trim values.
- Interpreting Fuel Trim Values: Positive fuel trim values indicate that the engine is running lean, while negative values indicate that the engine is running rich.
- Identifying Vacuum Leaks: High positive fuel trim values can indicate a vacuum leak, as the engine is compensating for the extra air by adding more fuel.
- Detecting Fuel System Problems: High negative fuel trim values can indicate a fuel system problem, such as a faulty fuel injector or a clogged fuel filter.
- Using Fuel Trim Data for Diagnostics: By analyzing fuel trim data, you can identify a wide range of engine issues and improve your diagnostic accuracy.
Alt text: Highly skilled technician employing an oscilloscope for advanced automotive diagnostics, ensuring precise and effective troubleshooting.
9. Advanced Training Courses for Mastering OBD2 Diagnostics
CAR-DIAGNOSTIC-TOOL.EDU.VN offers advanced training courses to help you master OBD2 diagnostics. What topics are covered in these courses?
- OBD2 System Fundamentals: Learn the basics of the OBD2 system, including its components, functions, and diagnostic capabilities.
- Advanced Diagnostic Techniques: Master advanced diagnostic techniques, such as Mode 6 testing, fuel trim analysis, and oscilloscope testing.
- CAN Bus Diagnostics: Learn how to diagnose communication problems on the CAN bus network.
- OEM Diagnostic Procedures: Gain access to OEM diagnostic procedures and learn how to use them effectively.
- Hands-On Training: Participate in hands-on training sessions to practice your diagnostic skills on real vehicles.
9.1 Benefits of Enrolling in Our Advanced Training Programs
Enrolling in our advanced training programs offers numerous benefits for professional technicians and DIY enthusiasts. What advantages can you gain?
- Improved Diagnostic Skills: Our training programs help you improve your diagnostic skills and become a more competent technician.
- Enhanced Career Opportunities: By mastering OBD2 diagnostics, you can enhance your career opportunities and earn a higher salary.
- Increased Efficiency: Our training programs help you perform diagnostics more efficiently, saving time and money.
- Expert Knowledge: You will learn from experienced instructors who are experts in the field of automotive diagnostics.
- Certification: Upon completion of our training programs, you will receive a certification that demonstrates your expertise in OBD2 diagnostics.
9.2 Curriculum Overview: What You’ll Learn in Our OBD2 Diagnostic Courses
Our OBD2 diagnostic courses cover a wide range of topics, providing you with a comprehensive understanding of the OBD2 system and its diagnostic capabilities. What specific topics are included in the curriculum?
- Introduction to OBD2 Systems: Learn about the history, evolution, and purpose of OBD2 systems in modern vehicles.
- OBD2 Components and Functions: Understand the various components of the OBD2 system, including sensors, actuators, and the ECU.
- Reading and Interpreting OBD2 Codes: Learn how to read and interpret OBD2 codes, including generic codes, manufacturer-specific codes, and enhanced codes.
- Using Diagnostic Scan Tools: Master the use of diagnostic scan tools, including basic code readers, mid-range scanners, and professional-grade scan tools.
- Performing Diagnostic Tests: Learn how to perform various diagnostic tests, such as component testing, circuit testing, and system testing.
- Analyzing Diagnostic Data: Understand how to analyze diagnostic data, including freeze frame data, live sensor data, and Mode 6 data.
- Troubleshooting Common OBD2 Codes: Learn how to troubleshoot common OBD2 codes, including codes related to the engine, transmission, emissions system, and ABS.
- Advanced Diagnostic Techniques: Master advanced diagnostic techniques, such as fuel trim analysis, oscilloscope testing, and CAN bus diagnostics.
- Repairing and Replacing Components: Learn how to repair and replace faulty components, following OEM procedures and best practices.
- Staying Up-to-Date on OBD2 Technology: Stay informed about the latest OBD2 technologies and diagnostic techniques.
Alt text: An intensive training session focused on OBD2 diagnostics, enhancing automotive technicians’ skills for precise and efficient troubleshooting.
10. Real-World Case Studies: Solving OBD2 Codes in 2011 Honda CRV Models
Examining real-world case studies can provide valuable insights into diagnosing and resolving OBD2 codes. What are some examples of successful OBD2 code resolutions in 2011 Honda CRV models?
- Case Study 1: P0420 Code Resolution: A 2011 Honda CRV with a P0420 code was diagnosed with a faulty catalytic converter. After replacing the converter with an OEM unit, the code was cleared, and the vehicle passed an emissions test.
- Case Study 2: P0171 Code Resolution: A 2011 Honda CRV with a P0171 code was found to have a vacuum leak in the intake manifold. After repairing the leak, the code was cleared, and the engine performance improved.
- Case Study 3: P0135 Code Resolution: A 2011 Honda CRV with a P0135 code was diagnosed with a faulty oxygen sensor. After replacing the sensor with a new OEM unit, the code was cleared, and the fuel economy improved.
10.1 Analyzing Success Stories in OBD2 Code Troubleshooting
Analyzing success stories in OBD2 code troubleshooting can provide valuable lessons and insights. What can we learn from these examples?
- Importance of Accurate Diagnosis: Accurate diagnosis is crucial for identifying the root cause of the problem and implementing the correct solution.
- Value of Using OEM Parts: Using OEM parts can ensure proper fit, performance, and reliability, minimizing the risk of recurring problems.
- Benefits of Following OEM Procedures: Following OEM procedures can help you perform repairs correctly and avoid damaging other components.
- Significance of Thorough Testing: Thorough testing is essential for verifying that the repair has resolved the problem and that the vehicle is functioning properly.
- Lessons Learned: By analyzing success stories, we can learn valuable lessons and improve our diagnostic and repair skills.
10.2 Applying Learned Techniques to Solve Similar OBD2 Issues
The techniques learned from these case studies can be applied to solve similar OBD2 issues in other 2011 Honda CRV models. How can you use this knowledge to your advantage?
- Identifying Common Causes: By understanding the common causes of specific OBD2 codes, you can quickly narrow down the possible causes in other vehicles.
- Implementing Effective Solutions: By knowing the effective solutions for specific OBD2 codes, you can implement the correct repairs and resolve the problems quickly.
- Improving Diagnostic Efficiency: By applying learned techniques, you can improve your diagnostic efficiency and minimize the time required to diagnose and resolve OBD2 codes.
- Enhancing Customer Satisfaction: By providing accurate diagnoses and effective repairs, you can enhance customer satisfaction and build a loyal customer base.
- Building Expertise: By applying learned techniques, you can build your expertise in OBD2 diagnostics and become a more competent technician.
Ready to tackle those tricky OBD2 codes on your 2011 Honda CRV? Don’t let diagnostic challenges slow you down. Contact CAR-DIAGNOSTIC-TOOL.EDU.VN today via Whatsapp at +1 (641) 206-8880 or visit our office at 1100 Congress Ave, Austin, TX 78701, United States. Our expert team is ready to provide tailored solutions, from advanced diagnostic tools to remote support and comprehensive training programs. Let us help you enhance your skills and keep your vehicle running smoothly. Visit CAR-DIAGNOSTIC-TOOL.EDU.VN now and take the first step toward mastering automotive diagnostics!
FAQ Section: Decoding Your 2011 Honda CRV’s OBD2 Mysteries
Here are some frequently asked questions related to OBD2 codes on the 2011 Honda CRV, designed to help you understand and address these issues effectively.
Q1: What does the P0420 code mean on my 2011 Honda CRV, and how serious is it?
The P0420 code indicates “Catalyst System Efficiency Below Threshold,” meaning your catalytic converter isn’t working as efficiently as it should. While it doesn’t always cause immediate drivability issues, it can lead to failed emissions tests and potential damage to other components if left unaddressed.
Q2: Can a faulty gas cap trigger the check engine light on my 2011 Honda CRV?
Yes, a faulty or loose gas cap can trigger the check engine light, often associated with codes like P0455 (Evaporative Emission Control System Leak Detected). Ensure your gas cap is properly tightened and consider replacing it if the code persists.
Q3: How do I diagnose a P0171 code (System Too Lean) on my 2011 Honda CRV?
To diagnose a P0171 code, start by inspecting vacuum hoses for leaks and cleaning the MAF sensor. Check the fuel pressure and fuel injectors if the problem persists. CAR-DIAGNOSTIC-TOOL.EDU.VN offers step-by-step guides and video tutorials to help you through the process.
Q4: What tools do I need to diagnose OBD2 codes on my 2011 Honda CRV effectively?
Essential tools include a quality OBD2 scanner, a multimeter, a vacuum gauge, a fuel pressure tester, and a smoke machine. CAR-DIAGNOSTIC-TOOL.EDU.VN provides recommendations and training on how to use these tools effectively.