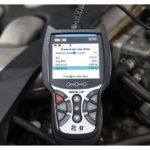
The V519 Obd2 Scanner Manual provides comprehensive instructions for effectively using your V519 OBD2 scanner, and at CAR-DIAGNOSTIC-TOOL.EDU.VN, we offer expert guidance, detailed repair solutions, and specialized training to help you master vehicle diagnostics. We provide exceptional remote support and advanced technician training to keep you ahead in the automotive industry.
Contents
- 1. Understanding the V519 OBD2 Scanner
- 1.1. Key Features of the V519 OBD2 Scanner
- 1.2. Benefits of Using the V519 OBD2 Scanner
- 2. Initial Setup and Basic Operation of Your V519 OBD2 Scanner
- 2.1. Unboxing and Inspection
- 2.2. Connecting the Scanner to Your Vehicle
- 2.3. Powering On and Navigating the Menu
- 2.4. Basic Settings Configuration
- 3. Detailed Guide to Using the V519 OBD2 Scanner Manual
- 3.1. Understanding the Manual Layout
- 3.2. Key Sections of the Manual
- 3.3. Reading and Clearing Fault Codes
- 3.4. Viewing and Interpreting Data Streams
- 3.5. Performing I/M Readiness Tests
- 3.6. Accessing Vehicle Information
- 3.7. Using the Fault Code Query Function
- 4. Advanced Features and Functions of the V519 OBD2 Scanner
- 4.1. Mode 6 Detection
- 4.2. Oxygen Sensor Test
- 4.3. Mode 8 Component Test
- 4.4. Playback Function
- 4.5. Voltage Reading
- 5. Software Updates and Printing Diagnostic Data
- 5.1. Updating the Scanner Software
- 5.2. Printing Diagnostic Data
- 6. Troubleshooting Common Issues with the V519 OBD2 Scanner
- 6.1. Scanner Not Powering On
- 6.2. Unable to Read Fault Codes
- 6.3. Communication Error
- 6.4. Incorrect Data Displayed
- 7. Maximizing the Value of Your V519 OBD2 Scanner
- 7.1. Regular Software Updates
- 7.2. Proper Storage and Maintenance
- 7.3. Understanding OBD2 Protocols
- 7.4. Combining with Other Diagnostic Tools
- 7.5. Seeking Professional Training
- 8. CAR-DIAGNOSTIC-TOOL.EDU.VN: Your Partner in Automotive Diagnostics
- 8.1. Expert Guidance and Support
- 8.2. Detailed Repair Solutions
- 8.3. Specialized Training Programs
- 8.4. Remote Support Services
- 9. The Future of Automotive Diagnostics and the Role of OBD2 Scanners
- 9.1. Integration with Advanced Technologies
- 9.2. Enhanced Data Analysis Capabilities
- 9.3. Wireless Connectivity and Cloud Integration
- 9.4. Focus on Preventative Maintenance
- 10. Frequently Asked Questions (FAQ) About the V519 OBD2 Scanner
- 10.1. What vehicles are compatible with the V519 OBD2 scanner?
- 10.2. How do I update the software on my V519 OBD2 scanner?
- 10.3. Can the V519 OBD2 scanner clear fault codes?
- 10.4. What is the I/M Readiness function?
- 10.5. How do I view real-time data streams with the V519 OBD2 scanner?
- 10.6. What does Mode 6 detection do?
- 10.7. How can I print diagnostic data from the V519 OBD2 scanner?
- 10.8. What should I do if the scanner is not powering on?
- 10.9. Is the V519 OBD2 scanner suitable for professional use?
- 10.10. Where can I get additional support and training for using OBD2 scanners?
1. Understanding the V519 OBD2 Scanner
The V519 OBD2 scanner is a versatile tool designed to help automotive technicians and car enthusiasts diagnose vehicle issues quickly and accurately. It supports nine OBD II/EOBD standard protocols, making it compatible with a wide range of vehicles. By plugging directly into your vehicle’s OBD port, the V519 scanner can read fault codes, display vehicle parameters, and provide valuable insights into your car’s health. According to a study by the National Institute for Automotive Service Excellence (ASE), using a reliable OBD2 scanner can reduce diagnostic time by up to 50%, leading to increased efficiency and customer satisfaction.
1.1. Key Features of the V519 OBD2 Scanner
- Supports Multiple Protocols: The V519 scanner supports nine OBD II/EOBD standard protocols, ensuring compatibility with a broad range of vehicles.
- Quick Fault Code Reading: Quickly identifies engine fault codes to help diagnose issues.
- Engine Fault Code Clearing: Allows you to clear engine fault codes after repairs are made.
- Vehicle Fault Freeze Frame: Captures snapshot data when a fault code is triggered, aiding in diagnostics.
- I/M Ready State: Checks if the vehicle’s monitors are ready for emission testing.
- Vehicle Information Display: Shows the vehicle identification number (VIN) and other important details.
- Data Stream Reading: Provides real-time data stream information from the vehicle engine.
- Battery Voltage Reading: Displays the current battery voltage to assess battery health.
- Mode 6 Detection: Performs on-board monitoring tests.
- Oxygen Sensor Test: Tests the oxygen sensor values to ensure they are within normal range.
- Mode 8 Detection: Performs component testing.
- Fault Code Query: Allows users to look up fault code definitions.
- Playback Function: Records and plays back fault codes and data streams.
- Print Function: Prints diagnostic data for record-keeping.
- Multi-Language Support: Supports ten languages, including English, German, French, Spanish, Italian, Russian, Dutch, Chinese, Japanese, and Portuguese.
1.2. Benefits of Using the V519 OBD2 Scanner
- Saves Time and Money: Accurate diagnostics reduce unnecessary repairs, saving both time and money.
- Enhances Diagnostic Accuracy: Provides detailed fault codes and data streams for precise troubleshooting.
- Improves Efficiency: Quickly identifies issues, allowing for faster repairs.
- Supports Preventative Maintenance: Helps identify potential problems before they become major issues.
- User-Friendly Interface: Easy-to-navigate menu and clear display make it accessible for both professionals and DIY enthusiasts.
2. Initial Setup and Basic Operation of Your V519 OBD2 Scanner
Setting up and operating your V519 OBD2 scanner is straightforward. Following these steps will help you get started quickly and efficiently.
2.1. Unboxing and Inspection
- Check the Contents: Ensure the package includes the V519 OBD2 scanner, OBD connecting cable, and user manual.
- Inspect for Damage: Check for any physical damage to the scanner or accessories.
2.2. Connecting the Scanner to Your Vehicle
- Locate the OBD Port: Find the OBD port in your vehicle. It is typically located under the dashboard on the driver’s side.
- Plug in the Scanner: Connect the OBD cable to the V519 scanner and plug the other end into the vehicle’s OBD port.
Alt text: Connecting the V519 OBD2 scanner cable to a car’s OBD2 port under the dashboard.
2.3. Powering On and Navigating the Menu
- Turn On the Ignition: Turn your vehicle’s ignition to the “ON” position without starting the engine.
- Power On the Scanner: The V519 scanner should power on automatically once connected to the OBD port.
- Navigate the Menu: Use the directional buttons (Up, Down, Left, Right) to navigate the main menu.
- Select Options: Press the “OK” button to select a menu option.
- Return to Previous Menu: Press the “Back/Exit” button to return to the previous menu.
2.4. Basic Settings Configuration
- Language Selection: Go to the “Settings” menu and select “Language” to choose your preferred language.
- Unit Selection: In the “Settings” menu, select “Unit” to choose between metric and imperial units.
- Other Settings: Adjust any other settings as needed, such as display contrast or sound options.
3. Detailed Guide to Using the V519 OBD2 Scanner Manual
The V519 OBD2 scanner manual is your primary resource for understanding and utilizing all the features of your scanner. Here’s a detailed guide to help you navigate and use the manual effectively.
3.1. Understanding the Manual Layout
The manual is typically organized into sections covering product introduction, setup, operation, troubleshooting, and specifications. Each section provides specific information to help you use the scanner effectively.
3.2. Key Sections of the Manual
- Product Introduction: Provides an overview of the V519 scanner and its key features.
- Safety Precautions: Outlines important safety guidelines to follow while using the scanner.
- Setup and Installation: Explains how to connect the scanner to your vehicle and configure basic settings.
- Menu Navigation: Describes the structure of the menu system and how to navigate through the options.
- Diagnostic Functions: Details how to use the scanner to read and clear fault codes, view data streams, and perform other diagnostic tests.
- Troubleshooting: Offers solutions to common problems encountered while using the scanner.
- Specifications: Lists the technical specifications of the scanner, including supported protocols and operating conditions.
3.3. Reading and Clearing Fault Codes
- Select “Diagnosis”: From the main menu, select the “Diagnosis” option and press “OK.”
- Select “Read Codes”: Choose the “Read Codes” option to retrieve any stored fault codes from the vehicle’s engine control unit (ECU).
- View Fault Codes: The scanner will display any fault codes along with a brief description. If multiple codes are present, use the Up/Down buttons to scroll through them.
- Record Fault Codes: Note down the fault codes for further research or repair.
- Clear Fault Codes (Optional): If you have addressed the underlying issue and wish to clear the fault codes, select the “Clear Codes” option. A confirmation message will appear; confirm to clear the codes.
Alt text: Display screen of the V519 OBD2 scanner showing diagnostic fault codes.
3.4. Viewing and Interpreting Data Streams
- Select “Data Stream”: From the “Diagnosis” menu, select “Data Stream” and press “OK.”
- Choose Data Parameters: The scanner will display a list of available data parameters, such as engine RPM, coolant temperature, and oxygen sensor readings. Select the parameters you want to monitor.
- View Real-Time Data: The scanner will display real-time data for the selected parameters. Monitor these values to identify any anomalies or issues.
3.5. Performing I/M Readiness Tests
- Select “I/M Readiness”: From the “Diagnosis” menu, select “I/M Readiness” and press “OK.”
- View Monitor Status: The scanner will display the status of various monitors, indicating whether they are ready for emission testing (“OK”), incomplete (“INC”), or not supported (“N/A”).
3.6. Accessing Vehicle Information
- Select “Vehicle Information”: From the “Diagnosis” menu, select “Vehicle Information” and press “OK.”
- View Vehicle Details: The scanner will display the vehicle identification number (VIN) and other relevant information.
3.7. Using the Fault Code Query Function
- Select “Fault Code Query”: From the main menu, select “Fault Code Query” and press “OK.”
- Enter Fault Code: Use the directional buttons to enter the fault code you want to query.
- View Definition: The scanner will display the definition of the fault code, providing more information about the issue.
4. Advanced Features and Functions of the V519 OBD2 Scanner
Beyond basic diagnostics, the V519 OBD2 scanner offers advanced features that can help you perform more in-depth analysis and troubleshooting.
4.1. Mode 6 Detection
Mode 6 allows you to access on-board diagnostic monitoring test results for specific components and systems.
- Select “Mode 6”: From the “Diagnosis” menu, select “Mode 6” and press “OK.”
- View Test Results: The scanner will display the test results for various components, helping you identify issues that may not trigger a fault code.
Alt text: V519 OBD2 scanner displaying results from the Mode 6 on-board monitoring test.
4.2. Oxygen Sensor Test
The oxygen sensor test allows you to monitor the performance of the vehicle’s oxygen sensors.
- Select “Oxygen Sensor Test”: From the “Diagnosis” menu, select “Oxygen Sensor Test” and press “OK.”
- View Sensor Data: The scanner will display the oxygen sensor values, allowing you to determine if they are functioning correctly.
4.3. Mode 8 Component Test
Mode 8 enables you to perform component tests, allowing you to activate or deactivate specific components to verify their functionality.
- Select “Mode 8”: From the “Diagnosis” menu, select “Mode 8” and press “OK.”
- Perform Component Test: Follow the on-screen instructions to perform the desired component test.
Alt text: Screenshot of the V519 OBD2 scanner showing the Mode 8 component test interface.
4.4. Playback Function
The playback function allows you to review previously recorded fault codes and data streams, which can be useful for analyzing intermittent issues.
- Select “Playback”: From the main menu, select “Playback” and press “OK.”
- Choose Playback Record: Select the fault code or data stream record you want to review.
- View Recorded Data: The scanner will display the recorded data, allowing you to analyze the issue.
Alt text: Reviewing recorded diagnostic data using the playback function on the V519 OBD2 scanner.
4.5. Voltage Reading
The voltage reading function displays the current battery voltage, allowing you to assess the health of the vehicle’s battery.
- Select “Voltage”: From the main menu, select “Voltage” and press “OK.”
- View Voltage Data: The scanner will display the current battery voltage.
5. Software Updates and Printing Diagnostic Data
Keeping your V519 OBD2 scanner up-to-date and being able to print diagnostic data are important for maintaining its functionality and keeping records.
5.1. Updating the Scanner Software
- Download the Update Tool: Visit “elm327.com” and download the “V519ProductTool.”
- Connect to Computer: Use a Type-C data cable to connect the V519 scanner to your computer.
- Run the Update Tool: Double-click to run the “V519ProductTool.”
- Select Update Firmware: Choose “Update Firmware” in the tool.
- Start Update: Click “Start Update” and wait for the process to complete.
Alt text: The V519 OBD2 scanner software update process, showing the steps to download and install the latest firmware.
5.2. Printing Diagnostic Data
- Download the Print Tool: Visit “elm327.com” and download the “V519ProductTool.”
- Connect to Computer: Use a Type-C data cable to connect the V519 scanner to your computer.
- Run the Print Tool: Double-click to run the “V519ProductTool.”
- Select “Review Datastream”: Choose “Review Datastream” in the tool.
- Read Data: After the data is read successfully, the vehicle data stream information will be displayed.
- Copy and Print: Copy the data and paste it into a document for printing.
Alt text: Printing diagnostic information from the V519 OBD2 scanner using the provided software tool.
6. Troubleshooting Common Issues with the V519 OBD2 Scanner
Even with careful use, you may encounter some issues while using the V519 OBD2 scanner. Here are some common problems and their solutions.
6.1. Scanner Not Powering On
- Check the OBD Connection: Ensure the scanner is securely connected to the vehicle’s OBD port.
- Verify Vehicle Ignition: Make sure the vehicle’s ignition is turned to the “ON” position.
- Check Vehicle Battery: Ensure the vehicle’s battery has sufficient charge.
6.2. Unable to Read Fault Codes
- Verify Vehicle Compatibility: Confirm that the vehicle is OBD2 compliant. The V519 scanner is not compatible with new energy vehicles, hybrid vehicles, or vehicles that do not conform to the OBD2 agreement.
- Check Connection: Ensure the OBD cable is properly connected to both the scanner and the vehicle’s OBD port.
- Try Again: Sometimes, simply turning the ignition off and then back on can resolve the issue.
6.3. Communication Error
- Check for Damage: Inspect the OBD cable and scanner for any signs of damage.
- Try Another Vehicle: Connect the scanner to another OBD2 compliant vehicle to see if the issue persists.
- Update Software: Ensure the scanner has the latest software updates installed.
6.4. Incorrect Data Displayed
- Verify Settings: Check the scanner’s settings to ensure the correct units (metric or imperial) are selected.
- Restart Scanner: Turn off the scanner and disconnect it from the vehicle, then reconnect and restart.
- Consult Manual: Refer to the manual for guidance on interpreting the displayed data.
7. Maximizing the Value of Your V519 OBD2 Scanner
To get the most out of your V519 OBD2 scanner, consider these additional tips and best practices.
7.1. Regular Software Updates
Keep your scanner’s software updated to ensure compatibility with the latest vehicle models and to access new features and improvements.
7.2. Proper Storage and Maintenance
Store the scanner in a clean, dry environment to prevent damage. Avoid exposing it to extreme temperatures or humidity.
7.3. Understanding OBD2 Protocols
Familiarize yourself with the various OBD2 protocols and their applications. This will help you better understand the data provided by the scanner and diagnose issues more effectively.
7.4. Combining with Other Diagnostic Tools
Use the V519 OBD2 scanner in conjunction with other diagnostic tools, such as multimeters and oscilloscopes, for more comprehensive troubleshooting.
7.5. Seeking Professional Training
Consider enrolling in professional automotive diagnostic training courses to enhance your skills and knowledge. CAR-DIAGNOSTIC-TOOL.EDU.VN offers comprehensive training programs designed to help technicians master advanced diagnostic techniques.
8. CAR-DIAGNOSTIC-TOOL.EDU.VN: Your Partner in Automotive Diagnostics
At CAR-DIAGNOSTIC-TOOL.EDU.VN, we are dedicated to providing top-notch resources and support for automotive technicians and enthusiasts. Our services include:
8.1. Expert Guidance and Support
Our team of experienced technicians is available to provide expert guidance and support for all your diagnostic needs. Whether you need help interpreting fault codes or troubleshooting complex issues, we are here to assist you.
8.2. Detailed Repair Solutions
We offer detailed repair solutions for a wide range of vehicle issues. Our solutions are based on industry best practices and are designed to help you perform accurate and effective repairs.
8.3. Specialized Training Programs
Our specialized training programs cover a variety of topics, including OBD2 diagnostics, advanced engine management, and electrical system troubleshooting. These programs are designed to help you enhance your skills and stay up-to-date with the latest automotive technologies.
8.4. Remote Support Services
We offer remote support services to help you diagnose and repair vehicles from anywhere in the world. Our remote support technicians can connect to your diagnostic tools and provide real-time assistance.
9. The Future of Automotive Diagnostics and the Role of OBD2 Scanners
As automotive technology continues to evolve, OBD2 scanners will play an increasingly important role in vehicle diagnostics.
9.1. Integration with Advanced Technologies
Future OBD2 scanners will likely integrate with advanced technologies such as artificial intelligence (AI) and machine learning (ML) to provide more accurate and efficient diagnostics. These technologies will be able to analyze vast amounts of data and identify patterns that human technicians may miss.
9.2. Enhanced Data Analysis Capabilities
Next-generation OBD2 scanners will offer enhanced data analysis capabilities, allowing technicians to monitor and interpret a wider range of vehicle parameters. This will enable them to diagnose complex issues more quickly and effectively.
9.3. Wireless Connectivity and Cloud Integration
Future OBD2 scanners will increasingly rely on wireless connectivity and cloud integration. This will allow technicians to access diagnostic data from anywhere and share information with other technicians and experts.
9.4. Focus on Preventative Maintenance
OBD2 scanners will play a greater role in preventative maintenance, helping vehicle owners identify potential problems before they become major issues. This will save time and money and improve vehicle reliability.
10. Frequently Asked Questions (FAQ) About the V519 OBD2 Scanner
Here are some frequently asked questions about the V519 OBD2 scanner and its use.
10.1. What vehicles are compatible with the V519 OBD2 scanner?
The V519 OBD2 scanner is compatible with most OBD2 compliant vehicles, which generally includes vehicles manufactured after 1996. However, it is not compatible with new energy vehicles, hybrid vehicles, or vehicles that do not conform to the OBD2 agreement.
10.2. How do I update the software on my V519 OBD2 scanner?
To update the software, download the “V519ProductTool” from “elm327.com,” connect the scanner to your computer using a Type-C cable, run the tool, and select “Update Firmware.”
10.3. Can the V519 OBD2 scanner clear fault codes?
Yes, the V519 OBD2 scanner can clear fault codes after you have addressed the underlying issue.
10.4. What is the I/M Readiness function?
The I/M Readiness function checks whether the vehicle’s monitors are ready for emission testing. “OK” means the monitoring test is completed, “INC” indicates that the vehicle has not completed monitoring, and “N/A” means that the vehicle does not support this monitoring.
10.5. How do I view real-time data streams with the V519 OBD2 scanner?
Select “Data Stream” from the “Diagnosis” menu, choose the data parameters you want to monitor, and view the real-time data displayed on the scanner.
10.6. What does Mode 6 detection do?
Mode 6 detection allows you to access on-board diagnostic monitoring test results for specific components and systems.
10.7. How can I print diagnostic data from the V519 OBD2 scanner?
Download the “V519ProductTool” from “elm327.com,” connect the scanner to your computer, run the tool, select “Review Datastream,” read the data, and copy it into a document for printing.
10.8. What should I do if the scanner is not powering on?
Check the OBD connection, verify the vehicle ignition is on, and ensure the vehicle’s battery has sufficient charge.
10.9. Is the V519 OBD2 scanner suitable for professional use?
Yes, the V519 OBD2 scanner is suitable for both professional technicians and DIY enthusiasts due to its wide range of features and ease of use.
10.10. Where can I get additional support and training for using OBD2 scanners?
CAR-DIAGNOSTIC-TOOL.EDU.VN offers expert guidance, detailed repair solutions, specialized training programs, and remote support services to help you master automotive diagnostics.
Do you want to take your automotive diagnostic skills to the next level? Contact CAR-DIAGNOSTIC-TOOL.EDU.VN today at +1 (641) 206-8880 or visit our office at 1100 Congress Ave, Austin, TX 78701, United States. Let us help you enhance your efficiency, accuracy, and knowledge in automotive diagnostics with our comprehensive support and training programs. Reach out via Whatsapp at +1 (641) 206-8880 or explore our website CAR-DIAGNOSTIC-TOOL.EDU.VN for more information.