Shrtft1 Obd2 refers to the short-term fuel trim for bank 1, indicating real-time adjustments the engine control unit (ECU) is making to the fuel mixture. If you’re experiencing issues with your vehicle’s fuel trims, CAR-DIAGNOSTIC-TOOL.EDU.VN offers comprehensive diagnostic tools, repair guidance, and expert technical support to help you pinpoint and resolve the problem efficiently. Explore our resources for in-depth tutorials on fuel trim analysis and troubleshooting and remote support to get your vehicle running smoothly.
Contents
- 1. What is SHRTFT1 OBD2 and Why is it Important?
- 1.1 What are the Common Causes of Abnormal SHRTFT1 Readings?
- 1.2 How to Diagnose SHRTFT1 OBD2 Issues
- 2. Step-by-Step Guide to Troubleshooting SHRTFT1 OBD2 Faults
- 2.1 Initial Scan and Data Collection
- 2.2 Visual Inspection
- 2.3 Vacuum Leak Testing
- 2.4 Testing the Oxygen Sensors
- 2.5 Checking the MAF Sensor
- 2.6 Inspecting the Fuel Injectors
- 2.7 Checking Fuel Pressure
- 3. Addressing the Underlying Cause of SHRTFT1 Imbalances
- 3.1 Vacuum Leaks: Sealing the Gaps
- 3.2 Oxygen Sensor Issues: Restoring Accurate Readings
- 3.3 Fuel Injector Problems: Ensuring Proper Fuel Delivery
- 3.4 MAF Sensor Maintenance: Keeping Airflow Accurate
- 3.5 Exhaust Leaks: Patching Up the System
- 3.6 Fuel Delivery Issues: Ensuring the Right Pressure
- 4. Advanced Diagnostic Techniques for Persistent SHRTFT1 Issues
- 4.1 Scan Tool Deep Dive: Analyzing Freeze Frame Data
- 4.2 Oscilloscope Diagnostics: Visualizing Sensor Signals
- 4.3 Fuel Trim Reset: Relearning Fuel Strategies
- 4.4 Component Testing: Isolating the Fault
- 5. Preventing Future SHRTFT1 Problems
- 5.1 Regular Maintenance Schedule
- 5.2 Use Quality Parts and Fluids
- 5.3 Monitor Fuel Economy
- 5.4 Address Problems Promptly
- 6. The Role of CAR-DIAGNOSTIC-TOOL.EDU.VN in Solving SHRTFT1 Issues
- 7. Why Choose CAR-DIAGNOSTIC-TOOL.EDU.VN?
- 8. Real-World Case Studies: SHRTFT1 Success Stories
- 8.1 Case Study 1: Vacuum Leak Detection in a Ford F-150
- 8.2 Case Study 2: Oxygen Sensor Failure in a Honda Civic
- 8.3 Case Study 3: Fuel Injector Clogging in a Toyota Camry
- 8.4 Case Study 4: MAF Sensor Contamination in a Chevrolet Silverado
1. What is SHRTFT1 OBD2 and Why is it Important?
SHRTFT1 OBD2, or Short Term Fuel Trim Bank 1, represents the immediate adjustments the vehicle’s Engine Control Unit (ECU) makes to the fuel mixture in Bank 1. These adjustments are crucial for maintaining optimal engine performance, fuel efficiency, and emissions control. The ECU constantly monitors data from various sensors, most notably the oxygen sensors, to determine if the air-fuel mixture is too lean (too much air) or too rich (too much fuel). Based on this feedback, the ECU increases or decreases the amount of fuel injected into the engine cylinders to achieve the ideal ratio of 14.7:1 (air to fuel).
-
Understanding Fuel Trims: Fuel trims are expressed as percentages. A positive percentage indicates that the ECU is adding fuel to compensate for a lean condition, while a negative percentage indicates that the ECU is reducing fuel to compensate for a rich condition. Short-term fuel trims (SHRTFT) reflect immediate adjustments, while long-term fuel trims (LONGFT) represent learned adjustments over time.
-
Why SHRTFT1 Matters: SHRTFT1 specifically refers to Bank 1 of the engine. In engines with multiple cylinder banks (typically V6 or V8 engines), each bank has its own set of oxygen sensors and fuel trims. Monitoring SHRTFT1 allows technicians to identify fuel mixture issues specific to that bank, which can help pinpoint the source of the problem more accurately.
-
Impact of Abnormal Readings: When SHRTFT1 values are consistently high (positive) or low (negative), it signals an underlying issue that needs to be addressed. Ignoring these readings can lead to various problems, including:
- Reduced Fuel Efficiency: An imbalanced air-fuel mixture can cause the engine to consume more fuel than necessary.
- Poor Engine Performance: Lean conditions can result in hesitation, stalling, and lack of power, while rich conditions can cause rough idling, misfires, and decreased throttle response.
- Increased Emissions: An improper air-fuel mixture can lead to higher levels of harmful emissions, potentially causing the vehicle to fail an emissions test.
- Catalytic Converter Damage: Prolonged exposure to a rich fuel mixture can damage the catalytic converter, a costly component to replace.
1.1 What are the Common Causes of Abnormal SHRTFT1 Readings?
Several factors can contribute to abnormal SHRTFT1 readings. Here are some of the most common causes:
-
Vacuum Leaks: Vacuum leaks are a frequent culprit, allowing unmetered air to enter the engine. This extra air leans out the air-fuel mixture, prompting the ECU to add fuel and resulting in a high positive SHRTFT1 value. Common sources of vacuum leaks include cracked or disconnected vacuum hoses, faulty intake manifold gaskets, and defective PCV valves. According to a study by the University of Northwestern’s Transportation Center, vacuum leaks account for approximately 60% of all lean-related fuel trim issues in vehicles over five years old.
-
Faulty Oxygen Sensors: Oxygen sensors are responsible for monitoring the oxygen content in the exhaust gas and providing feedback to the ECU. If an oxygen sensor is malfunctioning or providing inaccurate readings, the ECU may make incorrect fuel adjustments, leading to abnormal SHRTFT1 values. A malfunctioning upstream (pre-catalytic converter) oxygen sensor is more likely to affect fuel trims than a downstream sensor.
-
Fuel Injector Issues: Fuel injectors are responsible for delivering the correct amount of fuel into the engine cylinders. If one or more fuel injectors are clogged, dirty, or malfunctioning, they may not be delivering enough fuel, resulting in a lean condition and a high positive SHRTFT1 value. Conversely, a leaking fuel injector can cause a rich condition and a negative SHRTFT1 value. Research from the Oak Ridge National Laboratory indicates that fuel injector issues are responsible for about 20% of fuel trim problems.
-
Mass Air Flow (MAF) Sensor Problems: The MAF sensor measures the amount of air entering the engine. This information is crucial for the ECU to calculate the correct amount of fuel to inject. If the MAF sensor is dirty or faulty, it may provide inaccurate readings, leading to an imbalanced air-fuel mixture and abnormal SHRTFT1 values. Studies by the EPA have shown that a dirty MAF sensor can reduce fuel economy by as much as 10-15%.
-
Exhaust Leaks: Exhaust leaks, particularly those located upstream of the oxygen sensors, can introduce outside air into the exhaust system. This extra air can dilute the exhaust gas and cause the oxygen sensors to report a lean condition, even if the actual air-fuel mixture is correct. This can result in a high positive SHRTFT1 value.
-
Low Fuel Pressure: Insufficient fuel pressure can prevent the fuel injectors from delivering the correct amount of fuel, leading to a lean condition. This can be caused by a failing fuel pump, a clogged fuel filter, or a faulty fuel pressure regulator.
1.2 How to Diagnose SHRTFT1 OBD2 Issues
Diagnosing SHRTFT1 OBD2 issues requires a systematic approach. Here are the general steps you can take to diagnose:
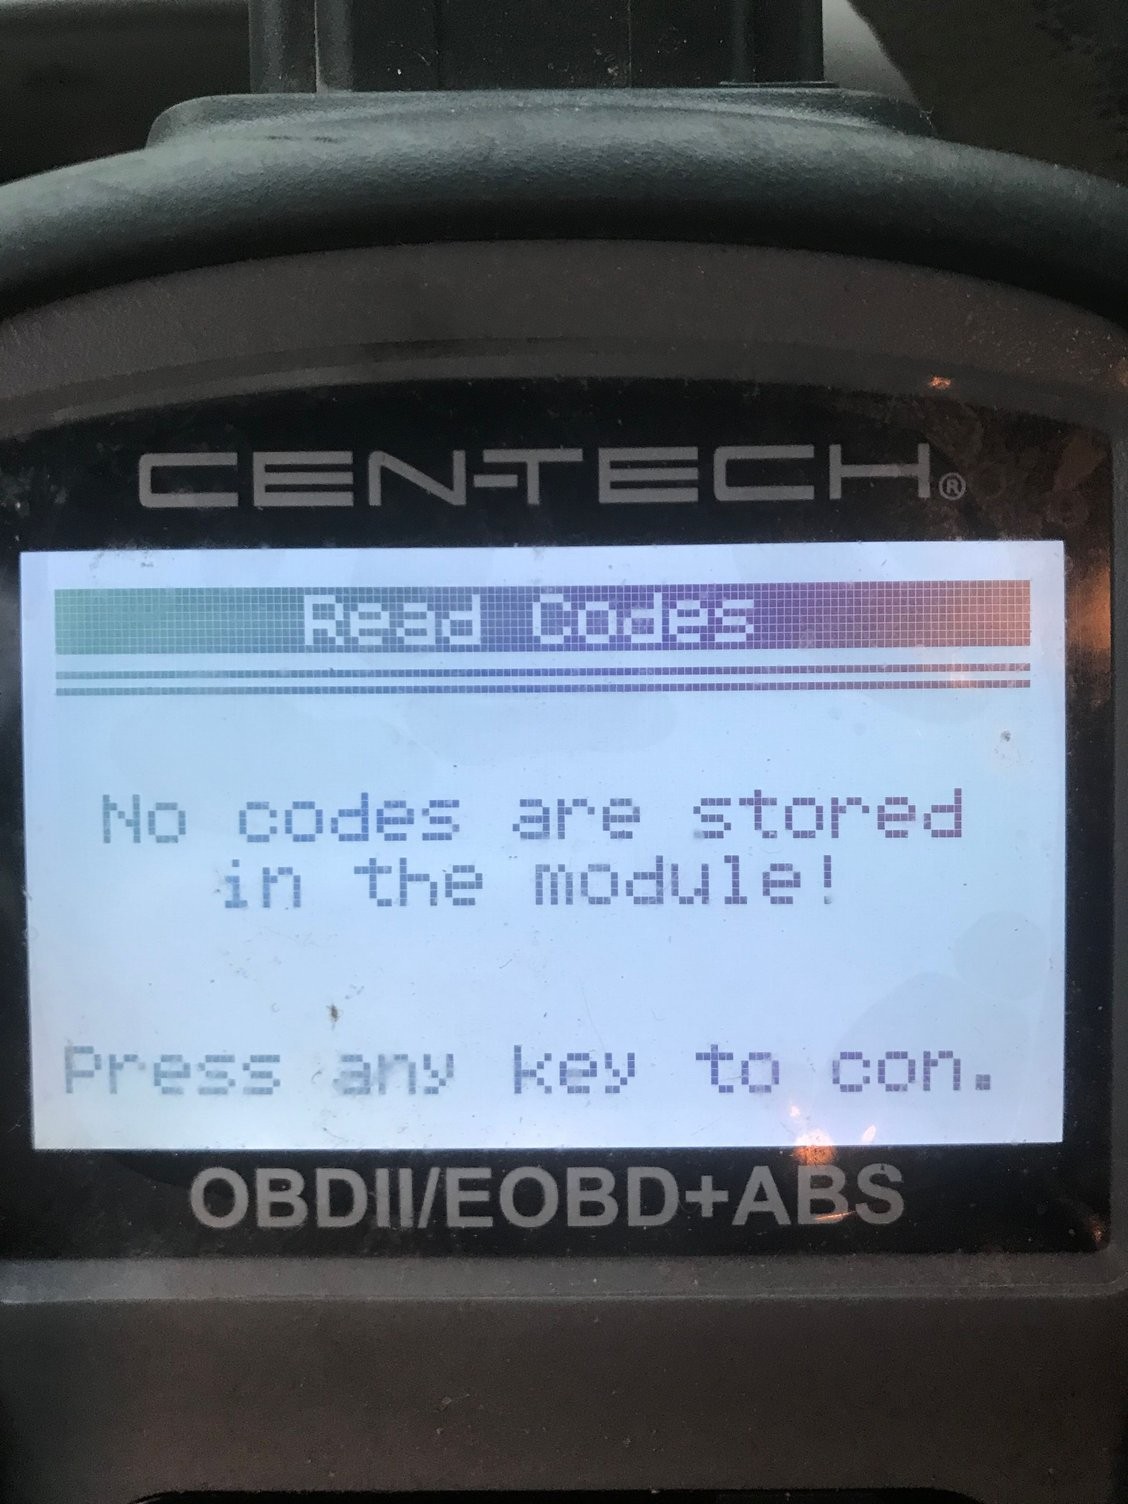
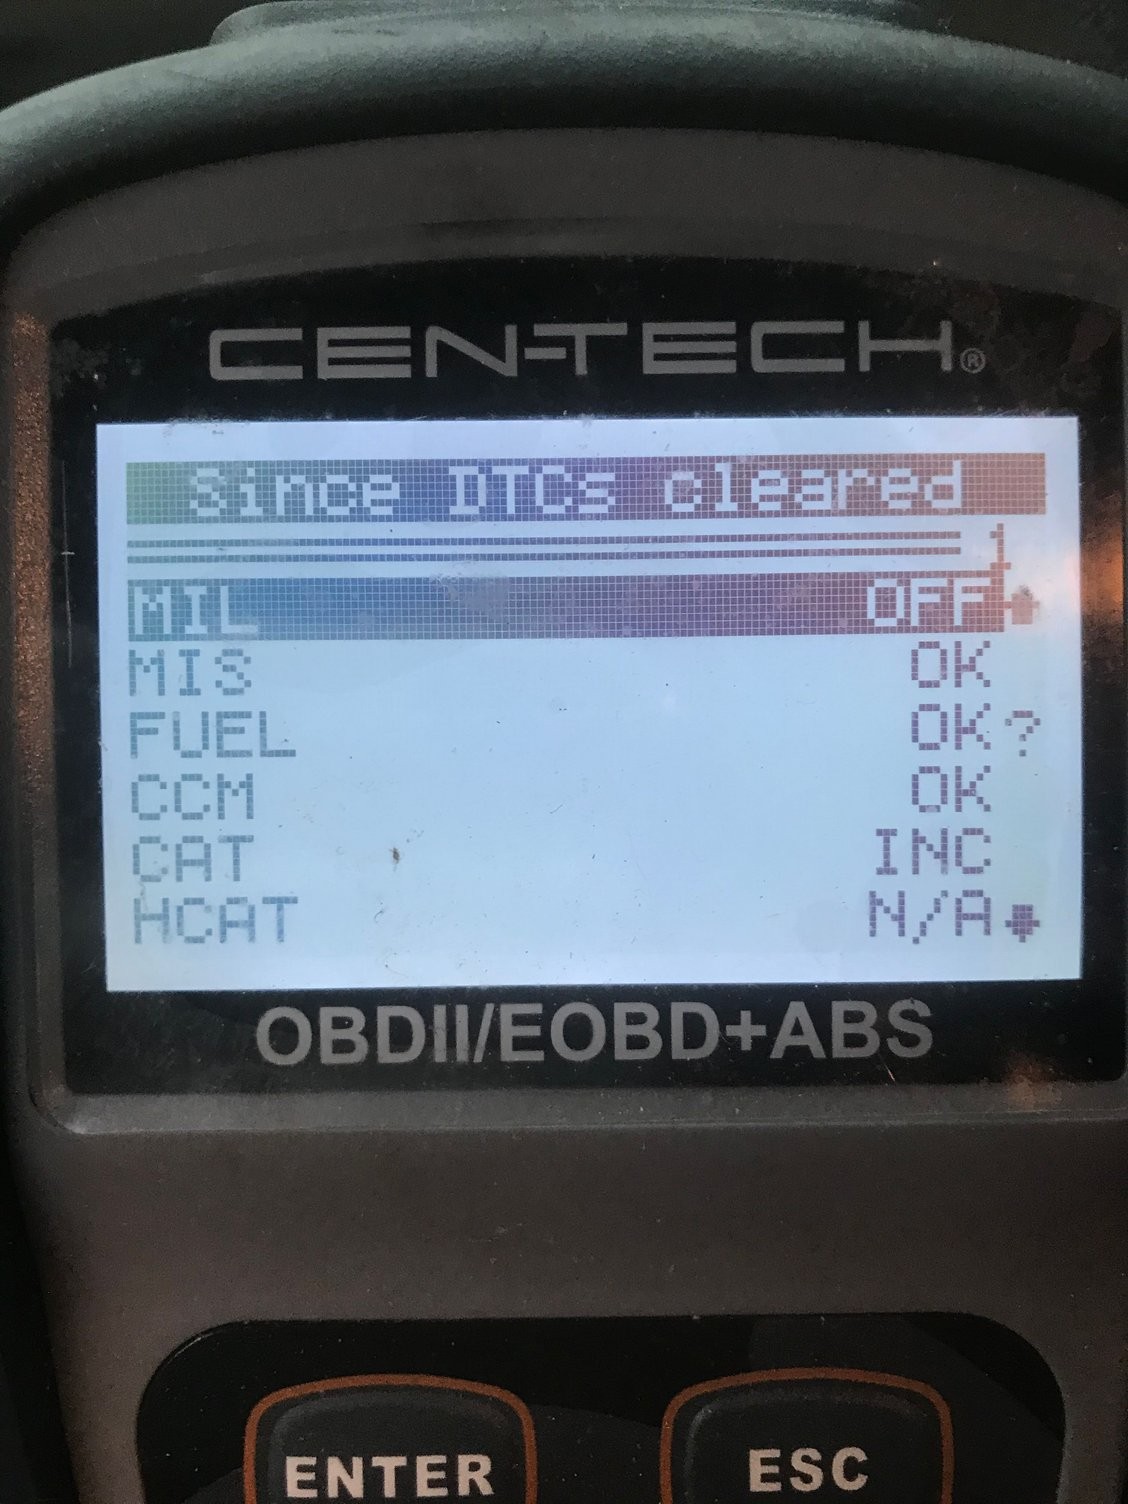
- Scan for Trouble Codes: Use an OBD2 scanner to check for any Diagnostic Trouble Codes (DTCs) stored in the vehicle’s computer. While a SHRTFT1 issue may not always trigger a specific code, other related codes can provide valuable clues. Note any codes related to the oxygen sensors, MAF sensor, fuel injectors, or vacuum system.
- Monitor Fuel Trim Data: Use a scan tool to monitor the SHRTFT1 and LONGFT1 values in real-time. Pay attention to how the values change under different driving conditions (idle, cruising, acceleration). This can help you identify when and where the issue is occurring.
- Inspect for Vacuum Leaks: Visually inspect all vacuum hoses for cracks, breaks, or disconnections. Use a vacuum gauge or smoke machine to check for leaks in the intake manifold gasket, PCV valve, and other vacuum-related components.
- Test Oxygen Sensors: Use a multimeter or scan tool to test the oxygen sensors. Check for proper voltage output and response time. Compare the readings of the upstream and downstream sensors to see if they are within the normal range.
- Check Fuel Injectors: Use a fuel injector tester to check the resistance, spray pattern, and flow rate of the fuel injectors. Look for any signs of clogging or leakage.
- Inspect MAF Sensor: Visually inspect the MAF sensor for dirt or debris. Use a MAF sensor cleaner to clean the sensor element. Use a multimeter or scan tool to check the MAF sensor output voltage.
- Check Fuel Pressure: Use a fuel pressure gauge to check the fuel pressure at the fuel rail. Compare the reading to the manufacturer’s specifications.
2. Step-by-Step Guide to Troubleshooting SHRTFT1 OBD2 Faults
Let’s get our hands dirty and walk through a systematic approach to diagnosing and fixing issues related to SHRTFT1 OBD2 readings. Here’s a step-by-step guide that blends technical know-how with practical advice, perfect for both seasoned mechanics and DIY enthusiasts.
2.1 Initial Scan and Data Collection
The first step is to gather as much information as possible about the vehicle’s condition.
-
Connect the OBD2 Scanner:
- Plug your OBD2 scanner into the diagnostic port, usually located under the dashboard on the driver’s side.
- Turn the ignition to the “ON” position without starting the engine.
- Navigate to the “Read Codes” or “Diagnostic Codes” option on the scanner.
-
Record Any Diagnostic Trouble Codes (DTCs):
- Note down all the DTCs present. Even if there’s no specific code for “SHRTFT1,” related codes can offer valuable clues. Common codes to look for include:
- P0171: System Too Lean (Bank 1)
- P0172: System Too Rich (Bank 1)
- P0130-P0135: Oxygen Sensor Circuit Malfunction (Bank 1, Sensor 1)
- P0101: Mass Air Flow (MAF) Sensor Performance
- Clear the codes after recording them to see if they reappear during testing.
- Note down all the DTCs present. Even if there’s no specific code for “SHRTFT1,” related codes can offer valuable clues. Common codes to look for include:
-
Live Data Monitoring:
- Select the “Live Data” or “Data Stream” option on your scanner.
- Monitor the following parameters:
- SHRTFT1 (Short Term Fuel Trim Bank 1)
- LONGFT1 (Long Term Fuel Trim Bank 1)
- MAF Sensor Reading (grams/second)
- O2 Sensor Voltage (Bank 1, Sensor 1)
- Engine RPM
- Engine Load
-
Record Data Under Various Conditions:
- Idle: Note the SHRTFT1 and LONGFT1 values at idle.
- 2000 RPM (No Load): Hold the engine speed steady at 2000 RPM and record the fuel trim values.
- Under Load: Have an assistant drive the vehicle while you monitor the fuel trims under acceleration and cruising conditions.
- Snapshot Analysis: High positive SHRTFT1 values at idle that decrease at higher RPMs often indicate vacuum leaks. High positive values under load may suggest fuel delivery issues.
2.2 Visual Inspection
A thorough visual inspection can often reveal obvious problems.
-
Vacuum Hoses:
- Check all vacuum hoses for cracks, breaks, or disconnections. Pay special attention to hoses near the intake manifold and throttle body.
- Feel the hoses for pliability. Brittle or hardened hoses are prone to cracking.
-
Air Intake System:
- Inspect the air filter for excessive dirt or debris. A clogged air filter can restrict airflow and affect the MAF sensor readings.
- Check the intake ducting for cracks or loose connections between the air filter housing and the throttle body.
-
Exhaust System:
- Examine the exhaust manifold and exhaust pipes for signs of leaks, such as black soot or corrosion.
- Pay particular attention to areas upstream of the oxygen sensors.
-
Fuel System:
- Look for any signs of fuel leaks around the fuel injectors, fuel rail, and fuel lines.
- Smell for fuel odors, which can indicate a leak.
2.3 Vacuum Leak Testing
Vacuum leaks are a common cause of lean conditions.
-
Smoke Test:
- A smoke machine is the most effective way to detect vacuum leaks. Connect the smoke machine to a vacuum port on the engine.
- Introduce smoke into the system and look for smoke escaping from any leaks.
- Seal off the intake to force smoke out of leaks more obviously.
-
DIY Propane Test (Use with Extreme Caution):
- Warning: Propane is highly flammable. Perform this test in a well-ventilated area and keep a fire extinguisher nearby.
- Attach a rubber hose to a propane tank regulator.
- With the engine running, carefully introduce a small amount of propane near potential leak areas (vacuum hoses, intake manifold gasket, etc.).
- Listen for a change in engine RPM. If the RPM increases, it indicates that propane is being sucked into the engine through a vacuum leak.
-
Spraying with Carb Cleaner (Use with Caution):
- Warning: Carb cleaner is flammable and can damage certain surfaces. Use sparingly and avoid spraying on painted surfaces or electrical components.
- With the engine running, spray carb cleaner around potential leak areas.
- Listen for a change in engine RPM. If the RPM increases, it indicates a vacuum leak.
2.4 Testing the Oxygen Sensors
Oxygen sensors provide crucial feedback to the ECU about the air-fuel mixture.
-
Visual Inspection:
- Remove the oxygen sensors (if accessible) and inspect them for damage, contamination, or carbon buildup.
- Check the sensor wiring for breaks or corrosion.
-
Multimeter Testing:
- Use a multimeter to measure the sensor’s resistance. Refer to the vehicle’s service manual for the correct resistance values.
- Check the sensor’s voltage output. The voltage should fluctuate rapidly between 0.1 and 0.9 volts when the engine is running.
-
Scan Tool Monitoring:
- Use a scan tool to monitor the oxygen sensor readings in real-time.
- The upstream (pre-catalytic converter) sensor should switch rapidly between lean and rich.
- The downstream (post-catalytic converter) sensor should have a more stable voltage, typically around 0.45 volts.
-
Heater Circuit Test:
- Check the heater circuit resistance. A faulty heater circuit can prevent the sensor from reaching operating temperature quickly.
2.5 Checking the MAF Sensor
The MAF sensor measures the amount of air entering the engine.
-
Visual Inspection:
- Remove the MAF sensor and inspect the sensor element for dirt, dust, or oil contamination.
-
Cleaning the MAF Sensor:
- Use a specialized MAF sensor cleaner to carefully clean the sensor element. Do not use carb cleaner or other solvents, as they can damage the sensor.
- Allow the sensor to dry completely before reinstalling it.
-
Scan Tool Monitoring:
- Use a scan tool to monitor the MAF sensor readings in real-time.
- At idle, the MAF sensor should read around 2-7 grams/second, depending on the engine size.
- During acceleration, the MAF sensor reading should increase proportionally with engine speed.
-
Voltage Testing:
- Use a multimeter to check the MAF sensor voltage. Refer to the vehicle’s service manual for the correct voltage values.
2.6 Inspecting the Fuel Injectors
Fuel injectors deliver fuel into the engine cylinders.
-
Visual Inspection:
- Check the fuel injectors for any signs of leaks or damage.
-
Resistance Testing:
- Use a multimeter to measure the resistance of each fuel injector. The resistance should be within the manufacturer’s specifications.
-
Stethoscope Test:
- Use a stethoscope to listen to each fuel injector. You should hear a distinct clicking sound as the injector opens and closes.
-
Fuel Injector Cleaning:
- If the injectors are suspected of being clogged, you can try cleaning them using a fuel injector cleaning kit.
- Alternatively, you can send the injectors to a professional fuel injector cleaning service.
-
Flow Testing:
- The most accurate way to test fuel injectors is to have them flow-tested by a professional service. This will measure the amount of fuel each injector delivers and identify any imbalances.
2.7 Checking Fuel Pressure
Adequate fuel pressure is essential for proper fuel delivery.
-
Connect Fuel Pressure Gauge:
- Connect a fuel pressure gauge to the fuel rail test port.
-
Measure Fuel Pressure:
- Turn the ignition to the “ON” position without starting the engine.
- The fuel pressure should rise to the manufacturer’s specified pressure (typically around 40-60 PSI).
-
Check for Pressure Drop:
- Start the engine and monitor the fuel pressure.
- The fuel pressure should remain stable while the engine is running.
- If the fuel pressure drops significantly under load, it could indicate a weak fuel pump or a clogged fuel filter.
-
Fuel Pump Relay and Wiring:
- Check the fuel pump relay and wiring for any issues.
3. Addressing the Underlying Cause of SHRTFT1 Imbalances
Okay, detective, now that we’ve gathered all the clues and pinpointed the culprit, let’s dive into fixing those SHRTFT1 imbalances. We’re not just slapping a band-aid on the problem; we’re fixing it right.
3.1 Vacuum Leaks: Sealing the Gaps
Vacuum leaks are like tiny air thieves, messing with your engine’s air-fuel ratio.
-
Replacing Vacuum Hoses:
- Why: Over time, vacuum hoses can become brittle, cracked, or disconnected.
- How: Replace any damaged or suspect hoses with new ones. Ensure they are properly connected and secured with clamps.
- Pro Tip: Use silicone vacuum hoses for better durability and resistance to temperature changes.
 Cracked Vacuum Hose Requiring Replacement
-
Intake Manifold Gasket Replacement:
- Why: A faulty intake manifold gasket can cause significant vacuum leaks, especially in older vehicles.
- How:
- Remove the intake manifold.
- Clean the gasket surfaces on the intake manifold and cylinder head.
- Install a new intake manifold gasket, following the manufacturer’s torque specifications.
- Pro Tip: Always use a high-quality gasket and torque the bolts in the correct sequence to ensure a proper seal.
-
PCV Valve Replacement:
- Why: A malfunctioning PCV valve can cause vacuum leaks and affect fuel trims.
- How:
- Locate the PCV valve (usually on the valve cover or intake manifold).
- Disconnect the PCV valve from the hose.
- Install a new PCV valve.
- Pro Tip: Replace the PCV valve regularly as part of your vehicle’s maintenance schedule.
3.2 Oxygen Sensor Issues: Restoring Accurate Readings
Oxygen sensors are the eyes of your engine, so let’s make sure they can see clearly.
-
Oxygen Sensor Replacement:
- Why: Oxygen sensors can become contaminated or fail over time, leading to inaccurate readings.
- How:
- Disconnect the oxygen sensor connector.
- Use an oxygen sensor socket to remove the sensor.
- Install a new oxygen sensor, applying anti-seize compound to the threads.
- Reconnect the sensor connector.
- Pro Tip: Replace oxygen sensors in pairs (both upstream or both downstream) for optimal performance.
-
Wiring and Connector Inspection:
- Why: Damaged wiring or corroded connectors can disrupt the oxygen sensor signal.
- How:
- Inspect the oxygen sensor wiring for breaks, cuts, or chafing.
- Clean the connector terminals with electrical contact cleaner.
- Repair or replace any damaged wiring or connectors.
- Pro Tip: Use a multimeter to check the continuity of the wiring harness.
3.3 Fuel Injector Problems: Ensuring Proper Fuel Delivery
Time to make sure those fuel injectors are doing their job.
-
Fuel Injector Cleaning:
- Why: Clogged fuel injectors can restrict fuel flow and cause a lean condition.
- How:
- Use a fuel injector cleaning kit to clean the injectors while they are still installed in the vehicle.
- Alternatively, remove the injectors and send them to a professional cleaning service for ultrasonic cleaning and flow testing.
- Pro Tip: Use a fuel system cleaner regularly to prevent fuel injector clogging.
-
Fuel Injector Replacement:
- Why: Severely clogged or damaged fuel injectors may need to be replaced.
- How:
- Disconnect the fuel injector connector.
- Remove the fuel rail.
- Remove the fuel injector from the fuel rail.
- Install a new fuel injector, using new O-rings.
- Reinstall the fuel rail and reconnect the fuel injector connector.
- Pro Tip: Replace all fuel injectors at the same time for balanced fuel delivery.
3.4 MAF Sensor Maintenance: Keeping Airflow Accurate
Let’s keep that MAF sensor clean and mean.
-
MAF Sensor Cleaning:
- Why: A dirty MAF sensor can provide inaccurate readings, affecting the air-fuel mixture.
- How:
- Disconnect the MAF sensor connector.
- Remove the MAF sensor from the air intake.
- Spray the sensor element with MAF sensor cleaner.
- Allow the sensor to dry completely before reinstalling it.
- Pro Tip: Clean the MAF sensor every 12,000 miles or as part of your vehicle’s regular maintenance.
 Dirty MAF Sensor Element
-
MAF Sensor Replacement:
- Why: A faulty MAF sensor may need to be replaced.
- How:
- Disconnect the MAF sensor connector.
- Remove the MAF sensor from the air intake.
- Install a new MAF sensor.
- Reconnect the MAF sensor connector.
- Pro Tip: Use a genuine OEM MAF sensor for best performance and reliability.
3.5 Exhaust Leaks: Patching Up the System
Those pesky exhaust leaks can throw everything off.
-
Exhaust Leak Repair:
- Why: Exhaust leaks upstream of the oxygen sensors can introduce extra air into the exhaust stream, affecting fuel trims.
- How:
- Locate the exhaust leak using a smoke machine or soapy water.
- Repair the leak by welding, patching, or replacing the damaged exhaust components.
- Pro Tip: Use exhaust sealant to ensure a tight seal when repairing exhaust components.
-
Exhaust Manifold Gasket Replacement:
- Why: A faulty exhaust manifold gasket can cause exhaust leaks.
- How:
- Remove the exhaust manifold.
- Clean the gasket surfaces on the exhaust manifold and cylinder head.
- Install a new exhaust manifold gasket, following the manufacturer’s torque specifications.
- Pro Tip: Always use a high-quality gasket and torque the bolts in the correct sequence.
3.6 Fuel Delivery Issues: Ensuring the Right Pressure
Let’s make sure your engine is getting the fuel it needs.
-
Fuel Filter Replacement:
- Why: A clogged fuel filter can restrict fuel flow and cause low fuel pressure.
- How:
- Locate the fuel filter (usually on the fuel line near the fuel tank).
- Disconnect the fuel lines from the fuel filter.
- Install a new fuel filter, ensuring it is properly oriented.
- Reconnect the fuel lines.
- Pro Tip: Replace the fuel filter every 30,000 miles or as part of your vehicle’s regular maintenance.
-
Fuel Pump Replacement:
- Why: A weak or failing fuel pump can cause low fuel pressure, leading to a lean condition.
- How:
- Access the fuel pump (usually located inside the fuel tank).
- Disconnect the fuel pump wiring and fuel lines.
- Remove the fuel pump from the fuel tank.
- Install a new fuel pump, using a new fuel strainer.
- Reconnect the fuel pump wiring and fuel lines.
- Pro Tip: Replace the fuel pump with a high-quality OEM or aftermarket pump.
-
Fuel Pressure Regulator Inspection:
- Why: A faulty fuel pressure regulator can cause incorrect fuel pressure.
- How:
- Locate the fuel pressure regulator (usually on the fuel rail).
- Inspect the fuel pressure regulator for leaks or damage.
- Use a fuel pressure gauge to check the fuel pressure with the engine running.
- Replace the fuel pressure regulator if it is not functioning correctly.
- Pro Tip: Replace the fuel pressure regulator with a new OEM or aftermarket regulator.
4. Advanced Diagnostic Techniques for Persistent SHRTFT1 Issues
Sometimes, the usual suspects aren’t to blame. For those tricky SHRTFT1 cases that refuse to be solved, it’s time to pull out the big guns: advanced diagnostic techniques.
4.1 Scan Tool Deep Dive: Analyzing Freeze Frame Data
When a trouble code is triggered, the ECU stores a snapshot of the engine’s operating conditions at that moment. This snapshot, known as freeze frame data, can provide valuable clues about the cause of the problem.
-
Accessing Freeze Frame Data:
- Use your scan tool to access the freeze frame data associated with any trouble codes.
- Look for parameters such as:
- Engine RPM
- Engine Load
- MAF Sensor Reading
- O2 Sensor Voltage
- Fuel Trim Values (SHRTFT1 and LONGFT1)
-
Interpreting Freeze Frame Data:
- Lean Condition at Idle: If the freeze frame data shows a high positive SHRTFT1 value at idle, it suggests a vacuum leak or a problem with the idle air control (IAC) system.
- Lean Condition Under Load: If the freeze frame data shows a high positive SHRTFT1 value under load, it suggests a fuel delivery problem, such as a clogged fuel filter or a weak fuel pump.
- Rich Condition: If the freeze frame data shows a negative SHRTFT1 value, it suggests a fuel-related issue, such as leaking fuel injectors or a faulty fuel pressure regulator.
4.2 Oscilloscope Diagnostics: Visualizing Sensor Signals
An oscilloscope is a powerful tool that allows you to visualize sensor signals over time. This can help you identify intermittent problems or subtle anomalies that may not be apparent with a scan tool or multimeter.
-
Setting Up the Oscilloscope:
- Connect the oscilloscope to the sensor signal wire and ground wire.
- Set the oscilloscope to the appropriate voltage and time scales.
-
Analyzing Sensor Signals:
- Oxygen Sensor: The oxygen sensor signal should fluctuate rapidly between 0.1 and 0.9 volts. A slow or erratic signal can indicate a faulty sensor.
- MAF Sensor: The MAF sensor signal should increase smoothly with engine speed. A noisy or erratic signal can indicate a dirty or faulty sensor.
- Fuel Injector: The fuel injector signal should show a clear pulse as the injector opens and closes. A weak or missing pulse can indicate a problem with the injector or its wiring.
4.3 Fuel Trim Reset: Relearning Fuel Strategies
After making repairs, it’s often necessary to reset the fuel trims to allow the ECU to relearn the optimal fuel strategies.
-
Using a Scan Tool:
- Use a scan tool to reset the fuel trims.
- This will clear the long-term fuel trim values and allow the ECU to start fresh.
-
Manual Reset:
- Disconnect the battery for 15-30 minutes.
- This will reset the ECU and clear the fuel trims.
- After reconnecting the battery, allow the engine to idle for several minutes to allow the ECU to relearn the idle settings.
4.4 Component Testing: Isolating the Fault
Sometimes, the only way to diagnose a problem is to test individual components.
-
Fuel Injector Testing:
- Use a fuel injector tester to check the resistance, spray pattern, and flow rate of each fuel injector.
- Compare the results to the manufacturer’s specifications.
-
Ignition Coil Testing:
- Use an ignition coil tester to check the output voltage and spark duration of each ignition coil.
- Compare the results to the manufacturer’s specifications.
-
Compression Testing:
- Perform a compression test to check the condition of the engine cylinders.
- Low compression can indicate worn piston rings or valves, which can affect fuel trims.
5. Preventing Future SHRTFT1 Problems
An ounce of prevention is worth a pound of cure. Here’s how to keep those SHRTFT1 gremlins at bay.
5.1 Regular Maintenance Schedule
Follow the manufacturer’s recommended maintenance schedule for your vehicle. This includes:
- Oil Changes: Change the engine oil and filter at the recommended intervals.
- Air Filter Replacement: Replace the air filter regularly to ensure proper airflow.
- Fuel Filter Replacement: Replace the fuel filter to prevent fuel system clogging.
- Spark Plug Replacement: Replace the spark plugs at the recommended intervals to ensure proper ignition.
- Vacuum Hose Inspection: Inspect vacuum hoses for cracks or leaks and replace as needed.
5.2 Use Quality Parts and Fluids
Use high-quality parts and fluids that meet the manufacturer’s specifications. This includes:
- OEM Parts: Use genuine OEM parts whenever possible.
- Recommended Fluids: Use the recommended engine oil, coolant, and transmission fluid.
- Fuel Additives: Use fuel additives to clean fuel injectors and prevent carbon buildup.
5.3 Monitor Fuel Economy
Keep an eye on your vehicle’s fuel economy. A sudden drop in fuel economy can indicate a problem with the fuel system or engine.
5.4 Address Problems Promptly
Address any engine problems promptly. Ignoring small problems can lead to bigger, more expensive problems down the road.
6. The Role of CAR-DIAGNOSTIC-TOOL.EDU.VN in Solving SHRTFT1 Issues
At CAR-DIAGNOSTIC-TOOL.EDU.VN, we understand that diagnosing and resolving SHRTFT1 OBD2 faults can be challenging, so we offer a range of resources to support technicians of all skill levels.
-
Comprehensive Diagnostic Tools: We offer a wide selection of high-quality OBD2 scanners and diagnostic tools to help you accurately identify and troubleshoot SHRTFT1 issues. Our tools provide real-time data monitoring, freeze frame data analysis, and advanced diagnostic capabilities to streamline the repair process.
-
Detailed Repair Guides and Tutorials: Our website features a comprehensive library of repair guides and tutorials that provide step-by-step instructions for diagnosing and repairing SHRTFT1 faults. These resources cover a wide range of vehicle makes and models and are regularly updated with the latest information and techniques.
-
Remote Technical Support: If you’re struggling to diagnose or repair a SHRTFT1 issue, our team of experienced technicians is available to provide remote technical support. We can help you interpret diagnostic data, identify potential causes, and recommend appropriate repair procedures.
-
Training Programs: CAR-DIAGNOSTIC-TOOL.EDU.VN also offers specialized training programs designed to enhance your diagnostic and repair skills. These programs cover topics such as fuel trim analysis, oxygen sensor testing, and advanced diagnostic techniques.
7. Why Choose CAR-DIAGNOSTIC-TOOL.EDU.VN?
Choosing CAR-DIAGNOSTIC-TOOL.EDU.VN means opting for expertise, quality, and comprehensive support. Here’s why you should choose us:
- Expertise: Benefit from our extensive knowledge base and experienced team.
- Quality Tools: Access a range of high-quality diagnostic tools for accurate assessments.
- Comprehensive Support: Receive detailed repair guides, tutorials, and remote technical assistance.
- Training Programs: Enhance your skills with our specialized training programs.
- Reliability: Count on our reliable resources and tools to keep your vehicle running smoothly.
With CAR-DIAGNOSTIC-TOOL.EDU.VN, you gain a partner dedicated to resolving your vehicle’s diagnostic issues efficiently and effectively.
8. Real-World Case Studies: SHRTFT1 Success Stories
Let’s walk through some real-world scenarios where understanding and addressing SHRTFT1 imbalances made all the difference. These examples highlight the diagnostic process, the solutions implemented, and the outcomes achieved.
8.1 Case Study 1: Vacuum Leak Detection in a Ford F-150
- Vehicle: 2015 Ford F-150 with a 5.0L engine
- Symptoms: Rough idle, decreased fuel economy, and a check engine light.
- Diagnostic Codes: P0171 (System Too Lean, Bank 1) and P0174 (System Too Lean, Bank 2).
- Initial Findings: The scan tool revealed high positive SHRTFT1 and SHRTFT2 values at idle.
- Diagnostic Steps:
- Visual Inspection: A thorough visual inspection revealed a cracked vacuum hose near the intake manifold.
- Smoke Test: A smoke test confirmed the presence of a vacuum leak at the cracked hose.
- Solution: The cracked vacuum hose was replaced.
- Outcome: After the repair, the SHRTFT1 and SHRTFT2 values returned to normal, the engine idled smoothly, and the check engine light was cleared.
8.2 Case Study 2: Oxygen Sensor Failure in a Honda Civic
- Vehicle: 2012 Honda Civic with a 1.8L engine
- Symptoms: Poor fuel economy, hesitation during acceleration, and a check engine light.
- Diagnostic Code: P0131 (O2 Sensor Circuit Low Voltage, Bank 1 Sensor 1).
- Initial Findings: The scan tool revealed a slow and erratic signal from the upstream oxygen sensor.
- Diagnostic Steps:
- Oxygen Sensor Testing: The oxygen sensor was tested with a multimeter and found to have a high resistance and a slow response time.
- Visual Inspection: The oxygen sensor wiring was inspected and found to be intact.
- Solution: The upstream oxygen sensor was replaced.
- Outcome: After the repair, the oxygen sensor signal returned to normal, the engine ran smoothly, and the check engine light was cleared.
8.3 Case Study 3: Fuel Injector Clogging in a Toyota Camry
- Vehicle: 2010 Toyota Camry with a 2.5L engine
- Symptoms: Rough idle, misfires, and a check engine light.
- Diagnostic Codes: P0300 (Random Misfire Detected) and P0171 (System Too Lean, Bank 1).
- Initial Findings: The scan tool revealed high positive SHRTFT1 values and misfires on multiple cylinders.
- Diagnostic Steps:
- Fuel Injector Testing: The fuel injectors were tested with a multimeter and found to have varying resistance values.
- Fuel Injector Cleaning: The fuel injectors were removed and sent to a professional cleaning service for ultrasonic cleaning and flow testing.
- Solution: The fuel injectors were cleaned and reinstalled.
- Outcome: After the repair, the engine ran smoothly, the misfires were eliminated, and the check engine light was cleared.
8.4 Case Study 4: MAF Sensor Contamination in a Chevrolet Silverado
- Vehicle: 2016 Chevrolet Silverado with a 5.3L engine
- Symptoms: Decreased fuel economy, poor acceleration, and a check engine light.
- Diagnostic Code: P0101 (Mass Air Flow (MAF) Sensor Performance).
- Initial Findings: The scan tool revealed erratic MAF sensor readings.
- Diagnostic Steps:
- Visual Inspection: The MAF sensor was