The 2002 Durango Obd2 Diagnostic Port Location is typically found under the dashboard on the driver’s side. CAR-DIAGNOSTIC-TOOL.EDU.VN provides detailed guides and tools to locate and utilize this port for accurate vehicle diagnostics and efficient repairs. We also offer expert remote support and comprehensive technician training to keep you ahead.
Contents
- 1. Understanding the Importance of the OBD2 Port
- 1.1 What is the OBD2 Port?
- 1.2 Why is the OBD2 Port Important?
- 1.3 Common Uses of the OBD2 Port
- 2. Specific Location of the OBD2 Port in a 2002 Dodge Durango
- 2.1 Step-by-Step Guide to Locate the OBD2 Port
- 2.2 Visual Aids and Diagrams
- 2.3 Potential Challenges in Finding the Port
- 3. Essential Tools for OBD2 Diagnostics
- 3.1 Basic OBD2 Scanners
- 3.2 Advanced OBD2 Scanners
- 3.3 Software and Apps
- 4. Common OBD2 Diagnostic Trouble Codes (DTCs) for Dodge Durango
- 4.1 Engine-Related Codes
- 4.2 Transmission-Related Codes
- 4.3 ABS-Related Codes
- 4.4 Airbag-Related Codes
- 5. Step-by-Step Diagnostic Process Using the OBD2 Port
- 5.1 Connecting the OBD2 Scanner
- 5.2 Reading Diagnostic Trouble Codes (DTCs)
- 5.3 Interpreting the Codes
- 5.4 Clearing the Codes (After Repairs)
- 5.5 Live Data Monitoring
- 6. Advanced Diagnostic Techniques
- 6.1 Using a Multimeter for Electrical Testing
- 6.2 Performing a Compression Test
- 6.3 Smoke Testing for Vacuum Leaks
- 6.4 Fuel System Testing
- 7. Maintaining Your 2002 Dodge Durango’s OBD2 System
- 7.1 Regular Inspections
- 7.2 Cleaning the Port
- 7.3 Protecting the Wiring
- 7.4 Software Updates
- 8. CAR-DIAGNOSTIC-TOOL.EDU.VN: Your Partner in Automotive Diagnostics
- 8.1 Comprehensive Diagnostic Tools
- 8.2 Expert Remote Support
- 8.3 Detailed Repair Guides
- 8.4 Technician Training Programs
- 9. Benefits of Using CAR-DIAGNOSTIC-TOOL.EDU.VN
- 9.1 Improved Efficiency
- 9.2 Increased Accuracy
- 9.3 Enhanced Knowledge
- 9.4 Better Customer Satisfaction
- 10. Success Stories
- 10.1 Technician A
- 10.2 Technician B
- 10.3 Shop Owner C
- 11. FAQ: Common Questions About the 2002 Durango OBD2 Port
- 11.1 Where is the OBD2 port located in a 2002 Dodge Durango?
- 11.2 What type of OBD2 scanner do I need for a 2002 Durango?
- 11.3 Can I use a smartphone app for OBD2 diagnostics?
- 11.4 How do I read diagnostic trouble codes (DTCs)?
- 11.5 How do I clear diagnostic trouble codes (DTCs)?
- 11.6 What are some common DTCs for a 2002 Dodge Durango?
- 11.7 How do I perform a compression test on a 2002 Durango?
- 11.8 What is live data monitoring?
- 11.9 How can CAR-DIAGNOSTIC-TOOL.EDU.VN help me with my diagnostic needs?
- 11.10 Where can I find more information about OBD2 diagnostics?
- 12. Call to Action
1. Understanding the Importance of the OBD2 Port
The On-Board Diagnostics II (OBD2) port is a standardized interface used to access a vehicle’s computer system. This port allows technicians and vehicle owners to read diagnostic trouble codes (DTCs), monitor vehicle performance, and perform various diagnostic tests. It’s a crucial component for modern automotive diagnostics and repair.
1.1 What is the OBD2 Port?
The OBD2 port, standardized since 1996 in the United States, is a 16-pin connector that provides access to a vehicle’s engine control unit (ECU) and other systems. According to the Society of Automotive Engineers (SAE), the OBD2 standard ensures uniformity in diagnostic procedures across different vehicle makes and models, simplifying vehicle maintenance and repair.
1.2 Why is the OBD2 Port Important?
The OBD2 port is essential for several reasons:
- Diagnostics: It allows technicians to quickly identify issues by reading DTCs.
- Monitoring: It enables real-time monitoring of vehicle performance parameters.
- Repairs: It aids in performing necessary repairs by providing insights into the vehicle’s condition.
- Compliance: It helps ensure vehicles meet emission standards, as highlighted by the Environmental Protection Agency (EPA).
1.3 Common Uses of the OBD2 Port
The OBD2 port is used for a variety of functions:
- Reading Trouble Codes: Retrieving diagnostic trouble codes to identify issues.
- Clearing Trouble Codes: Resetting the check engine light after repairs.
- Live Data Streaming: Monitoring real-time data such as engine speed, temperature, and oxygen sensor readings.
- Emissions Testing: Checking if the vehicle meets emission standards.
- Programming: Reprogramming the ECU for performance tuning or updates.
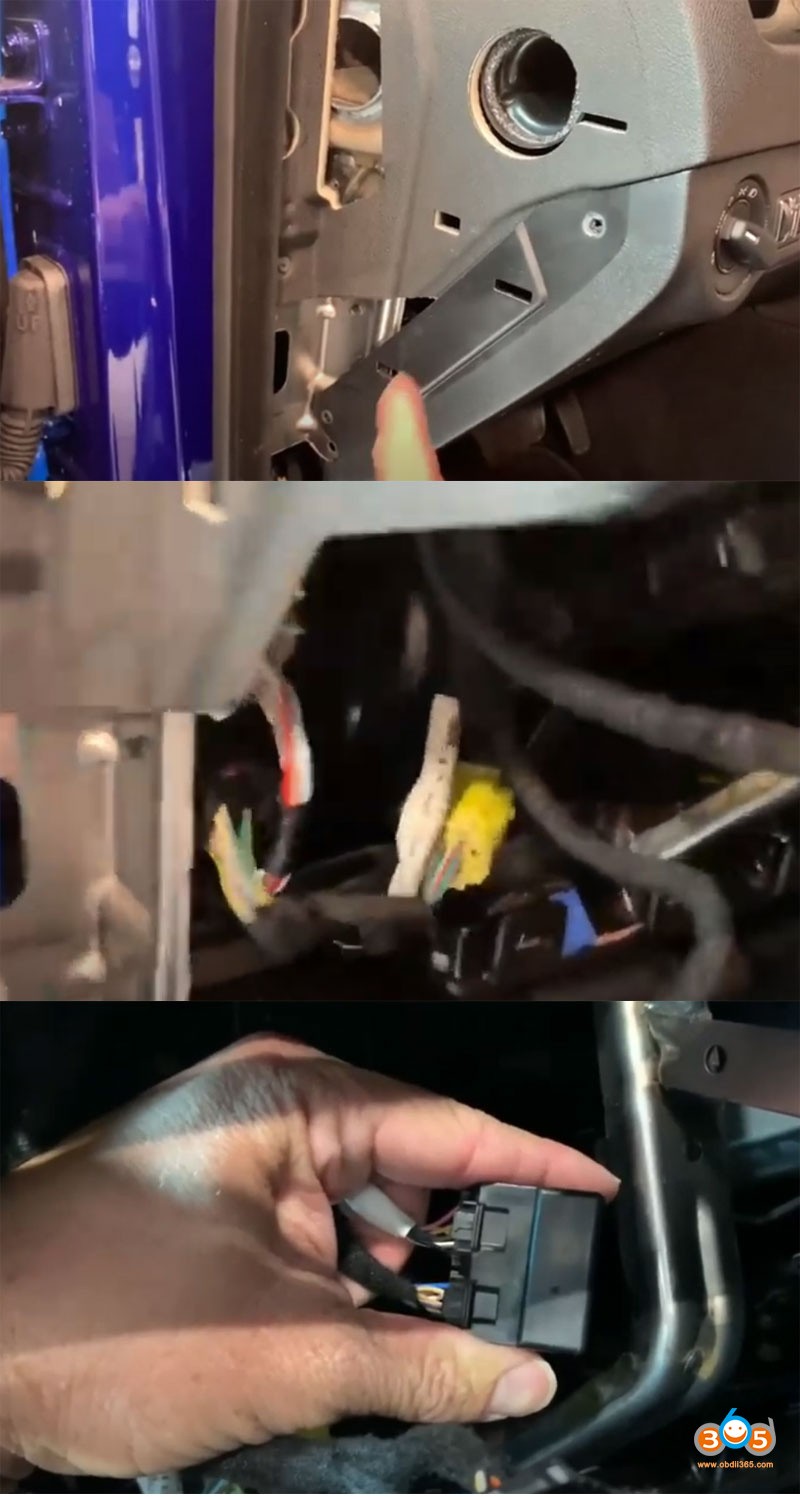
2. Specific Location of the OBD2 Port in a 2002 Dodge Durango
For the 2002 Dodge Durango, the OBD2 port is typically located under the dashboard on the driver’s side. The exact location can vary slightly, but it is generally near the steering column or the center console.
2.1 Step-by-Step Guide to Locate the OBD2 Port
- Driver’s Side: Sit in the driver’s seat of your 2002 Dodge Durango.
- Under the Dashboard: Look under the dashboard, near the steering column.
- Search for the Connector: Look for a 16-pin connector, which is usually trapezoidal in shape.
- Use a Flashlight: If the area is dark, use a flashlight to help locate the port.
- Check the Manual: If you are still having trouble, consult your vehicle’s owner’s manual for the exact location.
2.2 Visual Aids and Diagrams
To further assist you in locating the OBD2 port, consider the following:
- Online Images: Search online for images or diagrams showing the OBD2 port location in a 2002 Dodge Durango.
- Video Tutorials: Look for video tutorials on YouTube or automotive forums that provide a visual guide.
2.3 Potential Challenges in Finding the Port
- Obstructions: The port might be obstructed by panels or wiring.
- Dust and Debris: The port could be covered in dust or debris, making it harder to see.
- Location Variations: Although rare, the location might vary slightly depending on the vehicle’s trim and options.
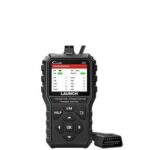
3. Essential Tools for OBD2 Diagnostics
Once you’ve located the OBD2 port, you’ll need the right tools to perform diagnostics. Here’s a breakdown of essential OBD2 diagnostic tools.
3.1 Basic OBD2 Scanners
Basic OBD2 scanners are affordable and easy to use, making them ideal for DIY enthusiasts and novice technicians.
| Feature | Description | Benefit |
|---|---|---|
| Code Reading | Reads diagnostic trouble codes (DTCs) from the vehicle’s computer. | Quickly identifies problems by providing specific error codes. |
| Code Clearing | Clears DTCs and resets the check engine light. | Resets the system after repairs are completed. |
| Live Data | Displays real-time data such as engine speed, coolant temperature, and O2 sensor readings. | Monitors vehicle performance and identifies issues as they occur. |
| Cost | Typically ranges from $20 to $100. | Affordable for most users. |
| Example Brands/Models | Autel AutoLink AL319, Innova 3020, Actron CP9600. | Reliable and widely available. |
3.2 Advanced OBD2 Scanners
Advanced OBD2 scanners offer more features and capabilities, making them suitable for professional technicians and serious DIYers.
| Feature | Description | Benefit |
|---|---|---|
| Enhanced Code Reading & Clearing | Reads and clears manufacturer-specific codes in addition to standard OBD2 codes. | Provides a more comprehensive diagnostic capability. |
| Bi-Directional Control | Allows you to send commands to the vehicle’s computer to test specific components (e.g., turning on/off fuel injectors). | Helps isolate problems by directly controlling and testing components. |
| Data Logging | Records live data for later analysis. | Identifies intermittent issues that may not be apparent during real-time monitoring. |
| Graphing | Visualizes live data in graphs, making it easier to spot trends and anomalies. | Simplifies data analysis and helps identify subtle problems. |
| Cost | Typically ranges from $200 to $1000+. | Offers a high level of functionality for detailed diagnostics and repairs. |
| Example Brands/Models | Autel MaxiCOM MK808, Launch X431 V+, Snap-on Zeus. | Professional-grade tools with extensive capabilities. |
3.3 Software and Apps
In addition to physical scanners, various software and apps can turn your smartphone or tablet into an OBD2 diagnostic tool.
| Feature | Description | Benefit |
|---|---|---|
| Compatibility | Works with a Bluetooth or Wi-Fi OBD2 adapter that plugs into the vehicle’s OBD2 port. | Convenient and portable diagnostic solution. |
| Code Reading | Reads and clears standard OBD2 codes. | Identifies and resets common vehicle issues. |
| Live Data | Displays real-time data on your smartphone or tablet. | Monitors vehicle performance on a familiar device. |
| Data Logging | Records data for later analysis. | Captures intermittent issues. |
| Cost | Adapter cost ranges from $20 to $100, and app costs vary from free to $50+. | Cost-effective solution with a wide range of options. |
| Example Apps/Tools | Torque Pro, OBD Fusion, Carly. | User-friendly interfaces with various advanced features. |
4. Common OBD2 Diagnostic Trouble Codes (DTCs) for Dodge Durango
Understanding common DTCs can help you quickly identify and address issues with your 2002 Dodge Durango. Here are some of the most frequently encountered codes.
4.1 Engine-Related Codes
Engine-related codes are among the most common DTCs. They often indicate problems with the engine’s performance, fuel system, or ignition system.
| DTC | Description | Possible Causes | Severity | Potential Solutions |
|---|---|---|---|---|
| P0300 | Random/Multiple Cylinder Misfire Detected | Faulty spark plugs, ignition coils, fuel injectors, vacuum leaks, low compression. | High | Replace spark plugs, ignition coils, or fuel injectors. Check and repair vacuum leaks. Perform a compression test. |
| P0171 | System Too Lean (Bank 1) | Vacuum leaks, faulty O2 sensor, low fuel pressure, dirty fuel injectors, malfunctioning mass airflow (MAF) sensor. | Medium | Check for vacuum leaks, replace O2 sensor, check fuel pressure, clean or replace fuel injectors, replace MAF sensor. |
| P0174 | System Too Lean (Bank 2) | Vacuum leaks, faulty O2 sensor, low fuel pressure, dirty fuel injectors, malfunctioning mass airflow (MAF) sensor. | Medium | Check for vacuum leaks, replace O2 sensor, check fuel pressure, clean or replace fuel injectors, replace MAF sensor. |
| P0113 | Intake Air Temperature Sensor Circuit High Input | Faulty IAT sensor, wiring issues, poor connection. | Medium | Replace IAT sensor, check and repair wiring, ensure proper connection. |
| P0128 | Coolant Thermostat (Coolant Temperature Below Thermostat Regulating Temperature) | Faulty thermostat, low coolant level, faulty coolant temperature sensor. | Medium | Replace thermostat, check and refill coolant, replace coolant temperature sensor. |
4.2 Transmission-Related Codes
Transmission-related codes can indicate problems with the transmission’s performance, gear shifting, or internal components.
| DTC | Description | Possible Causes | Severity | Potential Solutions |
|---|---|---|---|---|
| P0700 | Transmission Control System Malfunction | Faulty transmission control module (TCM), wiring issues, internal transmission problems. | High | Check TCM connections, repair wiring, consider TCM replacement or transmission rebuild. |
| P0740 | Torque Converter Clutch Circuit Malfunction | Faulty torque converter clutch solenoid, wiring issues, low transmission fluid. | Medium | Replace torque converter clutch solenoid, check wiring, check and refill transmission fluid. |
| P0731 | Gear 1 Incorrect Ratio | Internal transmission damage, faulty shift solenoid, low transmission fluid. | High | Inspect transmission for damage, replace shift solenoid, check and refill transmission fluid. |
| P0732 | Gear 2 Incorrect Ratio | Internal transmission damage, faulty shift solenoid, low transmission fluid. | High | Inspect transmission for damage, replace shift solenoid, check and refill transmission fluid. |
4.3 ABS-Related Codes
ABS (Anti-lock Braking System) codes indicate problems with the braking system, wheel speed sensors, or ABS module.
| DTC | Description | Possible Causes | Severity | Potential Solutions |
|---|---|---|---|---|
| C0031 | Left Front Wheel Speed Sensor Circuit Malfunction | Faulty wheel speed sensor, wiring issues, damaged tone ring. | Medium | Replace wheel speed sensor, check wiring, replace or repair tone ring. |
| C0034 | Right Front Wheel Speed Sensor Circuit Malfunction | Faulty wheel speed sensor, wiring issues, damaged tone ring. | Medium | Replace wheel speed sensor, check wiring, replace or repair tone ring. |
| C0040 | Left Rear Wheel Speed Sensor Circuit Malfunction | Faulty wheel speed sensor, wiring issues, damaged tone ring. | Medium | Replace wheel speed sensor, check wiring, replace or repair tone ring. |
| C0043 | Right Rear Wheel Speed Sensor Circuit Malfunction | Faulty wheel speed sensor, wiring issues, damaged tone ring. | Medium | Replace wheel speed sensor, check wiring, replace or repair tone ring. |
| C0051 | ABS Pump Motor Control Circuit Malfunction | Faulty ABS pump motor, wiring issues, ABS module failure. | High | Replace ABS pump motor, check wiring, consider ABS module replacement. |
4.4 Airbag-Related Codes
Airbag-related codes indicate problems with the airbag system, including sensors, wiring, or the airbag module.
| DTC | Description | Possible Causes | Severity | Potential Solutions |
|---|---|---|---|---|
| B0001 | Driver Airbag Circuit Open | Faulty airbag, wiring issues, clock spring malfunction. | High | Replace airbag, check wiring, replace clock spring. |
| B0002 | Driver Airbag Circuit Short to Battery | Faulty airbag, wiring issues. | High | Replace airbag, check wiring. |
| B0010 | Passenger Airbag Circuit Open | Faulty airbag, wiring issues. | High | Replace airbag, check wiring. |
| B0011 | Passenger Airbag Circuit Short to Ground | Faulty airbag, wiring issues. | High | Replace airbag, check wiring. |
5. Step-by-Step Diagnostic Process Using the OBD2 Port
Using the OBD2 port for diagnostics involves a systematic approach to accurately identify and resolve vehicle issues. Here’s a detailed step-by-step process.
5.1 Connecting the OBD2 Scanner
- Locate the OBD2 Port: Find the OBD2 port in your 2002 Dodge Durango, usually located under the dashboard on the driver’s side.
- Plug in the Scanner: Insert the OBD2 scanner into the port. Ensure it is securely connected.
- Turn on the Ignition: Turn the ignition to the “ON” position without starting the engine. This provides power to the vehicle’s computer.
- Power on the Scanner: Turn on the OBD2 scanner. It should automatically connect to the vehicle’s computer.
5.2 Reading Diagnostic Trouble Codes (DTCs)
- Select “Read Codes”: Navigate the scanner’s menu to find the “Read Codes” or “Diagnostic Codes” option.
- View the Codes: The scanner will display any stored DTCs. Record these codes for further analysis.
- Understand the Codes: Use the scanner’s built-in code definitions or consult online resources to understand what each code means.
5.3 Interpreting the Codes
- Identify the System: Determine which vehicle system the code relates to (e.g., engine, transmission, ABS).
- Understand the Problem: Read the code description to understand the nature of the problem. For example, a P0300 code indicates a random or multiple cylinder misfire.
- Consider Possible Causes: Based on the code description, consider the possible causes of the problem. A P0300 could be caused by faulty spark plugs, ignition coils, or fuel injectors.
5.4 Clearing the Codes (After Repairs)
- Perform Repairs: Address the issues indicated by the DTCs.
- Select “Clear Codes”: After completing the repairs, navigate the scanner’s menu to find the “Clear Codes” or “Erase Codes” option.
- Confirm the Clearing: Follow the scanner’s prompts to clear the codes.
- Verify the Repair: Start the vehicle and monitor for the return of the check engine light or any new DTCs.
5.5 Live Data Monitoring
- Select “Live Data”: Navigate the scanner’s menu to find the “Live Data” or “Real-Time Data” option.
- Choose Parameters: Select the parameters you want to monitor, such as engine speed, coolant temperature, and oxygen sensor readings.
- Monitor the Data: Observe the data as the vehicle runs. Look for any values that are outside the normal range.
- Record the Data: If necessary, record the data for later analysis. This can be helpful for identifying intermittent issues.
6. Advanced Diagnostic Techniques
For more complex issues, advanced diagnostic techniques can provide deeper insights into your vehicle’s condition.
6.1 Using a Multimeter for Electrical Testing
A multimeter is an essential tool for testing electrical components and circuits. Here’s how to use it effectively:
- Voltage Testing: Check the voltage at various points in a circuit to identify voltage drops or shorts.
- Continuity Testing: Verify the continuity of wires and connections to ensure they are not broken or corroded.
- Resistance Testing: Measure the resistance of components such as sensors and resistors to ensure they are within the specified range.
6.2 Performing a Compression Test
A compression test can help diagnose engine problems such as worn piston rings or leaky valves.
- Warm-Up: Warm up the engine to normal operating temperature.
- Disable Ignition: Disable the ignition system to prevent the engine from starting.
- Remove Spark Plugs: Remove all spark plugs from the engine.
- Insert Compression Tester: Insert the compression tester into one of the spark plug holes.
- Crank the Engine: Crank the engine for several seconds while observing the compression reading.
- Repeat: Repeat the test for each cylinder and compare the readings.
6.3 Smoke Testing for Vacuum Leaks
A smoke test is an effective way to find vacuum leaks in the engine.
- Connect Smoke Machine: Connect the smoke machine to the vehicle’s intake system.
- Introduce Smoke: Introduce smoke into the intake system.
- Observe for Leaks: Look for smoke escaping from any vacuum lines, seals, or gaskets.
- Repair Leaks: Repair any leaks that are found.
6.4 Fuel System Testing
Testing the fuel system can help diagnose issues related to fuel delivery and pressure.
- Fuel Pressure Test: Use a fuel pressure gauge to measure the fuel pressure at the fuel rail.
- Fuel Injector Testing: Use a multimeter to test the resistance of the fuel injectors.
- Fuel Pump Testing: Check the fuel pump’s voltage and current to ensure it is operating correctly.
7. Maintaining Your 2002 Dodge Durango’s OBD2 System
Proper maintenance of your vehicle’s OBD2 system ensures accurate and reliable diagnostics.
7.1 Regular Inspections
Regularly inspect the OBD2 port and wiring for any signs of damage or corrosion.
7.2 Cleaning the Port
Keep the OBD2 port clean and free of debris to ensure a good connection with the scanner.
7.3 Protecting the Wiring
Protect the OBD2 wiring from damage by securing it properly and avoiding any sharp bends or abrasions.
7.4 Software Updates
Keep your OBD2 scanner’s software up to date to ensure compatibility with the latest vehicle models and diagnostic protocols.
8. CAR-DIAGNOSTIC-TOOL.EDU.VN: Your Partner in Automotive Diagnostics
At CAR-DIAGNOSTIC-TOOL.EDU.VN, we understand the challenges technicians and car enthusiasts face when diagnosing and repairing modern vehicles. That’s why we offer a comprehensive suite of tools, resources, and support to help you succeed.
8.1 Comprehensive Diagnostic Tools
We provide a wide range of OBD2 scanners, from basic code readers to advanced diagnostic platforms. Our tools are designed to be user-friendly and accurate, ensuring you get the right information quickly.
8.2 Expert Remote Support
Our team of experienced technicians is available to provide remote support and guidance. Whether you’re struggling with a complex diagnostic issue or need help interpreting DTCs, we’re here to assist you.
8.3 Detailed Repair Guides
We offer detailed repair guides and tutorials that walk you through the repair process step-by-step. Our guides cover a wide range of vehicle makes and models, including the 2002 Dodge Durango.
8.4 Technician Training Programs
We offer comprehensive technician training programs designed to enhance your skills and knowledge. Our programs cover everything from basic diagnostics to advanced repair techniques.
9. Benefits of Using CAR-DIAGNOSTIC-TOOL.EDU.VN
Choosing CAR-DIAGNOSTIC-TOOL.EDU.VN as your partner in automotive diagnostics offers numerous benefits.
9.1 Improved Efficiency
Our tools and resources help you diagnose and repair vehicles more quickly and efficiently. This saves you time and money, allowing you to focus on other tasks.
9.2 Increased Accuracy
Our diagnostic tools are designed to provide accurate and reliable information, reducing the risk of misdiagnosis and unnecessary repairs.
9.3 Enhanced Knowledge
Our training programs and repair guides enhance your knowledge and skills, making you a more competent and confident technician.
9.4 Better Customer Satisfaction
By providing accurate and efficient service, you can improve customer satisfaction and build a loyal customer base.
10. Success Stories
Here are a few success stories from technicians who have benefited from using CAR-DIAGNOSTIC-TOOL.EDU.VN.
10.1 Technician A
Technician A, a seasoned mechanic, struggled with diagnosing intermittent electrical issues in a 2015 Ford F-150. After using our advanced diagnostic tools and consulting with our remote support team, he was able to quickly identify a faulty wiring harness and resolve the issue.
10.2 Technician B
Technician B, a recent graduate of a vocational program, felt overwhelmed by the complexity of modern automotive systems. By enrolling in our technician training program, he gained the knowledge and skills needed to confidently diagnose and repair a wide range of vehicles.
10.3 Shop Owner C
Shop Owner C was looking for ways to improve the efficiency and profitability of his repair shop. By implementing our diagnostic tools and training programs, he was able to reduce diagnostic times, increase customer satisfaction, and boost revenue.
11. FAQ: Common Questions About the 2002 Durango OBD2 Port
Here are some frequently asked questions about the 2002 Dodge Durango OBD2 port and diagnostics.
11.1 Where is the OBD2 port located in a 2002 Dodge Durango?
The OBD2 port in a 2002 Dodge Durango is typically located under the dashboard on the driver’s side.
11.2 What type of OBD2 scanner do I need for a 2002 Durango?
Any standard OBD2 scanner should work with a 2002 Dodge Durango. However, an advanced scanner will provide more detailed information and capabilities.
11.3 Can I use a smartphone app for OBD2 diagnostics?
Yes, you can use a smartphone app for OBD2 diagnostics, but you will need a Bluetooth or Wi-Fi OBD2 adapter that plugs into the vehicle’s OBD2 port.
11.4 How do I read diagnostic trouble codes (DTCs)?
To read DTCs, plug the OBD2 scanner into the port, turn on the ignition, and select the “Read Codes” option on the scanner.
11.5 How do I clear diagnostic trouble codes (DTCs)?
To clear DTCs, perform the necessary repairs, plug the OBD2 scanner into the port, turn on the ignition, and select the “Clear Codes” option on the scanner.
11.6 What are some common DTCs for a 2002 Dodge Durango?
Some common DTCs include P0300 (Random/Multiple Cylinder Misfire Detected), P0171 (System Too Lean – Bank 1), and P0700 (Transmission Control System Malfunction).
11.7 How do I perform a compression test on a 2002 Durango?
To perform a compression test, warm up the engine, disable the ignition, remove the spark plugs, insert the compression tester into each cylinder, and crank the engine while observing the readings.
11.8 What is live data monitoring?
Live data monitoring involves observing real-time data from the vehicle’s sensors, such as engine speed, coolant temperature, and oxygen sensor readings, to identify issues as they occur.
11.9 How can CAR-DIAGNOSTIC-TOOL.EDU.VN help me with my diagnostic needs?
CAR-DIAGNOSTIC-TOOL.EDU.VN provides comprehensive diagnostic tools, expert remote support, detailed repair guides, and technician training programs to help you succeed in automotive diagnostics.
11.10 Where can I find more information about OBD2 diagnostics?
You can find more information about OBD2 diagnostics on our website, CAR-DIAGNOSTIC-TOOL.EDU.VN, as well as in automotive forums, repair manuals, and educational resources.
12. Call to Action
Ready to take your automotive diagnostics to the next level? Contact CAR-DIAGNOSTIC-TOOL.EDU.VN today!
- Address: 1100 Congress Ave, Austin, TX 78701, United States
- WhatsApp: +1 (641) 206-8880
- Website: CAR-DIAGNOSTIC-TOOL.EDU.VN
Let us help you with:
- Choosing the right diagnostic tools
- Troubleshooting complex issues
- Enhancing your skills with our training programs
Don’t let diagnostic challenges slow you down. Reach out to CAR-DIAGNOSTIC-TOOL.EDU.VN and experience the difference expert support and quality tools can make!
{width=800 height=1500}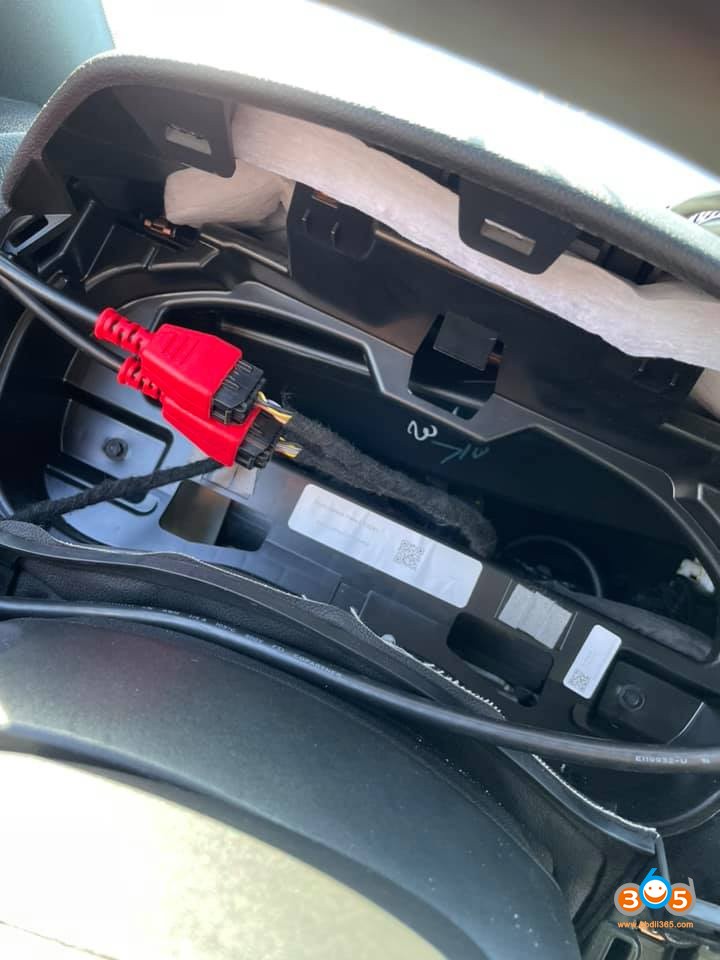{width=720 height=960}{width=800 height=1500}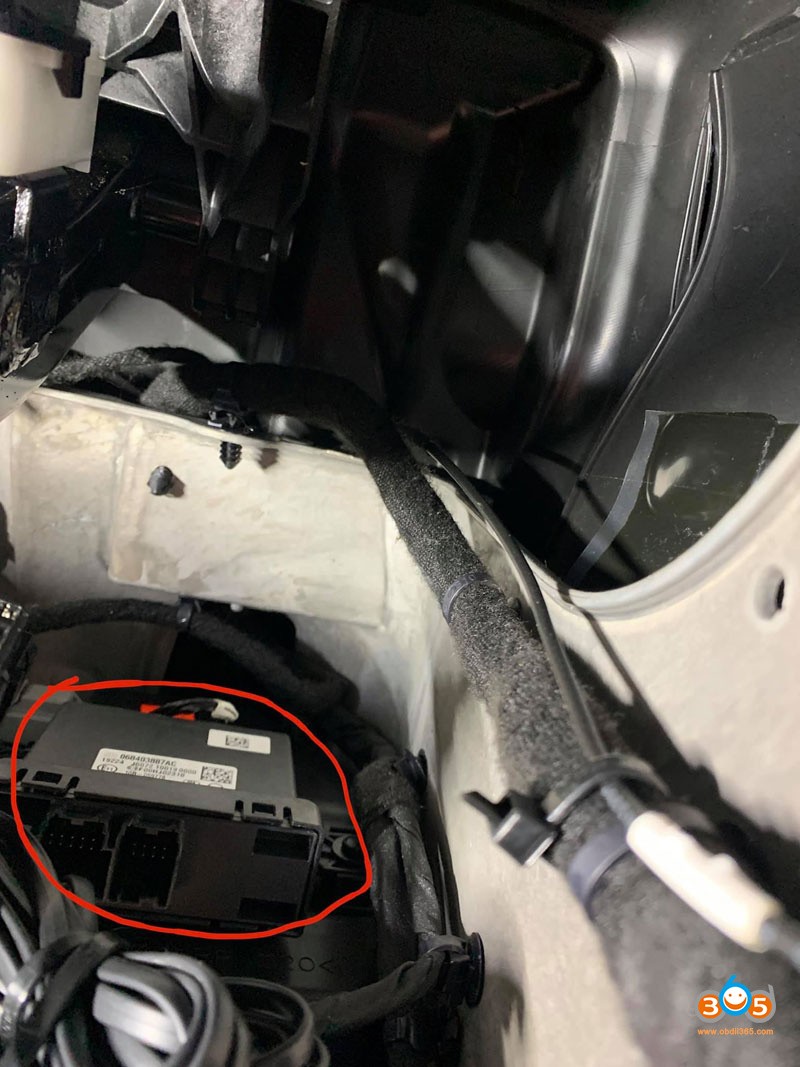{width=800 height=1067}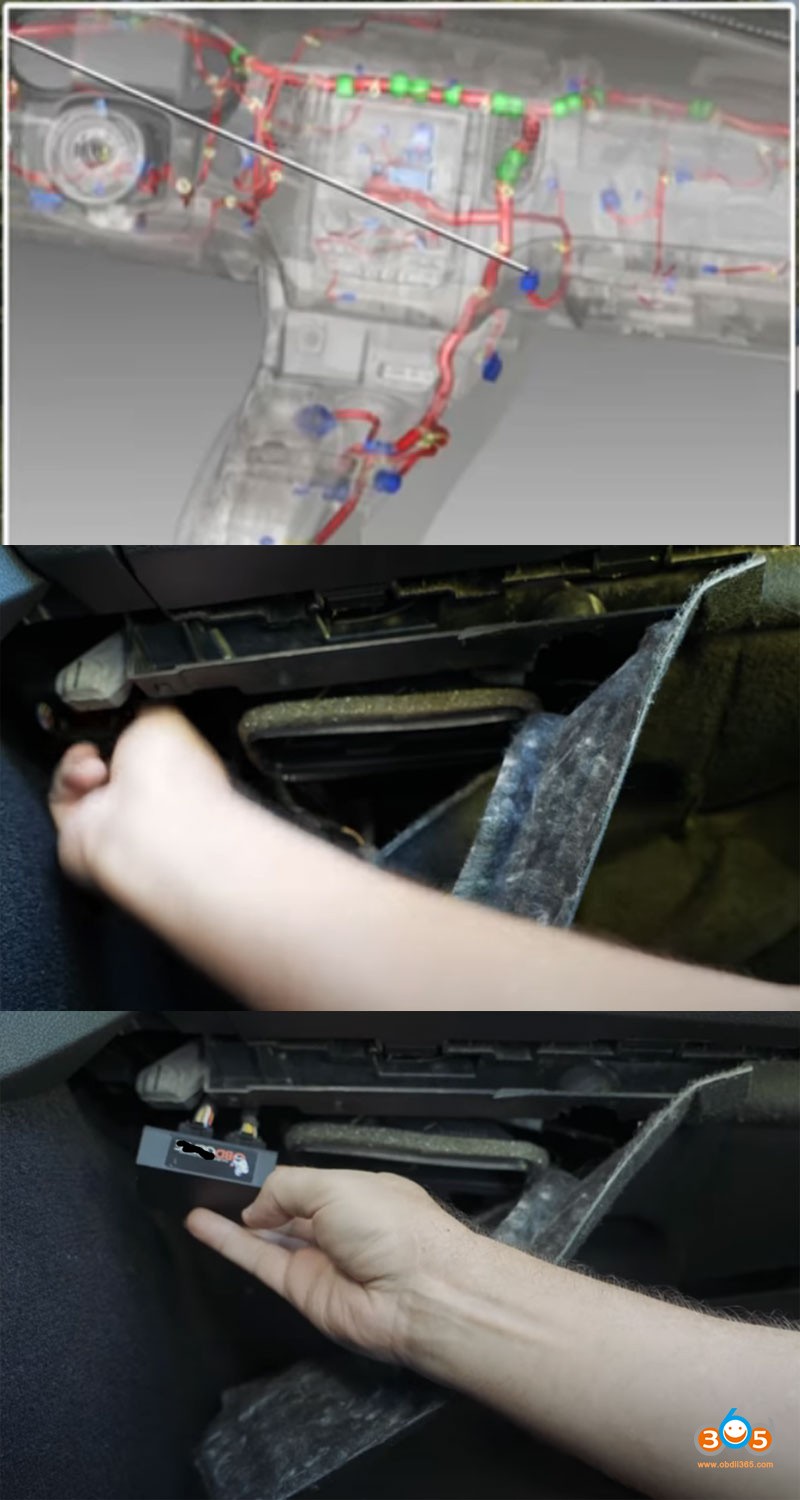{width=800 height=1500}{width=800 height=600}{width=432 height=960}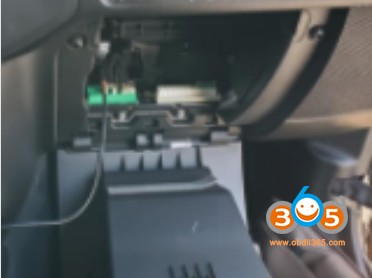{width=372 height=278}{width=413 height=274}{width=529 height=528}{width=421 height=536}{width=800 height=1067}