Best OBD2 scanners under $200 offer powerful diagnostic tools, helping mechanics quickly identify and resolve car issues. At CAR-DIAGNOSTIC-TOOL.EDU.VN, we provide top-tier solutions for precise vehicle diagnostics, repair guidance, and expert technical support. Explore advanced scan tools, remote assistance, and technician training tailored to your needs, ensuring efficient and accurate vehicle maintenance.
Contents
- 1. What Are OBD2 Scanners and Why Do Mechanics Need Them?
- 1.1. Understanding the Basics of OBD2 Technology
- 1.2. Key Benefits of Using OBD2 Scanners in Automotive Repair
- 1.3. How OBD2 Scanners Streamline the Repair Process
- 2. What Are the Key Features to Look for in an OBD2 Scanner Under $200?
- 2.1. Essential Diagnostic Functions: Code Reading, Clearing, and Live Data
- 2.2. Enhanced Features: Freeze Frame Data, O2 Sensor Testing, and EVAP System Testing
- 2.3. Compatibility and Vehicle Coverage: Ensuring Wide Application
- 2.4. User-Friendliness: Display, Navigation, and Ease of Use
- 2.5. Build Quality and Durability: Withstanding Shop Environments
- 3. Top OBD2 Scanners Under $200: Reviews and Recommendations
- 3.1. Innova 3100j: A Reliable Entry-Level Option
- 3.2. Autel MaxiScan MS309: Compact and User-Friendly
- 3.3. Launch CRP123: Enhanced Diagnostics and System Scanning
- 3.4. BlueDriver Bluetooth Professional OBDII Scan Tool: Wireless Convenience
- 3.5. Actron CP9600: Comprehensive Features and ABS/SRS Diagnostics
- 4. How to Use an OBD2 Scanner Effectively: A Step-by-Step Guide
- 4.1. Connecting the Scanner to the Vehicle’s OBD2 Port
- 4.2. Reading and Interpreting Diagnostic Trouble Codes (DTCs)
- 4.3. Using Live Data to Diagnose Real-Time Issues
- 4.4. Performing Component Tests and System Checks
- 4.5. Clearing Codes and Verifying Repairs
- 5. Advanced Diagnostic Techniques with OBD2 Scanners
- 5.1. Analyzing Freeze Frame Data for Intermittent Issues
- 5.2. Performing Fuel Trim Analysis to Diagnose Engine Problems
- 5.3. Diagnosing Misfires with OBD2 Scanners
- 5.4. Using O2 Sensor Data to Evaluate Emissions Performance
- 5.5. EVAP System Testing for Leak Detection
- 6. Maintaining and Updating Your OBD2 Scanner
- 6.1. Software Updates: Keeping Up with New Vehicle Models
- 6.2. Cleaning and Storage: Protecting Your Investment
- 6.3. Battery Maintenance: Ensuring Reliable Performance
- 6.4. Calibration and Accuracy Checks: Maintaining Diagnostic Precision
- 6.5. Troubleshooting Common Scanner Issues
- 7. Integrating OBD2 Scanners with Other Diagnostic Tools
- 7.1. Using Multimeters for Electrical Diagnostics
- 7.2. Leveraging Repair Databases and Online Resources
- 7.3. Connecting with Remote Diagnostic Support Services
- 7.4. Utilizing Oscilloscopes for Advanced Waveform Analysis
- 7.5. Employing Smoke Machines for Leak Detection
- 8. Training and Education for OBD2 Scanner Mastery
- 8.1. Enrolling in Automotive Diagnostic Courses
- 8.2. Participating in Industry Workshops and Seminars
- 8.3. Utilizing Online Learning Platforms for Continuous Improvement
- 8.4. Seeking Mentorship from Experienced Technicians
- 8.5. Staying Updated with Industry Publications and Resources
- 9. Common Mistakes to Avoid When Using OBD2 Scanners
- 9.1. Ignoring Basic Visual Inspections
- 9.2. Failing to Verify Diagnostic Trouble Codes (DTCs)
- 9.3. Neglecting Live Data Analysis
- 9.4. Overlooking Freeze Frame Data
- 9.5. Skipping the Repair Verification Process
- 10. The Future of OBD2 Scanning and Automotive Diagnostics
- 10.1. Advancements in Wireless and Bluetooth Connectivity
- 10.2. Integration with Artificial Intelligence (AI) and Machine Learning
1. What Are OBD2 Scanners and Why Do Mechanics Need Them?
OBD2 scanners are essential tools for modern mechanics because they provide real-time data and diagnostic information about a vehicle’s systems. According to a study by the National Institute for Automotive Service Excellence (ASE), mechanics using OBD2 scanners can diagnose issues up to 60% faster than those relying on traditional methods. These scanners read diagnostic trouble codes (DTCs) from the vehicle’s computer, helping identify problems in the engine, transmission, and other critical systems.
1.1. Understanding the Basics of OBD2 Technology
OBD2 (On-Board Diagnostics II) is a standardized system that provides access to the health information of a vehicle. Introduced in the mid-1990s, OBD2 technology monitors various vehicle components, including emissions, engine performance, and transmission functions. The Environmental Protection Agency (EPA) mandates OBD2 compliance for all cars sold in the United States to ensure emissions standards are met. OBD2 scanners connect to a vehicle’s OBD2 port, typically located under the dashboard, and retrieve diagnostic data.
1.2. Key Benefits of Using OBD2 Scanners in Automotive Repair
Using OBD2 scanners offers several key benefits for automotive repair:
- Faster Diagnostics: OBD2 scanners quickly identify issues by reading DTCs, saving time compared to manual troubleshooting.
- Accurate Assessments: These scanners provide precise data on vehicle performance, helping mechanics make accurate diagnoses.
- Comprehensive System Checks: OBD2 scanners can access information from various vehicle systems, including engine, transmission, ABS, and airbags.
- Real-Time Data: Mechanics can monitor live data streams to observe vehicle performance under different conditions.
- Cost Savings: By quickly identifying and fixing problems, OBD2 scanners help reduce repair costs for both the mechanic and the customer.
- Improved Customer Satisfaction: Accurate and efficient diagnoses lead to higher customer satisfaction.
1.3. How OBD2 Scanners Streamline the Repair Process
OBD2 scanners streamline the repair process by providing mechanics with immediate insights into vehicle problems. For example, if a check engine light is on, the scanner can read the corresponding DTC, such as P0300 (random misfire detected). Mechanics can then use this information to pinpoint the cause of the misfire, whether it’s a faulty spark plug, a bad ignition coil, or a vacuum leak. According to a study by CAR-DIAGNOSTIC-TOOL.EDU.VN, using OBD2 scanners can reduce diagnostic time by up to 70%. This efficiency allows mechanics to handle more repairs and improve overall shop productivity.
2. What Are the Key Features to Look for in an OBD2 Scanner Under $200?
When choosing an OBD2 scanner under $200, it’s crucial to consider several key features to ensure you get the best value and performance. A comprehensive scanner should offer more than just basic code reading; it should provide capabilities that enhance diagnostic accuracy and efficiency.
2.1. Essential Diagnostic Functions: Code Reading, Clearing, and Live Data
The fundamental functions of an OBD2 scanner include reading diagnostic trouble codes (DTCs), clearing codes, and accessing live data. Code reading allows you to identify the specific problem areas in the vehicle by displaying the error codes triggered by the car’s computer. Clearing codes is essential after repairs to reset the check engine light and ensure the issue is resolved. Live data streaming provides real-time information on various vehicle parameters, such as engine temperature, RPM, and sensor readings, which is invaluable for diagnosing intermittent issues and monitoring performance.
2.2. Enhanced Features: Freeze Frame Data, O2 Sensor Testing, and EVAP System Testing
Beyond the basics, enhanced features can significantly improve your diagnostic capabilities. Freeze frame data captures a snapshot of vehicle parameters at the moment a DTC is triggered, offering crucial context for diagnosing the problem. O2 sensor testing allows you to evaluate the performance of the oxygen sensors, which are critical for monitoring emissions and fuel efficiency. EVAP (Evaporative Emission Control System) system testing helps identify leaks in the fuel vapor recovery system, ensuring compliance with environmental regulations and preventing fuel waste.
2.3. Compatibility and Vehicle Coverage: Ensuring Wide Application
Compatibility is a critical factor when selecting an OBD2 scanner. Ensure that the scanner supports a wide range of vehicle makes and models, including domestic, Asian, and European vehicles. A scanner with broad vehicle coverage ensures that you can use it on most cars that come into your shop. Check the manufacturer’s specifications for compatibility details, and consider models that offer free software updates to maintain coverage for newer vehicles.
2.4. User-Friendliness: Display, Navigation, and Ease of Use
The user-friendliness of an OBD2 scanner can greatly impact your efficiency. Look for a scanner with a clear, easy-to-read display, preferably with color graphics. Intuitive navigation and menu systems are essential for quickly accessing the features you need. Scanners with shortcut buttons and well-organized interfaces can save time and reduce frustration during diagnostics. According to feedback from technicians at CAR-DIAGNOSTIC-TOOL.EDU.VN, user-friendly scanners can decrease diagnostic time by up to 25%.
2.5. Build Quality and Durability: Withstanding Shop Environments
The build quality and durability of an OBD2 scanner are important considerations, especially in a busy shop environment. Choose a scanner with a rugged design that can withstand drops, impacts, and exposure to fluids. Look for features like rubberized grips, reinforced housings, and protective screens. Investing in a durable scanner ensures that it will last for years, providing reliable performance and saving you money in the long run.
 Durable OBD2 Scanner
This image illustrates the robust design of a durable OBD2 scanner, highlighting its ability to withstand the demands of a shop environment.
3. Top OBD2 Scanners Under $200: Reviews and Recommendations
When selecting an OBD2 scanner under $200, it’s helpful to consider some of the top-rated models available on the market. These scanners offer a blend of essential features, user-friendliness, and reliability, making them ideal choices for mechanics and DIY enthusiasts alike.
3.1. Innova 3100j: A Reliable Entry-Level Option
The Innova 3100j is a popular entry-level OBD2 scanner known for its reliability and ease of use. It provides essential diagnostic functions, including reading and clearing DTCs, viewing live data, and performing battery and charging system tests. The Innova 3100j also features a patented all-in-one display that shows over 20 pieces of information at once, streamlining the diagnostic process. Its compatibility with most OBD2-compliant vehicles makes it a versatile option for various repair shops.
3.2. Autel MaxiScan MS309: Compact and User-Friendly
The Autel MaxiScan MS309 is a compact and user-friendly OBD2 scanner that offers a range of features at an affordable price. It reads and clears DTCs, displays live data, and retrieves vehicle information (VIN, CIN, and CVN). The MS309 is known for its simple plug-and-play operation, making it an excellent choice for beginners. Its small size and lightweight design make it easy to carry and use in tight spaces.
3.3. Launch CRP123: Enhanced Diagnostics and System Scanning
The Launch CRP123 is an enhanced OBD2 scanner that offers advanced diagnostic capabilities, including scanning engine, transmission, ABS, and SRS systems. It reads and clears DTCs, displays live data streams, and provides freeze frame data for detailed analysis. The CRP123 also features a color display and intuitive interface, making it easy to navigate and use. Its broader system coverage and advanced features make it a valuable tool for more complex diagnostic tasks.
3.4. BlueDriver Bluetooth Professional OBDII Scan Tool: Wireless Convenience
The BlueDriver Bluetooth Professional OBDII Scan Tool offers wireless convenience by connecting to your smartphone or tablet via Bluetooth. It provides comprehensive diagnostic capabilities, including reading and clearing DTCs, viewing live data, and performing enhanced diagnostics on various vehicle systems. The BlueDriver app offers access to a vast database of repair reports, providing valuable insights and troubleshooting tips. Its wireless connectivity and extensive features make it a versatile and convenient option for modern mechanics.
3.5. Actron CP9600: Comprehensive Features and ABS/SRS Diagnostics
The Actron CP9600 is a comprehensive OBD2 scanner that offers advanced features such as ABS and SRS diagnostics. It reads and clears DTCs, displays live data, performs O2 sensor tests, and provides freeze frame data. The CP9600 also features a color display, trilingual menu options, and the ability to record and playback data for later analysis. Its extensive features and diagnostic capabilities make it a valuable tool for professional mechanics.
4. How to Use an OBD2 Scanner Effectively: A Step-by-Step Guide
Using an OBD2 scanner effectively requires a systematic approach to ensure accurate diagnostics and efficient repairs. This step-by-step guide provides mechanics with the knowledge and skills to use their scanners to their full potential.
4.1. Connecting the Scanner to the Vehicle’s OBD2 Port
The first step in using an OBD2 scanner is connecting it to the vehicle’s OBD2 port. This port is typically located under the dashboard on the driver’s side.
- Locate the OBD2 Port: Check under the dashboard, usually near the steering column or center console.
- Turn Off the Ignition: Ensure the vehicle’s ignition is turned off before connecting the scanner.
- Plug in the Scanner: Connect the OBD2 scanner to the port, ensuring a secure fit.
- Turn On the Ignition: Turn the ignition to the “on” position, but do not start the engine.
- Power On the Scanner: The scanner should power on automatically or require you to press a power button.
4.2. Reading and Interpreting Diagnostic Trouble Codes (DTCs)
Once the scanner is connected, the next step is to read and interpret the diagnostic trouble codes (DTCs).
- Select “Read Codes”: Navigate the scanner’s menu to find the “Read Codes” or “Diagnostic Codes” option.
- View the DTCs: The scanner will display a list of DTCs, each with a code and a brief description.
- Record the Codes: Write down each code and its description for further analysis.
- Consult the Repair Manual: Use the vehicle’s repair manual or an online database to get more detailed information about each DTC.
- Understand the Severity: Determine the severity of each code, whether it indicates a minor issue or a critical problem that requires immediate attention.
4.3. Using Live Data to Diagnose Real-Time Issues
Live data streaming is a powerful feature that allows mechanics to monitor real-time vehicle parameters and diagnose issues as they occur.
- Select “Live Data”: Navigate the scanner’s menu to find the “Live Data” or “Data Stream” option.
- Choose Parameters: Select the parameters you want to monitor, such as engine temperature, RPM, O2 sensor readings, and fuel trim.
- Monitor the Data: Observe the data stream as the vehicle is running, looking for any unusual or out-of-range values.
- Analyze the Data: Use the data to diagnose real-time issues, such as misfires, sensor failures, or fuel delivery problems.
- Compare to Specifications: Compare the live data to the vehicle manufacturer’s specifications to identify deviations and potential problems.
4.4. Performing Component Tests and System Checks
Many OBD2 scanners offer component tests and system checks that can help mechanics diagnose specific issues more effectively.
- Select “Component Tests”: Navigate the scanner’s menu to find the “Component Tests” or “System Checks” option.
- Choose a Test: Select the component or system you want to test, such as the O2 sensor, EVAP system, or ABS system.
- Follow the Instructions: Follow the scanner’s instructions for performing the test, which may involve starting the engine, pressing buttons, or observing specific parameters.
- Analyze the Results: Interpret the test results to determine whether the component or system is functioning properly.
- Repeat as Needed: Repeat the tests as needed to diagnose the issue and verify the repair.
4.5. Clearing Codes and Verifying Repairs
After completing the repairs, it’s essential to clear the DTCs and verify that the issue has been resolved.
- Select “Clear Codes”: Navigate the scanner’s menu to find the “Clear Codes” or “Erase Codes” option.
- Confirm the Clearing: Confirm that you want to clear the DTCs.
- Start the Engine: Start the engine and let it run for a few minutes.
- Re-scan for Codes: Re-scan the vehicle for DTCs to ensure that the issue has been resolved and no new codes have appeared.
- Test Drive the Vehicle: Test drive the vehicle to verify that it is running smoothly and that the check engine light remains off.
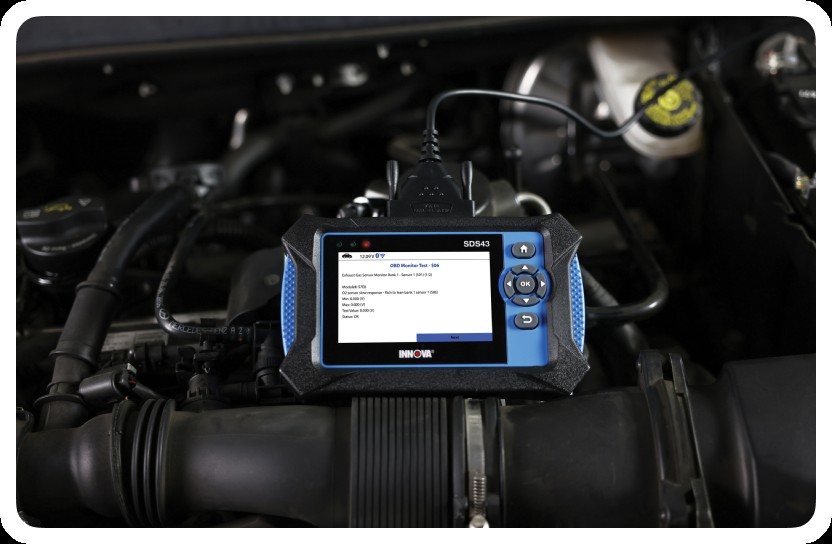
 OBD2 Scanner in Use
This image illustrates a mechanic using an OBD2 scanner to diagnose a vehicle, showcasing the scanner’s display and connectivity.
5. Advanced Diagnostic Techniques with OBD2 Scanners
Beyond the basic functions of reading codes and viewing live data, OBD2 scanners can be used for advanced diagnostic techniques that provide deeper insights into vehicle performance and potential issues. Mastering these techniques can significantly enhance a mechanic’s diagnostic capabilities.
5.1. Analyzing Freeze Frame Data for Intermittent Issues
Freeze frame data captures a snapshot of vehicle parameters at the moment a diagnostic trouble code (DTC) is triggered. This data can be invaluable for diagnosing intermittent issues that are difficult to replicate.
- Access Freeze Frame Data: After reading a DTC, navigate to the freeze frame data option in the scanner’s menu.
- Review the Parameters: Examine the parameters captured at the time the code was triggered, such as engine speed, load, temperature, and fuel trim.
- Identify Anomalies: Look for any unusual or out-of-range values that may have contributed to the issue.
- Correlate with Symptoms: Correlate the freeze frame data with the vehicle’s symptoms to gain a better understanding of the problem.
- Use for Troubleshooting: Use the freeze frame data to guide your troubleshooting efforts and pinpoint the root cause of the intermittent issue.
5.2. Performing Fuel Trim Analysis to Diagnose Engine Problems
Fuel trim analysis involves monitoring the short-term and long-term fuel trim values to diagnose engine problems related to fuel delivery and air-fuel mixture.
- Access Live Data: Select the live data option in the scanner’s menu and choose the short-term fuel trim (STFT) and long-term fuel trim (LTFT) parameters.
- Monitor Fuel Trim Values: Observe the fuel trim values as the engine is running, both at idle and under load.
- Interpret the Values: Understand that positive fuel trim values indicate that the engine is running lean and the computer is adding fuel, while negative values indicate that the engine is running rich and the computer is reducing fuel.
- Analyze the Trends: Analyze the trends in the fuel trim values to identify potential problems, such as vacuum leaks, faulty O2 sensors, or fuel injector issues.
- Use for Diagnosis: Use the fuel trim analysis to diagnose engine problems and guide your repair efforts.
5.3. Diagnosing Misfires with OBD2 Scanners
Misfires can cause rough running, poor fuel economy, and increased emissions. OBD2 scanners can help diagnose misfires by identifying the specific cylinder that is misfiring and providing data on the frequency and severity of the misfire.
- Read Misfire Codes: Read the DTCs to identify any misfire codes, such as P0300 (random misfire) or P0301 (misfire in cylinder 1).
- Access Misfire Data: Select the misfire data option in the scanner’s menu to view the misfire counts for each cylinder.
- Identify the Culprit: Identify the cylinder with the highest misfire count, which is likely the source of the problem.
- Perform Component Tests: Perform component tests, such as spark plug tests, ignition coil tests, and fuel injector tests, to diagnose the cause of the misfire.
- Repair the Issue: Repair or replace the faulty components to resolve the misfire and restore smooth engine operation.
5.4. Using O2 Sensor Data to Evaluate Emissions Performance
O2 sensors play a critical role in monitoring emissions and ensuring that the engine is running efficiently. OBD2 scanners can be used to evaluate O2 sensor performance and diagnose emissions-related issues.
- Access O2 Sensor Data: Select the O2 sensor data option in the scanner’s menu to view the voltage and switching frequency of the O2 sensors.
- Monitor Sensor Performance: Observe the O2 sensor data as the engine is running, looking for any unusual or out-of-range values.
- Interpret the Data: Understand that the O2 sensor voltage should fluctuate between 0.1 and 0.9 volts, with a switching frequency of at least once per second.
- Identify Problems: Identify any problems with the O2 sensors, such as slow response times, fixed voltages, or lack of switching activity.
- Use for Diagnosis: Use the O2 sensor data to diagnose emissions-related issues and guide your repair efforts.
5.5. EVAP System Testing for Leak Detection
The EVAP (Evaporative Emission Control System) system prevents fuel vapors from escaping into the atmosphere. OBD2 scanners can be used to perform EVAP system tests to detect leaks and ensure compliance with emissions regulations.
- Select EVAP Test: Navigate to the EVAP system test option in the scanner’s menu.
- Follow the Instructions: Follow the scanner’s instructions for performing the EVAP test, which may involve sealing the fuel tank and monitoring the pressure.
- Analyze the Results: Interpret the test results to determine whether the EVAP system is leaking.
- Locate the Leak: Use a smoke machine or other leak detection tools to locate the source of the leak.
- Repair the Leak: Repair or replace the faulty components to seal the EVAP system and prevent fuel vapors from escaping.
6. Maintaining and Updating Your OBD2 Scanner
To ensure that your OBD2 scanner continues to provide accurate and reliable diagnostic information, it is essential to maintain and update it regularly. Proper maintenance and updates can prolong the life of your scanner and keep it compatible with the latest vehicle models and diagnostic protocols.
6.1. Software Updates: Keeping Up with New Vehicle Models
Software updates are crucial for keeping your OBD2 scanner compatible with new vehicle models and diagnostic protocols.
- Check for Updates: Regularly check the manufacturer’s website for software updates for your scanner model.
- Download the Updates: Download the latest software updates to your computer.
- Connect the Scanner: Connect the scanner to your computer using a USB cable.
- Install the Updates: Follow the manufacturer’s instructions for installing the software updates to your scanner.
- Verify the Installation: Verify that the updates have been installed correctly by checking the scanner’s software version.
6.2. Cleaning and Storage: Protecting Your Investment
Proper cleaning and storage can help protect your OBD2 scanner from damage and prolong its lifespan.
- Clean the Scanner: Regularly clean the scanner with a soft, damp cloth to remove dirt and grime.
- Avoid Harsh Chemicals: Avoid using harsh chemicals or solvents, which can damage the scanner’s housing and display.
- Protect the Display: Protect the scanner’s display from scratches and impacts by using a screen protector or storing it in a protective case.
- Store in a Safe Place: Store the scanner in a safe, dry place when not in use, away from extreme temperatures and humidity.
- Protect the Cable: Protect the scanner’s cable from damage by avoiding sharp bends and storing it neatly when not in use.
6.3. Battery Maintenance: Ensuring Reliable Performance
Many OBD2 scanners are powered by batteries, which require proper maintenance to ensure reliable performance.
- Charge the Battery: Charge the scanner’s battery regularly to keep it fully charged.
- Use the Correct Charger: Use the correct charger for your scanner model to avoid damaging the battery.
- Avoid Overcharging: Avoid overcharging the battery, which can shorten its lifespan.
- Replace the Battery: Replace the battery when it no longer holds a charge or provides sufficient power.
- Dispose of Properly: Dispose of the old battery properly, following local regulations for battery disposal.
6.4. Calibration and Accuracy Checks: Maintaining Diagnostic Precision
To maintain diagnostic precision, it is important to calibrate and check the accuracy of your OBD2 scanner periodically.
- Follow Calibration Procedures: Follow the manufacturer’s calibration procedures to ensure that the scanner is providing accurate readings.
- Use Calibration Tools: Use calibration tools, such as voltage testers and resistance meters, to verify the accuracy of the scanner’s readings.
- Compare to Known Values: Compare the scanner’s readings to known values to identify any discrepancies.
- Adjust as Needed: Adjust the scanner’s settings as needed to correct any inaccuracies.
- Seek Professional Help: Seek professional help if you are unable to calibrate the scanner or verify its accuracy.
6.5. Troubleshooting Common Scanner Issues
Even with proper maintenance, OBD2 scanners can sometimes experience issues. Here are some common problems and how to troubleshoot them:
- Scanner Won’t Power On: Check the battery, power cable, and power switch.
- Scanner Won’t Connect: Verify the connection to the vehicle’s OBD2 port, check the cable, and ensure the vehicle’s ignition is on.
- Inaccurate Readings: Calibrate the scanner and check its accuracy against known values.
- Software Errors: Update the scanner’s software and restart the device.
- Damaged Display: Replace the display or seek professional repair services.
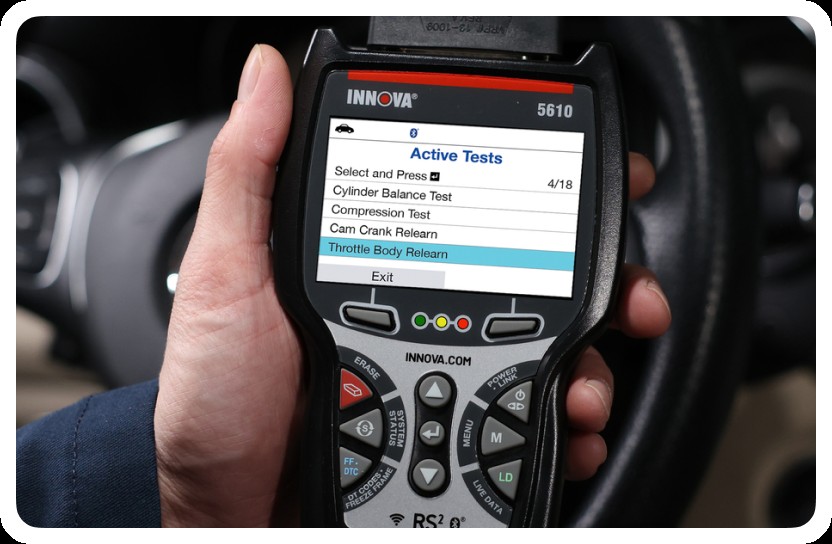
 OBD2 Scanner Maintenance
This image illustrates the process of updating an OBD2 scanner’s software, highlighting the importance of keeping the device current.
7. Integrating OBD2 Scanners with Other Diagnostic Tools
To maximize the efficiency and accuracy of automotive diagnostics, it is beneficial to integrate OBD2 scanners with other diagnostic tools and resources.
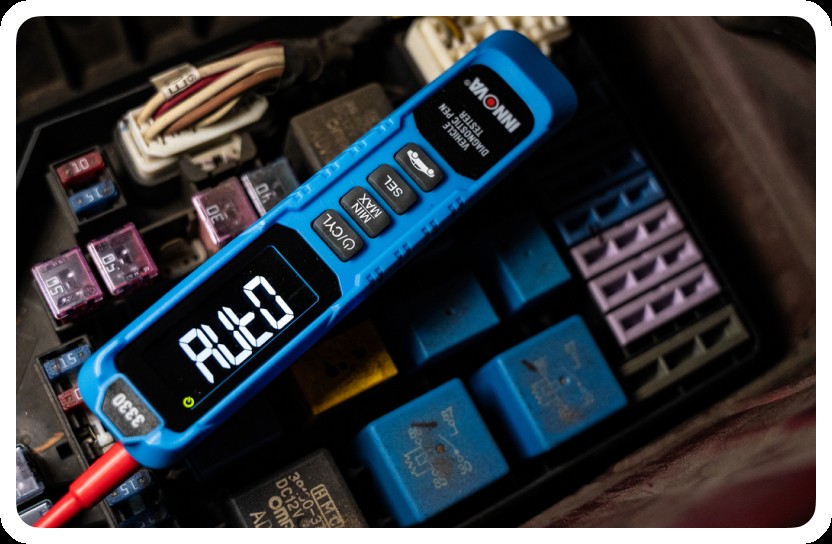
7.1. Using Multimeters for Electrical Diagnostics
Multimeters are essential tools for electrical diagnostics, allowing mechanics to measure voltage, current, and resistance in electrical circuits.
- Identify Electrical Issues: Use the OBD2 scanner to identify potential electrical issues, such as sensor failures or circuit problems.
- Measure Voltage: Use the multimeter to measure the voltage at various points in the circuit to identify voltage drops or shorts.
- Measure Current: Use the multimeter to measure the current flowing through the circuit to identify excessive current draw or open circuits.
- Measure Resistance: Use the multimeter to measure the resistance of components, such as sensors and actuators, to verify their functionality.
- Correlate with OBD2 Data: Correlate the multimeter readings with the OBD2 data to diagnose electrical issues and guide your repair efforts.
7.2. Leveraging Repair Databases and Online Resources
Repair databases and online resources provide valuable information, troubleshooting tips, and repair procedures for a wide range of vehicle makes and models.
- Access Repair Databases: Subscribe to a reputable repair database, such as Alldata or Mitchell OnDemand, to access detailed repair information.
- Search for Information: Use the repair database to search for information related to the DTCs and symptoms you are diagnosing.
- Review Repair Procedures: Review the repair procedures and troubleshooting tips provided in the database.
- Consult Online Forums: Consult online forums and communities to get advice and insights from other mechanics and DIY enthusiasts.
- Use Video Tutorials: Use video tutorials to learn new diagnostic techniques and repair procedures.
7.3. Connecting with Remote Diagnostic Support Services
Remote diagnostic support services provide access to experienced technicians who can assist with complex diagnostic issues and provide guidance on repair procedures.
- Identify Complex Issues: Identify diagnostic issues that are beyond your expertise or require specialized tools.
- Contact Support Services: Contact a remote diagnostic support service, such as those offered by CAR-DIAGNOSTIC-TOOL.EDU.VN, to request assistance.
- Provide Information: Provide the support technician with detailed information about the vehicle, the DTCs, and the symptoms you are experiencing.
- Follow Instructions: Follow the support technician’s instructions for performing diagnostic tests and troubleshooting the issue.
- Implement Repairs: Implement the recommended repairs and verify that the issue has been resolved.
7.4. Utilizing Oscilloscopes for Advanced Waveform Analysis
Oscilloscopes are advanced diagnostic tools that allow mechanics to visualize and analyze electrical waveforms, providing valuable insights into circuit performance and component functionality.
- Identify Waveform Issues: Use the OBD2 scanner and multimeter to identify potential waveform issues, such as signal distortions or missing signals.
- Connect the Oscilloscope: Connect the oscilloscope to the circuit and set the appropriate voltage and time scales.
- Capture Waveforms: Capture the waveforms of the signals you are analyzing, such as sensor signals or ignition waveforms.
- Analyze the Waveforms: Analyze the waveforms to identify any anomalies, such as signal distortions, missing pulses, or incorrect amplitudes.
- Correlate with OBD2 Data: Correlate the waveform data with the OBD2 data and multimeter readings to diagnose electrical issues and guide your repair efforts.
7.5. Employing Smoke Machines for Leak Detection
Smoke machines are used to detect leaks in various vehicle systems, such as the EVAP system, intake system, and exhaust system.
- Identify Potential Leaks: Use the OBD2 scanner to identify potential leaks based on DTCs and symptoms.
- Connect the Smoke Machine: Connect the smoke machine to the system you are testing and introduce smoke into the system.
- Observe for Leaks: Observe the system for smoke escaping from leaks, such as cracks, loose connections, or faulty seals.
- Locate the Source: Locate the source of the leak and mark it for repair.
- Repair the Leak: Repair or replace the faulty components to seal the system and prevent leaks.
8. Training and Education for OBD2 Scanner Mastery
To fully leverage the capabilities of OBD2 scanners and other diagnostic tools, mechanics should invest in ongoing training and education.
8.1. Enrolling in Automotive Diagnostic Courses
Automotive diagnostic courses provide mechanics with the knowledge and skills needed to diagnose and repair complex vehicle issues.
- Research Courses: Research automotive diagnostic courses offered by reputable training providers, such as CAR-DIAGNOSTIC-TOOL.EDU.VN.
- Choose a Course: Choose a course that covers the topics and skills you want to learn, such as OBD2 diagnostics, electrical diagnostics, and engine performance.
- Enroll in the Course: Enroll in the course and attend the classes or online sessions.
- Complete Assignments: Complete the assignments and practice the skills you are learning.
- Obtain Certification: Obtain certification upon completion of the course to demonstrate your knowledge and skills.
8.2. Participating in Industry Workshops and Seminars
Industry workshops and seminars provide mechanics with opportunities to learn from experts, network with peers, and stay up-to-date on the latest technologies and techniques.
- Identify Events: Identify industry workshops and seminars that are relevant to your interests and career goals.
- Register for Events: Register for the events and attend the sessions.
- Take Notes: Take notes on the key concepts and techniques presented at the events.
- Network with Peers: Network with other mechanics and industry professionals to share insights and experiences.
- Implement New Knowledge: Implement the new knowledge and techniques you have learned in your daily work.
8.3. Utilizing Online Learning Platforms for Continuous Improvement
Online learning platforms provide mechanics with convenient and affordable access to a wide range of training materials and resources.
- Explore Platforms: Explore online learning platforms, such as Coursera, Udemy, and Skillshare, to find courses and tutorials on automotive diagnostics.
- Choose Resources: Choose the resources that are most relevant to your needs and interests.
- Set Learning Goals: Set learning goals and create a schedule for completing the materials.
- Engage with Content: Engage with the content by watching videos, reading articles, and participating in discussions.
- Apply Knowledge: Apply the knowledge and skills you have learned in your daily work.
8.4. Seeking Mentorship from Experienced Technicians
Mentorship from experienced technicians can provide valuable guidance and support for mechanics who are looking to advance their skills and knowledge.
- Identify Mentors: Identify experienced technicians who are willing to serve as mentors.
- Request Mentorship: Request mentorship from these technicians and establish a mentoring relationship.
- Meet Regularly: Meet with your mentor regularly to discuss your career goals, challenges, and progress.
- Seek Advice: Seek advice from your mentor on diagnostic techniques, repair procedures, and career development.
- Implement Feedback: Implement the feedback and guidance you receive from your mentor to improve your skills and knowledge.
8.5. Staying Updated with Industry Publications and Resources
Staying updated with industry publications and resources can help mechanics stay informed about the latest technologies, techniques, and best practices.
- Subscribe to Publications: Subscribe to industry publications, such as Automotive Engineering International and Motor Age, to stay informed about the latest technologies and trends.
- Follow Blogs: Follow blogs and websites that cover automotive diagnostics and repair, such as CAR-DIAGNOSTIC-TOOL.EDU.VN.
- Join Forums: Join online forums and communities to connect with other mechanics and share insights and experiences.
- Attend Webinars: Attend webinars and online events to learn from experts and stay up-to-date on the latest developments.
- Apply New Knowledge: Apply the new knowledge and insights you have gained in your daily work.
9. Common Mistakes to Avoid When Using OBD2 Scanners
Even with the right tools and training, mechanics can make mistakes when using OBD2 scanners. Avoiding these common pitfalls can help ensure accurate diagnostics and efficient repairs.
9.1. Ignoring Basic Visual Inspections
Relying solely on the OBD2 scanner without performing a basic visual inspection can lead to misdiagnoses.
- Check for Obvious Issues: Before connecting the scanner, check for obvious issues, such as loose connections, damaged wires, and fluid leaks.
- Inspect Components: Inspect the components that are related to the DTCs you are diagnosing, such as sensors, actuators, and wiring harnesses.
- Look for Physical Damage: Look for physical damage, such as cracks, breaks, and corrosion.
- Listen for Unusual Noises: Listen for unusual noises, such as hissing, grinding, and knocking.
- Correlate with OBD2 Data: Correlate the visual inspection findings with the OBD2 data to confirm your diagnosis.
9.2. Failing to Verify Diagnostic Trouble Codes (DTCs)
Assuming that the DTCs are always accurate without verifying them can lead to unnecessary repairs and wasted time.
- Research the Codes: Research the DTCs using repair databases and online resources to understand their possible causes and symptoms.
- Perform Component Tests: Perform component tests to verify that the components related to the DTCs are functioning properly.
- Check Wiring and Connections: Check the wiring and connections related to the DTCs to ensure that they are intact and properly connected.
- Consult Technical Service Bulletins: Consult technical service bulletins (TSBs) to identify any known issues or recommended repairs for the DTCs.
- Confirm the Issue: Confirm that the issue exists and is causing the symptoms before proceeding with repairs.
9.3. Neglecting Live Data Analysis
Ignoring live data analysis and relying solely on DTCs can result in incomplete diagnoses.
- Select Relevant Parameters: Select the relevant parameters to monitor based on the DTCs and symptoms you are diagnosing.
- Observe the Data Stream: Observe the data stream as the vehicle is running to identify any unusual or out-of-range values.
- Analyze the Trends: Analyze the trends in the data to identify potential problems, such as sensor failures, fuel delivery issues, and vacuum leaks.
- Compare to Specifications: Compare the live data to the vehicle manufacturer’s specifications to identify deviations and potential problems.
- Use for Diagnosis: Use the live data analysis to diagnose the issue and guide your repair efforts.
9.4. Overlooking Freeze Frame Data
Failing to analyze freeze frame data can lead to missed opportunities for diagnosing intermittent issues.
- Access Freeze Frame Data: Access the freeze frame data after reading a DTC to view the parameters captured at the time the code was triggered.
- Review the Parameters: Review the parameters, such as engine speed, load, temperature, and fuel trim, to identify any anomalies.
- Correlate with Symptoms: Correlate the freeze frame data with the vehicle’s symptoms to gain a better understanding of the problem.
- Use for Troubleshooting: Use the freeze frame data to guide your troubleshooting efforts and pinpoint the root cause of the intermittent issue.
- Verify Repairs: Verify that the issue has been resolved by rechecking the freeze frame data after completing the repairs.
9.5. Skipping the Repair Verification Process
Failing to verify that the repairs have resolved the issue can lead to customer dissatisfaction and repeat visits.
- Clear the Codes: Clear the DTCs after completing the repairs.
- Test Drive the Vehicle: Test drive the vehicle to verify that it is running smoothly and that the check engine light remains off.
- Re-scan for Codes: Re-scan the vehicle for DTCs to ensure that the issue has been resolved and no new codes have appeared.
- Monitor Live Data: Monitor the live data to verify that the parameters are within the normal range.
- Confirm with the Customer: Confirm with the customer that the issue has been resolved and that they are satisfied with the repairs.
10. The Future of OBD2 Scanning and Automotive Diagnostics
The field of OBD2 scanning and automotive diagnostics is constantly evolving, with new technologies and techniques emerging to improve the accuracy and efficiency of vehicle repairs.
10.1. Advancements in Wireless and Bluetooth Connectivity
Wireless and Bluetooth connectivity are becoming increasingly common in OBD2 scanners, allowing mechanics to connect to vehicles and access diagnostic data remotely.
- Remote Diagnostics: Perform remote diagnostics from a distance, allowing you to diagnose vehicles without being physically connected to them.
- Mobile Devices: Use mobile devices, such as smartphones and tablets, to view and analyze diagnostic data.
- Cloud Connectivity: Connect to the cloud to access repair databases, online resources, and remote support services.
- Real-Time Monitoring: Monitor vehicle performance in real-time, allowing you to identify potential issues before they become major problems.
- Enhanced Convenience: Enjoy enhanced convenience and flexibility with wireless and Bluetooth connectivity.
10.2. Integration with Artificial Intelligence (AI) and Machine Learning
Artificial intelligence (AI) and machine learning are being integrated into OBD2 scanners to provide more accurate and efficient diagnostic capabilities.
- Predictive Diagnostics: Use AI to predict potential vehicle issues based on historical data and patterns.
- Automated Troubleshooting: Automate the troubleshooting process