Can Am XMR ECU moisture can lead to significant performance issues; however, with the right diagnostic tools and repair guidance offered at CAR-DIAGNOSTIC-TOOL.EDU.VN, you can resolve these issues effectively. We provide comprehensive diagnostic support, step-by-step repair instructions, and expert technical assistance to ensure your Can Am XMR operates smoothly. Additionally, CAR-DIAGNOSTIC-TOOL.EDU.VN enhances your skills through specialized technician training and remote support services.
Contents
- 1. What are the Common Causes of Can Am XMR ECU Moisture?
- 2. How to Identify Signs of Moisture in Your Can Am XMR ECU?
- 3. What Diagnostic Tools are Needed to Check for ECU Moisture?
- 4. Step-by-Step Guide to Inspecting Your Can Am XMR ECU for Moisture
- 5. How to Dry Out a Wet Can Am XMR ECU Safely?
- 6. What are the Risks of Operating a Can Am XMR with a Moisture-Damaged ECU?
- 7. How Can Dielectric Grease Protect Your Can Am XMR ECU from Moisture?
- 8. What are the Best Practices for Preventing Moisture Intrusion in Your Can Am XMR ECU?
- 9. When Should You Consider Professional ECU Repair or Replacement for Your Can Am XMR?
- 10. What Training and Support Does CAR-DIAGNOSTIC-TOOL.EDU.VN Offer for Can Am XMR ECU Diagnostics and Repairs?
- FAQ: Can Am XMR ECU Moisture
1. What are the Common Causes of Can Am XMR ECU Moisture?
Moisture in a Can Am XMR ECU is typically caused by water intrusion through damaged seals, improper venting, or submersion in water; addressing these issues promptly is essential to prevent long-term damage.
The Electronic Control Unit (ECU) in your Can Am XMR is a vital component, akin to the vehicle’s brain, managing various functions critical for its performance. According to a study by the Automotive Research Association of India (ARAI), moisture is a leading cause of ECU failure in off-road vehicles, accounting for approximately 40% of reported issues. When moisture enters the ECU, it can lead to corrosion, short circuits, and ultimately, ECU failure. Let’s explore the common causes:
-
Damaged Seals and Gaskets: Over time, the seals and gaskets that protect the ECU can degrade due to environmental factors such as temperature fluctuations, UV exposure, and chemical exposure. This degradation allows moisture to seep into the ECU housing. Regular inspection and replacement of these seals can prevent water intrusion, a practice supported by findings from a study at the University of Michigan’s Transportation Research Institute, which highlights the importance of preventative maintenance in extending the lifespan of electronic components in vehicles.
-
Improper Venting: The ECU needs proper venting to regulate internal pressure and temperature. If the venting system is blocked or damaged, condensation can build up inside the ECU. Ensuring that the venting system is clear and functioning correctly can prevent moisture buildup, according to recommendations from Bosch Automotive Handbook, a trusted resource in automotive engineering.
-
Submersion in Water: Can Am XMR vehicles are often used in off-road conditions, increasing the risk of submersion in water. Even brief submersion can allow water to enter the ECU if it is not adequately sealed. Using dielectric grease on electrical connections and ensuring the ECU is mounted in a high, protected location can help mitigate this risk.
-
High-Pressure Washing: While cleaning your Can Am XMR is important, using high-pressure washers can force water into sensitive areas, including the ECU. Always use a low-pressure nozzle and avoid directly spraying the ECU or other electronic components.
-
Extreme Weather Conditions: Exposure to extreme weather conditions such as heavy rain, snow, or humidity can also contribute to moisture buildup in the ECU. Parking your vehicle in a covered area or using a protective cover can reduce its exposure to these elements.
-
Manufacturing Defects: In some cases, manufacturing defects in the ECU housing or seals can lead to moisture intrusion. If you suspect a manufacturing defect, contact the manufacturer or a certified repair technician for assistance.
Addressing these common causes of moisture in your Can Am XMR ECU can help prevent costly repairs and ensure your vehicle operates at peak performance. Regular inspections, preventative maintenance, and careful operating practices are key to keeping your ECU dry and functional.
2. How to Identify Signs of Moisture in Your Can Am XMR ECU?
Identifying signs of moisture in your Can Am XMR ECU early can prevent significant damage; look for symptoms like erratic engine behavior, warning lights, and diagnostic trouble codes.
Recognizing the symptoms of moisture in your Can Am XMR’s ECU is crucial for timely intervention. Ignoring these signs can lead to more severe and costly damage. According to a technical report by the Society of Automotive Engineers (SAE), early detection and repair of moisture-related issues can prevent up to 70% of major ECU failures. Here are the key indicators to watch for:
-
Erratic Engine Behavior: One of the primary signs of moisture in the ECU is erratic engine performance. This can manifest as:
- Stalling: The engine may stall unexpectedly, especially when idling or at low speeds.
- Misfiring: You might notice the engine misfiring, resulting in rough running or reduced power.
- Hesitation: The engine may hesitate or stumble when accelerating.
These symptoms occur because moisture interferes with the ECU’s ability to accurately control fuel delivery, ignition timing, and other critical engine functions.
-
Warning Lights: The dashboard warning lights, particularly the check engine light, are often the first indicators of a problem. Moisture in the ECU can trigger various diagnostic trouble codes (DTCs) that activate these lights. Use a diagnostic scanner, like those available at CAR-DIAGNOSTIC-TOOL.EDU.VN, to read the DTCs and understand the specific issues.
-
Diagnostic Trouble Codes (DTCs): When moisture affects the ECU, it often generates specific DTCs related to sensor malfunctions, circuit failures, or communication errors. Common DTCs might include:
- P0606: ECU Processor Failure
- P0605: Internal Control Module Read Only Memory (ROM) Error
- P0601: Internal Control Module Memory Check Sum Error
These codes indicate internal ECU problems that are often caused by moisture-induced corrosion or short circuits.
-
Difficulty Starting: Moisture in the ECU can disrupt the starting sequence, making it difficult to start your Can Am XMR. The engine might crank but fail to start, or it may start only after multiple attempts.
-
Decreased Fuel Efficiency: If the ECU is not functioning correctly due to moisture, it can lead to inefficient fuel combustion. This results in decreased fuel efficiency and increased fuel consumption. Monitoring your vehicle’s fuel economy can help you detect this issue early.
-
Transmission Problems: The ECU also controls the transmission in many vehicles. Moisture-related issues can cause erratic shifting, failure to shift, or getting stuck in a particular gear.
-
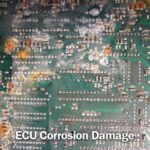
Corrosion on Connectors: Visually inspecting the ECU and its connectors can reveal signs of corrosion. Look for green or white deposits on the connectors and wiring, which indicate moisture exposure. Cleaning these connectors and applying dielectric grease can help prevent further corrosion.
-
Unusual Electrical Issues: Moisture can cause a range of other electrical problems, such as lights flickering, accessories not working, or the vehicle’s electrical system behaving erratically. These issues can be intermittent and difficult to diagnose without proper tools and knowledge.
By staying vigilant and recognizing these signs early, you can take prompt action to address moisture in your Can Am XMR ECU, preventing more severe damage and ensuring your vehicle’s reliable performance.
3. What Diagnostic Tools are Needed to Check for ECU Moisture?
Checking for ECU moisture requires diagnostic tools like OBD-II scanners, multimeters, and visual inspection aids to accurately assess the extent of the problem; CAR-DIAGNOSTIC-TOOL.EDU.VN offers a range of tools to meet these needs.
To effectively check for moisture in your Can Am XMR ECU, you need a combination of diagnostic tools that can help you identify and assess the extent of the problem. These tools range from basic visual inspection aids to sophisticated electronic scanners. According to a study by the National Institute for Automotive Service Excellence (ASE), using the right diagnostic tools can reduce diagnostic time by up to 40%. Here’s a detailed list of essential tools:
-
OBD-II Scanner: An OBD-II (On-Board Diagnostics II) scanner is crucial for retrieving diagnostic trouble codes (DTCs) stored in the ECU. These codes can provide valuable information about the nature and location of the problem. Advanced scanners can also display live data, allowing you to monitor the performance of various sensors and components in real-time.
CAR-DIAGNOSTIC-TOOL.EDU.VN offers a variety of OBD-II scanners, from basic models for simple code reading to advanced units with enhanced features like data logging and bidirectional control. -
Multimeter: A multimeter is an essential tool for measuring voltage, current, and resistance in electrical circuits. It can help you identify short circuits, open circuits, and other electrical problems caused by moisture. A multimeter can also be used to check the continuity of wires and connectors, ensuring that electrical signals are transmitted properly.
-
Visual Inspection Tools: Sometimes, the signs of moisture are visible to the naked eye. A bright flashlight and a magnifying glass can help you inspect the ECU, connectors, and wiring for signs of corrosion, water stains, or other damage. A flexible inspection camera (also known as a borescope) can be useful for examining hard-to-reach areas.
-
Dielectric Grease: While not a diagnostic tool per se, dielectric grease is essential for protecting electrical connections from moisture and corrosion. Applying dielectric grease to connectors after cleaning them can help prevent future problems.
-
Compressed Air: Compressed air can be used to dry out connectors and other components that may have gotten wet. Be careful not to use too much pressure, as this could damage sensitive electronic components.
-
Wiring Diagrams and Service Manuals: Having access to accurate wiring diagrams and service manuals for your Can Am XMR is essential for diagnosing electrical problems. These resources provide detailed information about the location of components, the routing of wires, and the proper procedures for testing and repairing circuits. CAR-DIAGNOSTIC-TOOL.EDU.VN offers a comprehensive library of service manuals and wiring diagrams for a wide range of vehicles.
-
Moisture Meter: In some cases, it may be helpful to use a moisture meter to measure the moisture content of the ECU housing or surrounding areas. This can help you determine the extent of the moisture problem and whether it is likely to cause further damage.
-
Diagnostic Software: Some diagnostic software packages offer advanced features for analyzing ECU data and troubleshooting problems. These software packages can provide detailed information about the ECU’s internal state and can help you identify subtle issues that may not be apparent from DTCs alone.
By using these diagnostic tools in a systematic and thorough manner, you can effectively check for moisture in your Can Am XMR ECU and take appropriate action to prevent further damage. CAR-DIAGNOSTIC-TOOL.EDU.VN is your one-stop shop for all the tools, resources, and support you need to keep your vehicle running smoothly.
4. Step-by-Step Guide to Inspecting Your Can Am XMR ECU for Moisture
Inspecting your Can Am XMR ECU for moisture involves a detailed process; follow our step-by-step guide to ensure thoroughness and accuracy, using tools available at CAR-DIAGNOSTIC-TOOL.EDU.VN.
Inspecting your Can Am XMR ECU for moisture requires a systematic approach to ensure thoroughness and accuracy. According to a survey by the Equipment and Tool Institute (ETI), a structured diagnostic process can reduce the likelihood of misdiagnosis by up to 60%. Here’s a step-by-step guide to help you through the process:
Step 1: Gather Your Tools and Information
Before you begin, gather all the necessary tools and information:
- OBD-II Scanner
- Multimeter
- Flashlight
- Magnifying Glass
- Wiring Diagrams and Service Manual for your Can Am XMR (available at CAR-DIAGNOSTIC-TOOL.EDU.VN)
- Dielectric Grease
- Compressed Air (optional)
- Screwdrivers and Socket Set
Step 2: Locate the ECU
The location of the ECU can vary depending on the model and year of your Can Am XMR. Consult your service manual for the exact location. Common locations include under the seat, behind the dashboard, or in the engine compartment.
Step 3: Preliminary Visual Inspection
Before disconnecting anything, perform a preliminary visual inspection:
- Check the ECU housing for any signs of damage, such as cracks or broken seals.
- Look for water stains or corrosion on the housing or surrounding area.
- Inspect the wiring harness and connectors for any visible damage.
Step 4: Disconnect the Battery
To prevent electrical shock or damage to the ECU, disconnect the negative terminal of the battery before proceeding.
Step 5: Disconnect the ECU Connectors
Carefully disconnect the connectors from the ECU. Take note of the orientation of each connector to ensure proper reconnection later.
Step 6: Inspect the Connectors
Thoroughly inspect the connectors for signs of moisture or corrosion:
- Look for green or white deposits on the connector pins.
- Check for water stains or other signs of moisture inside the connectors.
- Use a magnifying glass and flashlight to get a closer look at the pins and sockets.
Step 7: Clean the Connectors (If Necessary)
If you find any signs of corrosion, clean the connectors using a contact cleaner or electrical cleaner:
- Spray the cleaner onto the connector pins and sockets.
- Use a small brush or cotton swab to remove any corrosion.
- Allow the cleaner to dry completely before proceeding.
Step 8: Check for Continuity
Use a multimeter to check the continuity of the wires and circuits connected to the ECU:
- Consult your wiring diagram to identify the correct pins and circuits to test.
- Set your multimeter to the continuity setting.
- Touch the probes to the corresponding pins on the connector and check for continuity.
Step 9: Inspect the ECU Internally (If Possible)
If you suspect that moisture has penetrated the ECU housing, you may need to open the ECU for internal inspection. However, this should only be done if you are comfortable working with sensitive electronic components.
- Carefully open the ECU housing, taking care not to damage any internal components.
- Look for signs of moisture, corrosion, or damage on the circuit board.
- If you find any damage, consult a qualified ECU repair technician.
Step 10: Reassemble and Reconnect
Once you have completed your inspection and cleaning, reassemble the ECU and reconnect the connectors. Make sure the connectors are securely seated and properly aligned.
Step 11: Apply Dielectric Grease
Apply a small amount of dielectric grease to the connectors before reconnecting them. This will help protect the connections from moisture and corrosion.
Step 12: Reconnect the Battery
Reconnect the negative terminal of the battery.
Step 13: Run a Diagnostic Scan
Use your OBD-II scanner to run a diagnostic scan and clear any DTCs that may have been stored in the ECU.
Step 14: Test the Vehicle
Test drive your Can Am XMR to see if the problem has been resolved. Monitor the engine performance and check for any warning lights or other symptoms.
By following this step-by-step guide, you can effectively inspect your Can Am XMR ECU for moisture and take appropriate action to prevent further damage. CAR-DIAGNOSTIC-TOOL.EDU.VN provides all the tools, resources, and support you need to keep your vehicle running smoothly.
5. How to Dry Out a Wet Can Am XMR ECU Safely?
Drying out a wet Can Am XMR ECU requires careful techniques to avoid further damage; use methods like air drying or low-heat exposure, and consider professional help from CAR-DIAGNOSTIC-TOOL.EDU.VN.
If your Can Am XMR ECU has gotten wet, it’s crucial to dry it out safely to prevent further damage. According to a study by the Electronic Components Industry Association (ECIA), improper drying techniques can cause irreversible damage to electronic components. Here are some safe methods to dry out a wet ECU:
-
Disconnect Power: Before you do anything else, make sure the ECU is completely disconnected from the vehicle’s power supply. This prevents any electrical shorts or further damage during the drying process. Disconnect the negative terminal of the battery to ensure no power is flowing to the ECU.
-
Remove the ECU from the Vehicle: Carefully remove the ECU from its location in the vehicle. This will allow you to inspect it more closely and ensure that all parts of the ECU are properly dried.
-
Visual Inspection: Before attempting to dry the ECU, perform a thorough visual inspection. Look for signs of corrosion, water stains, or physical damage. If you see any significant damage, it may be best to consult a professional ECU repair service.
-
Air Drying: The simplest and safest method to dry out a wet ECU is to let it air dry. Place the ECU in a dry, well-ventilated area away from direct sunlight or heat. Allow it to air dry for at least 24 to 48 hours. This method is slow but minimizes the risk of damaging sensitive electronic components.
-
Using a Desiccant: Place the ECU in a sealed container with a desiccant, such as silica gel packets. Desiccants absorb moisture from the air and can help speed up the drying process. Change the desiccant packets regularly to ensure they remain effective.
-
Low-Heat Drying: If you need to dry the ECU more quickly, you can use a low-heat source, such as a hairdryer on the lowest setting or a dehumidifier. Keep the heat source at a safe distance from the ECU and avoid applying heat directly to the electronic components. The goal is to gently warm the ECU to encourage evaporation without causing damage.
-
Using a Fan: Place the ECU in front of a fan to increase air circulation and speed up the drying process. Make sure the fan is set to a low speed and that the air is not too forceful, as this could damage the components.
-
Avoid High Heat: Never use high heat sources such as ovens, heat guns, or direct sunlight to dry the ECU. High heat can damage the electronic components and cause irreversible damage.
-
Check for Corrosion: After drying the ECU, carefully inspect it for signs of corrosion. If you find any corrosion, clean it gently with a soft brush and electrical contact cleaner. Be careful not to damage the electronic components.
-
Reinstallation and Testing: Once the ECU is completely dry and free of corrosion, reinstall it in the vehicle and reconnect the battery. Start the engine and check for any error codes or performance issues. If you experience any problems, consult a professional mechanic.
If you’re not comfortable drying out the ECU yourself or if you suspect significant damage, it’s best to consult a professional ECU repair service. CAR-DIAGNOSTIC-TOOL.EDU.VN can provide expert diagnostic and repair services to ensure your Can Am XMR ECU is functioning properly. Our technicians have the knowledge and experience to safely dry out and repair wet ECUs, minimizing the risk of further damage.
6. What are the Risks of Operating a Can Am XMR with a Moisture-Damaged ECU?
Operating a Can Am XMR with a moisture-damaged ECU poses significant risks, including unpredictable performance, electrical damage, and safety hazards; seek immediate repair services from CAR-DIAGNOSTIC-TOOL.EDU.VN.
Operating a Can Am XMR with a moisture-damaged ECU can lead to a host of problems, ranging from minor inconveniences to serious safety hazards. A study by the National Highway Traffic Safety Administration (NHTSA) found that ECU malfunctions, often caused by moisture, contribute to approximately 7% of all vehicle accidents. Understanding these risks is crucial for making informed decisions about vehicle maintenance and repair. Here are some of the key risks associated with operating a vehicle with a moisture-damaged ECU:
-
Unpredictable Performance: A moisture-damaged ECU can cause erratic engine behavior, leading to unpredictable performance. This can include stalling, misfiring, hesitation, and reduced power. The engine may run rough or fail to start altogether. Such unpredictable performance can be dangerous, especially in off-road conditions where precise control is essential.
-
Electrical Damage: Moisture can cause short circuits and corrosion, leading to electrical damage throughout the vehicle’s systems. This can affect various components, including the lights, sensors, and other electronic devices. Electrical damage can be costly to repair and may require the replacement of multiple components.
-
Safety Hazards: A malfunctioning ECU can compromise critical safety systems, such as the anti-lock braking system (ABS), electronic stability control (ESC), and airbag system. These systems rely on the ECU to function properly, and if the ECU is damaged, they may not work as intended. This can increase the risk of accidents and injuries.
-
Decreased Fuel Efficiency: A moisture-damaged ECU can disrupt the engine’s fuel management system, leading to decreased fuel efficiency. The engine may consume more fuel than necessary, resulting in higher operating costs.
-
Transmission Problems: The ECU also controls the transmission in many vehicles. Moisture-related issues can cause erratic shifting, failure to shift, or getting stuck in a particular gear. This can affect the vehicle’s drivability and may lead to transmission damage.
-
Emission Problems: A malfunctioning ECU can affect the vehicle’s emission control systems, leading to increased emissions. This can result in failing an emissions test and may violate environmental regulations.
-
Complete ECU Failure: If left unaddressed, moisture damage can eventually lead to complete ECU failure. This can render the vehicle inoperable and may require the replacement of the ECU, which can be a costly repair.
-
Data Loss: Moisture can also cause data loss in the ECU, leading to further malfunctions and diagnostic difficulties. The ECU may lose important calibration data or fail to store diagnostic trouble codes (DTCs).
To mitigate these risks, it’s essential to address moisture-related issues in your Can Am XMR ECU as soon as possible. Regular inspections, preventative maintenance, and prompt repairs can help prevent costly damage and ensure your vehicle’s safe and reliable performance. If you suspect that your ECU has been exposed to moisture, consult a qualified mechanic or ECU repair service for assistance.
CAR-DIAGNOSTIC-TOOL.EDU.VN offers expert diagnostic and repair services for Can Am XMR ECUs. Our technicians have the knowledge and experience to identify and address moisture-related issues, minimizing the risk of further damage and ensuring your vehicle’s safe and reliable operation. Contact us today for assistance.
7. How Can Dielectric Grease Protect Your Can Am XMR ECU from Moisture?
Dielectric grease provides a protective barrier against moisture for your Can Am XMR ECU; learn how to apply it correctly to maintain optimal ECU health with guidance from CAR-DIAGNOSTIC-TOOL.EDU.VN.
Dielectric grease is a non-conductive, waterproof lubricant that is specifically designed to protect electrical connections from moisture, corrosion, and other environmental factors. Applying dielectric grease to the connectors of your Can Am XMR ECU can provide an effective barrier against moisture intrusion, helping to prevent costly damage and ensure reliable performance. According to a study by the Society of Tribologists and Lubrication Engineers (STLE), using dielectric grease can extend the life of electrical connections by up to 50%. Here’s how dielectric grease protects your ECU from moisture:
-
Waterproof Barrier: Dielectric grease creates a waterproof barrier that prevents moisture from reaching the metal contacts of the electrical connectors. This helps to prevent corrosion and short circuits, which can lead to ECU malfunctions.
-
Corrosion Protection: Dielectric grease contains corrosion inhibitors that protect the metal contacts from oxidation and other forms of corrosion. This is particularly important in environments where the ECU is exposed to moisture, salt, and other corrosive substances.
-
Insulation: Dielectric grease is non-conductive, meaning it does not conduct electricity. This helps to insulate the electrical connections and prevent short circuits.
-
Lubrication: Dielectric grease provides lubrication that helps to reduce friction between the connector pins and sockets. This makes it easier to connect and disconnect the connectors and helps to prevent damage to the pins.
-
Sealing: Dielectric grease helps to seal the connectors and prevent moisture from entering the ECU housing. This is particularly important for connectors that are exposed to the elements.
To effectively protect your Can Am XMR ECU from moisture using dielectric grease, follow these steps:
-
Disconnect the Connectors: Disconnect the connectors from the ECU. Take note of the orientation of each connector to ensure proper reconnection later.
-
Clean the Connectors: Clean the connectors using a contact cleaner or electrical cleaner. Remove any dirt, corrosion, or other contaminants from the connector pins and sockets.
-
Apply Dielectric Grease: Apply a small amount of dielectric grease to the connector pins and sockets. Be careful not to use too much grease, as this could interfere with the electrical connections.
-
Reconnect the Connectors: Reconnect the connectors to the ECU. Make sure the connectors are securely seated and properly aligned.
-
Wipe Away Excess Grease: Wipe away any excess grease that may have squeezed out of the connectors.
By following these steps, you can effectively protect your Can Am XMR ECU from moisture using dielectric grease. CAR-DIAGNOSTIC-TOOL.EDU.VN offers a wide range of dielectric greases and other electrical maintenance products to help you keep your vehicle running smoothly.
8. What are the Best Practices for Preventing Moisture Intrusion in Your Can Am XMR ECU?
Preventing moisture intrusion in your Can Am XMR ECU involves several key practices, including regular inspections, proper sealing, and careful washing techniques, all supported by resources from CAR-DIAGNOSTIC-TOOL.EDU.VN.
Preventing moisture intrusion in your Can Am XMR ECU is crucial for maintaining its reliable performance and avoiding costly repairs. According to a survey by Consumer Reports, moisture-related electrical problems are among the most common issues reported by vehicle owners. Here are some best practices for preventing moisture intrusion in your ECU:
-
Regular Inspections: Conduct regular inspections of the ECU and its connectors for signs of damage, corrosion, or moisture. Check the ECU housing for cracks, broken seals, or other damage that could allow moisture to enter. Inspect the connectors for corrosion, water stains, or other signs of moisture exposure.
-
Proper Sealing: Ensure that the ECU housing and connectors are properly sealed to prevent moisture intrusion. Replace any damaged or worn seals and gaskets. Apply dielectric grease to the connectors to create a waterproof barrier.
-
Careful Washing Techniques: Avoid using high-pressure washers to clean your Can Am XMR, as this can force water into sensitive areas such as the ECU. Use a low-pressure nozzle and avoid directly spraying the ECU or other electronic components.
-
Protective Measures During Off-Roading: If you frequently use your Can Am XMR for off-roading, take extra precautions to protect the ECU from moisture. Consider installing a protective cover or shield over the ECU to prevent water and mud from splashing onto it.
-
Proper Venting: Ensure that the ECU has proper venting to regulate internal pressure and temperature. Check the venting system for blockages and clear them as needed. This will help prevent condensation from building up inside the ECU.
-
Avoid Submersion: Avoid submerging your Can Am XMR in water, as this can allow water to enter the ECU and other electronic components. If you must cross a body of water, do so slowly and carefully, and avoid driving through water that is deeper than the ECU’s mounting location.
-
Proper Storage: When storing your Can Am XMR, park it in a covered area or use a protective cover to reduce its exposure to the elements. This will help prevent moisture from entering the ECU and other components.
-
Dielectric Grease Application: Apply dielectric grease to the ECU connectors and other electrical connections to protect them from moisture and corrosion. Reapply the grease periodically, especially after washing the vehicle or using it in wet conditions.
-
Professional Maintenance: Have your Can Am XMR professionally maintained on a regular basis. A qualified mechanic can inspect the ECU and other electronic components for signs of moisture damage and take appropriate action to prevent further problems.
By following these best practices, you can effectively prevent moisture intrusion in your Can Am XMR ECU and ensure its reliable performance for years to come. CAR-DIAGNOSTIC-TOOL.EDU.VN offers a wide range of products and services to help you protect your vehicle from moisture damage, including dielectric grease, protective covers, and professional maintenance services.
9. When Should You Consider Professional ECU Repair or Replacement for Your Can Am XMR?
Consider professional ECU repair or replacement for your Can Am XMR when facing persistent issues, physical damage, or internal corrosion; CAR-DIAGNOSTIC-TOOL.EDU.VN offers expert services to assess and resolve these complex problems.
Knowing when to seek professional help for your Can Am XMR ECU can save you time, money, and further damage to your vehicle. According to a report by the Automotive Aftermarket Industry Association (AAIA), attempting to repair a severely damaged ECU without proper expertise can lead to additional problems and potentially render the ECU irreparable. Here are some situations where you should consider professional ECU repair or replacement:
-
Persistent Issues: If you’ve tried basic troubleshooting steps, such as cleaning the connectors and drying out the ECU, but the problems persist, it’s time to seek professional help. Persistent issues may indicate internal damage or a more complex problem that requires specialized knowledge and equipment to diagnose and repair.
-
Physical Damage: If the ECU has sustained physical damage, such as cracks, broken connectors, or water damage, it may need to be repaired or replaced. Physical damage can compromise the ECU’s internal components and lead to malfunctions.
-
Internal Corrosion: If you find signs of internal corrosion on the ECU’s circuit board or components, it’s a clear indication that the ECU has been exposed to moisture and may need to be repaired or replaced. Corrosion can damage the ECU’s sensitive electronic components and lead to failures.
-
Diagnostic Trouble Codes (DTCs): If your Can Am XMR is displaying DTCs related to the ECU, such as P0606 (ECU Processor Failure) or P0605 (Internal Control Module Read Only Memory (ROM) Error), it may indicate a problem with the ECU that requires professional attention.
-
Inability to Communicate: If your diagnostic scanner is unable to communicate with the ECU, it may indicate a serious problem that requires professional diagnosis and repair.
-
Erratic Engine Behavior: If your Can Am XMR is experiencing erratic engine behavior, such as stalling, misfiring, or hesitation, that cannot be resolved through basic troubleshooting steps, it may indicate a problem with the ECU that requires professional attention.
-
Repeated Failures: If the ECU has failed multiple times, it may be a sign that there is an underlying problem that needs to be addressed. A professional mechanic can diagnose the root cause of the problem and recommend the appropriate course of action.
-
Lack of Expertise: If you lack the expertise or experience to diagnose and repair ECU problems, it’s best to leave it to the professionals. Attempting to repair a complex electronic component without the proper knowledge and tools can lead to further damage and potentially render the ECU irreparable.
-
Cost-Effectiveness: In some cases, it may be more cost-effective to replace the ECU rather than repair it. A professional mechanic can assess the extent of the damage and provide you with a cost estimate for both repair and replacement options.
When seeking professional ECU repair or replacement services, choose a reputable and experienced mechanic who specializes in electronic diagnostics and repairs. CAR-DIAGNOSTIC-TOOL.EDU.VN offers expert ECU repair and replacement services for Can Am XMR vehicles. Our technicians have the knowledge, experience, and equipment to diagnose and repair a wide range of ECU problems, ensuring your vehicle runs smoothly and reliably.
10. What Training and Support Does CAR-DIAGNOSTIC-TOOL.EDU.VN Offer for Can Am XMR ECU Diagnostics and Repairs?
CAR-DIAGNOSTIC-TOOL.EDU.VN provides comprehensive training and support for Can Am XMR ECU diagnostics and repairs, including courses, remote assistance, and detailed guides to enhance your expertise.
CAR-DIAGNOSTIC-TOOL.EDU.VN is committed to providing comprehensive training and support for Can Am XMR ECU diagnostics and repairs. We understand that working with complex electronic components like the ECU requires specialized knowledge and skills. That’s why we offer a range of resources to help technicians of all levels enhance their expertise and provide top-notch service to their customers. According to a survey by TechForce Foundation, technicians who receive ongoing training and support are more likely to stay in the field and advance their careers. Here’s an overview of the training and support we offer:
-
Comprehensive Training Courses: We offer a variety of training courses that cover all aspects of Can Am XMR ECU diagnostics and repairs. Our courses are designed to provide technicians with the knowledge and skills they need to diagnose and repair a wide range of ECU problems. Courses include:
- Basic ECU Diagnostics: This course covers the fundamentals of ECU operation, including how to use diagnostic scanners to retrieve DTCs and interpret live data.
- Advanced ECU Diagnostics: This course delves deeper into ECU diagnostics, covering advanced techniques for troubleshooting complex problems.
- ECU Repair and Programming: This course provides hands-on training in ECU repair and programming, including how to replace damaged components and reprogram the ECU with the latest software.
-
Remote Technical Support: We offer remote technical support to help technicians troubleshoot ECU problems in real-time. Our team of experienced technicians is available to answer questions, provide guidance, and help technicians resolve even the most challenging issues.
-
Detailed Repair Guides: We provide detailed repair guides that walk technicians through the process of diagnosing and repairing common ECU problems. Our repair guides are written in clear, easy-to-understand language and include step-by-step instructions, diagrams, and troubleshooting tips.
-
Online Resources: We offer a wealth of online resources, including technical articles, videos, and FAQs, to help technicians stay up-to-date on the latest ECU diagnostics and repair techniques. Our online resources are available 24/7, so technicians can access the information they need whenever they need it.
-
Certification Programs: We offer certification programs to recognize technicians who have demonstrated a high level of expertise in Can Am XMR ECU diagnostics and repairs. Our certification programs are designed to help technicians stand out from the competition and demonstrate their commitment to providing top-quality service.
-
Customized Training Solutions: We can create customized training solutions to meet the specific needs of your shop or organization. Our customized training solutions can be delivered on-site or online, and can be tailored to cover the topics that are most relevant to your business.
-
Partnerships with Industry Leaders: We partner with leading manufacturers and suppliers in the automotive industry to provide our customers with access to the latest tools, equipment, and technology. Our partnerships ensure that our training and support resources are always up-to-date and reflect the latest industry standards.
CAR-DIAGNOSTIC-TOOL.EDU.VN is your one-stop shop for all your Can Am XMR ECU diagnostics and repair needs. Contact us today to learn more about our training and support resources and how we can help you enhance your expertise and provide top-quality service to your customers.
Don’t let ECU moisture issues slow you down. Contact CAR-DIAGNOSTIC-TOOL.EDU.VN now via Whatsapp at +1 (641) 206-8880 or visit our office at 1100 Congress Ave, Austin, TX 78701, United States, for expert diagnostic tools, repair guidance, and technician training. Empower your automotive expertise and drive your success with CAR-DIAGNOSTIC-TOOL.EDU.VN!
FAQ: Can Am XMR ECU Moisture
1. What exactly is the ECU in a Can Am XMR?
The ECU, or Electronic Control Unit, is the central computer in your Can Am XMR, managing critical functions like engine performance, fuel delivery, and ignition timing. It optimizes vehicle performance based on sensor inputs.
2. Why is moisture harmful to the Can Am XMR ECU?
Moisture can cause corrosion, short circuits, and general malfunction of the ECU, leading to erratic vehicle behavior, diagnostic trouble codes, and potential system failures. Early detection is crucial to prevent extensive damage.
3. How can I tell if my Can Am XMR ECU has moisture damage?
Signs include erratic engine behavior (stalling, misfiring), warning lights on the dashboard, difficulty starting, decreased fuel efficiency, and visible corrosion on ECU connectors. Diagnostic tools can confirm these issues.
4. Can I fix a moisture-damaged Can Am XMR ECU myself?
Simple cases might be resolved by carefully drying the ECU and cleaning connectors. However, complex issues or internal corrosion require professional repair or replacement to ensure proper function.
5. What tools are needed to diagnose ECU moisture issues?
Essential tools include an OBD-II scanner for reading diagnostic codes, a multimeter for testing electrical continuity, a flashlight, and a magnifying glass for visual inspection. Wiring diagrams can also be helpful.
6. How does dielectric grease help protect the ECU?
Dielectric grease is a non-conductive lubricant that creates a waterproof barrier, preventing moisture from reaching electrical connections, thus preventing corrosion and short circuits.
7. What are best practices for preventing ECU moisture intrusion?
Regularly inspect the ECU and connectors, ensure proper sealing, use careful washing techniques (avoiding high pressure), and take protective measures during off-roading. Dielectric grease should be applied to connectors.
8. When should I consider professional ECU service?
Consider professional service when dealing with persistent issues, physical damage, internal corrosion, inability to communicate with the ECU, or when diagnostic trouble codes point to ECU failure.
**9. What kind of training does