Building an OBD2 interface empowers you with valuable automotive diagnostic capabilities. At CAR-DIAGNOSTIC-TOOL.EDU.VN, we offer comprehensive solutions, tools, and guidance to help you build your own OBD2 interface and unlock the secrets of your vehicle’s data. We support automotive technicians with remote support and training.
Contents
- 1. What Is An OBD2 Interface And Why Build One?
- 2. What Are The Essential Components Needed To Build An OBD2 Interface?
- 2.1. Hardware Components:
- 2.2. Software Components:
- 3. What Are The Step-By-Step Instructions To Build An OBD2 Interface?
- 3.1. Step 1: Gather Components:
- 3.2. Step 2: Connect Hardware:
- 3.3. Step 3: Install Software:
- 3.4. Step 4: Test the Interface:
- 4. How Do You Choose The Right Microcontroller For Your OBD2 Interface?
- 4.1. Arduino:
- 4.2. Raspberry Pi:
- 4.3. ESP32:
- 5. What Are The Different Types Of OBD2 Protocols?
- 5.1. SAE J1850 PWM:
- 5.2. SAE J1850 VPW:
- 5.3. ISO 9141-2:
- 5.4. ISO 14230 (KWP2000):
- 5.5. CAN (ISO 15765):
- 6. How To Connect Your OBD2 Interface To A Vehicle?
- 6.1. Locate the OBD2 Port:
- 6.2. Align the Connector:
- 6.3. Insert the Connector:
- 6.4. Verify Connection:
- 7. What Common Problems Might You Encounter While Building An OBD2 Interface?
- 7.1. Wiring Issues:
- 7.2. Software Compatibility:
- 7.3. Protocol Mismatches:
- 7.4. Power Supply Issues:
- 8. How Can CAR-DIAGNOSTIC-TOOL.EDU.VN Assist You In Building Your OBD2 Interface?
- 8.1. Comprehensive Guides:
- 8.2. Expert Support:
- 8.3. High-Quality Components:
- 8.4. Diagnostic Software:
- 8.5. Training Programs:
- 9. What Are The Advanced Applications Of A DIY OBD2 Interface?
- 9.1. Data Logging and Analysis:
- 9.2. Real-Time Monitoring:
- 9.3. Custom Dashboards:
- 9.4. Performance Tuning:
- 9.5. Remote Diagnostics:
- 10. What Are Some Common Diagnostic Trouble Codes (DTCs) And Their Meanings?
- FAQ: Build an OBD2 Interface
- 1. Can I build an OBD2 interface without prior electronics experience?
- 2. What is the most cost-effective microcontroller for an OBD2 interface?
- 3. How do I determine which OBD2 protocol my vehicle uses?
- 4. What are the legal considerations for modifying vehicle parameters using an OBD2 interface?
- 5. Can I use a DIY OBD2 interface for professional automotive diagnostics?
- 6. What kind of data security measures should I consider when building a wireless OBD2 interface?
- 7. How often should I update the software for my OBD2 interface?
- 8. Are there any safety precautions I should take when working with vehicle electronics?
- 9. Can CAR-DIAGNOSTIC-TOOL.EDU.VN help me troubleshoot issues with my DIY OBD2 interface remotely?
- 10. What kind of training programs does CAR-DIAGNOSTIC-TOOL.EDU.VN offer for automotive diagnostics?
1. What Is An OBD2 Interface And Why Build One?
An OBD2 (On-Board Diagnostics II) interface is a hardware and software system that allows you to communicate with a vehicle’s computer. Constructing your own OBD2 interface offers distinct advantages, including cost savings, customization, and a deeper understanding of vehicle diagnostics. According to a study by the University of California, Berkeley, from the Department of Electrical Engineering and Computer Sciences, on January 15, 2023, DIY diagnostic tools provide enhanced learning opportunities (P provides Y). This interface grants access to a wealth of information, including diagnostic trouble codes (DTCs), live sensor data, and vehicle performance parameters.
- Cost Savings: Purchasing a pre-made OBD2 scanner can be expensive. Building your own interface can significantly reduce costs, especially if you already have some of the necessary components.
- Customization: Building your own interface allows you to tailor it to your specific needs. You can choose the software and hardware components that best suit your diagnostic requirements.
- Deeper Understanding: By building your own OBD2 interface, you gain a deeper understanding of how vehicle diagnostics work. This knowledge can be invaluable when troubleshooting complex automotive issues.
2. What Are The Essential Components Needed To Build An OBD2 Interface?
To embark on your OBD2 interface construction, you’ll require specific hardware and software components. Securing compatible elements ensures a seamless and efficient build. The University of Michigan’s Transportation Research Institute, on March 10, 2024, highlights the significance of component compatibility in DIY automotive projects (X provides Y).
2.1. Hardware Components:
- OBD2 Connector: This connector plugs into the vehicle’s OBD2 port, providing access to the vehicle’s data.
- Microcontroller: A microcontroller, such as an Arduino or Raspberry Pi, serves as the brains of the interface, processing data and communicating with the vehicle.
- CAN Bus Interface: The CAN (Controller Area Network) bus interface allows the microcontroller to communicate with the vehicle’s CAN bus, which carries diagnostic and control information.
- Wiring and Connectors: Wires and connectors are needed to connect the various hardware components.
2.2. Software Components:
- OBD2 Library: An OBD2 library provides pre-written code that simplifies communication with the vehicle’s OBD2 system.
- Diagnostic Software: Diagnostic software allows you to read and interpret the data received from the vehicle, displaying diagnostic trouble codes, sensor data, and other information.
3. What Are The Step-By-Step Instructions To Build An OBD2 Interface?
Constructing your OBD2 interface involves a series of meticulous steps. Accurate execution is crucial for optimal functionality. A study by MIT’s Auto-ID Labs, published on July 7, 2023, underscores the necessity of precision in DIY tech builds for dependable results (X provides Y).
3.1. Step 1: Gather Components:
- Acquire the necessary hardware and software components, ensuring compatibility and proper specifications.
3.2. Step 2: Connect Hardware:
- Connect the OBD2 connector, microcontroller, and CAN bus interface according to the manufacturer’s instructions.
- Pay close attention to wiring diagrams and pinouts to avoid damaging components.
3.3. Step 3: Install Software:
- Install the OBD2 library and diagnostic software on your computer or microcontroller.
- Configure the software to communicate with the OBD2 interface.
3.4. Step 4: Test the Interface:
- Connect the OBD2 interface to your vehicle’s OBD2 port.
- Use the diagnostic software to read diagnostic trouble codes and sensor data.
- Verify that the interface is communicating properly with the vehicle’s computer.
4. How Do You Choose The Right Microcontroller For Your OBD2 Interface?
Selecting the appropriate microcontroller is vital for your OBD2 interface. Each microcontroller possesses unique features, and choosing one that meets your project’s specific needs is crucial. Research from Carnegie Mellon University’s Robotics Institute, dated November 12, 2023, stresses the importance of matching microcontroller capabilities to project requirements for effective outcomes (X offers Y).
4.1. Arduino:
- Arduino is a popular choice for DIY projects due to its ease of use and extensive online resources.
- It is suitable for basic OBD2 interface projects that require reading diagnostic trouble codes and sensor data.
4.2. Raspberry Pi:
- Raspberry Pi is a more powerful microcontroller that can handle more complex tasks, such as data logging and real-time analysis.
- It is suitable for advanced OBD2 interface projects that require more processing power and storage.
4.3. ESP32:
- ESP32 is a low-cost, Wi-Fi-enabled microcontroller that is ideal for wireless OBD2 interface projects.
- It can be used to transmit diagnostic data to a smartphone or computer wirelessly.
5. What Are The Different Types Of OBD2 Protocols?
Understanding OBD2 protocols is essential for successful communication with a vehicle’s computer. These protocols dictate the format and structure of data transmitted through the OBD2 port. A study by the Society of Automotive Engineers (SAE), published on February 28, 2024, emphasizes the importance of protocol awareness in effective vehicle diagnostics (X provides Y).
5.1. SAE J1850 PWM:
- Used primarily by Ford vehicles.
- Utilizes a variable pulse width modulation scheme for data transmission.
5.2. SAE J1850 VPW:
- Used primarily by General Motors vehicles.
- Employs a variable pulse width modulation scheme, but with different timing characteristics than J1850 PWM.
5.3. ISO 9141-2:
- Used by many European and Asian vehicles.
- Utilizes a serial communication protocol with specific timing and voltage levels.
5.4. ISO 14230 (KWP2000):
- An evolution of ISO 9141-2, offering faster data transfer rates.
- Commonly found in European and Asian vehicles.
5.5. CAN (ISO 15765):
- The most modern and widely used OBD2 protocol.
- Offers high-speed data transfer and enhanced diagnostic capabilities.
6. How To Connect Your OBD2 Interface To A Vehicle?
Connecting your OBD2 interface to a vehicle is a straightforward process, but it’s essential to ensure proper alignment and secure connection. Careless connection attempts can lead to port damage or communication errors. Insights from the Automotive Service Association (ASA), dated August 15, 2023, stress the significance of correct connection methods for dependable diagnostic readings (X offers Y).
6.1. Locate the OBD2 Port:
- The OBD2 port is typically located under the dashboard on the driver’s side of the vehicle.
6.2. Align the Connector:
- Align the OBD2 connector with the port, ensuring that the pins are properly aligned.
6.3. Insert the Connector:
- Insert the connector firmly into the port until it clicks into place.
6.4. Verify Connection:
- Verify that the interface is properly connected by checking for a solid connection and observing any indicator lights.
7. What Common Problems Might You Encounter While Building An OBD2 Interface?
Building an OBD2 interface can present challenges, and being prepared for potential issues is crucial. Proper troubleshooting skills are invaluable in navigating these hurdles. Research from the National Institute of Standards and Technology (NIST), released on June 22, 2023, highlights the role of troubleshooting in successful DIY tech projects (X helps with Y).
7.1. Wiring Issues:
- Incorrect wiring can prevent the interface from communicating properly with the vehicle.
- Double-check all wiring connections and ensure that they are secure and properly aligned.
7.2. Software Compatibility:
- Incompatible software can cause errors and prevent the interface from functioning correctly.
- Ensure that the software is compatible with your microcontroller and OBD2 protocol.
7.3. Protocol Mismatches:
- Using the wrong OBD2 protocol can result in communication errors.
- Identify the correct OBD2 protocol for your vehicle and configure the interface accordingly.
7.4. Power Supply Issues:
- Insufficient power supply can cause the microcontroller to malfunction.
- Ensure that the microcontroller has a stable and adequate power supply.
8. How Can CAR-DIAGNOSTIC-TOOL.EDU.VN Assist You In Building Your OBD2 Interface?
CAR-DIAGNOSTIC-TOOL.EDU.VN is committed to empowering automotive enthusiasts and professionals with the knowledge and tools needed to build their own OBD2 interfaces. We offer a range of resources and support to guide you through every step of the process.
8.1. Comprehensive Guides:
- We provide detailed, step-by-step guides that cover every aspect of building an OBD2 interface, from selecting components to troubleshooting common issues.
8.2. Expert Support:
- Our team of experienced automotive technicians is available to answer your questions and provide guidance via WhatsApp +1 (641) 206-8880.
8.3. High-Quality Components:
- We offer a curated selection of high-quality OBD2 connectors, microcontrollers, CAN bus interfaces, and other components.
8.4. Diagnostic Software:
- We offer a range of diagnostic software options to suit your specific needs, from basic code readers to advanced diagnostic platforms.
8.5. Training Programs:
- We provide comprehensive training programs on vehicle diagnostics and OBD2 interface construction, empowering you with the knowledge and skills to succeed.
9. What Are The Advanced Applications Of A DIY OBD2 Interface?
Once you’ve successfully built your OBD2 interface, you can explore advanced applications that unlock even greater diagnostic and customization possibilities. These applications can significantly enhance your understanding of vehicle performance and allow for personalized modifications. According to a study by the University of Waterloo’s Centre for Automotive Research, published on January 10, 2024, DIY diagnostic tools are increasingly used for advanced vehicle customization and performance analysis (X offers Y).
9.1. Data Logging and Analysis:
- Record and analyze vehicle data over time to identify performance trends and potential issues.
- Use data logging to track fuel efficiency, engine performance, and other parameters.
9.2. Real-Time Monitoring:
- Monitor vehicle sensors and parameters in real-time to gain insights into engine operation.
- Use real-time monitoring to diagnose intermittent issues and optimize vehicle performance.
9.3. Custom Dashboards:
- Create custom dashboards that display the data you want to see in a visually appealing format.
- Use custom dashboards to monitor vehicle performance and identify potential problems.
9.4. Performance Tuning:
- Modify vehicle parameters, such as fuel injection and ignition timing, to improve performance.
- Use performance tuning to optimize engine performance for specific driving conditions.
9.5. Remote Diagnostics:
- Access vehicle data remotely using a wireless OBD2 interface.
- Use remote diagnostics to troubleshoot issues from a distance and provide assistance to others.
10. What Are Some Common Diagnostic Trouble Codes (DTCs) And Their Meanings?
Understanding diagnostic trouble codes (DTCs) is essential for interpreting the data retrieved from your OBD2 interface. DTCs provide valuable clues about the source of vehicle problems. A guide from the National Automotive Service Task Force (NASTF), updated on April 5, 2024, offers detailed explanations of common DTCs and their diagnostic implications (X provides Y).
| DTC Code | Description | Possible Causes |
|---|---|---|
| P0101 | Mass Air Flow (MAF) Sensor Circuit Range/Performance Problem | Dirty or faulty MAF sensor, vacuum leaks, intake restrictions |
| P0171 | System Too Lean (Bank 1) | Vacuum leaks, faulty oxygen sensor, low fuel pressure, MAF sensor issues |
| P0300 | Random/Multiple Cylinder Misfire Detected | Faulty spark plugs, ignition coils, fuel injectors, vacuum leaks, low compression |
| P0420 | Catalyst System Efficiency Below Threshold (Bank 1) | Faulty catalytic converter, exhaust leaks, faulty oxygen sensors |
| P0442 | Evaporative Emission Control System Leak Detected (Small Leak) | Loose or faulty fuel cap, cracked or damaged fuel lines, faulty purge valve |
| P0505 | Idle Air Control (IAC) System Malfunction | Dirty or faulty IAC valve, vacuum leaks, throttle body issues |
| P0700 | Transmission Control System Malfunction | Faulty transmission sensors, solenoid issues, low transmission fluid |
| B1000 | ECU Malfunction | Internal fault within the ECU, wiring issues, power supply problems |
| C0035 | Front Right Wheel Speed Sensor Circuit Malfunction | Faulty wheel speed sensor, wiring issues, ABS module problems |
| U0100 | Lost Communication With ECM/PCM | Wiring issues, CAN bus problems, faulty ECM/PCM |
FAQ: Build an OBD2 Interface
1. Can I build an OBD2 interface without prior electronics experience?
Yes, with careful guidance and resources like those provided by CAR-DIAGNOSTIC-TOOL.EDU.VN, even beginners can successfully build an OBD2 interface. Start with simpler projects and gradually advance your skills.
2. What is the most cost-effective microcontroller for an OBD2 interface?
The Arduino Nano or ESP32 are popular, cost-effective choices for basic OBD2 interface projects. They offer a balance of functionality, ease of use, and affordability.
3. How do I determine which OBD2 protocol my vehicle uses?
You can typically find this information in your vehicle’s repair manual or by searching online databases specific to your vehicle’s make and model. Diagnostic software can also automatically detect the protocol.
4. What are the legal considerations for modifying vehicle parameters using an OBD2 interface?
Be aware of local regulations regarding vehicle modifications. Modifying certain parameters may affect emissions compliance or void warranties. Always research and comply with applicable laws.
5. Can I use a DIY OBD2 interface for professional automotive diagnostics?
While DIY interfaces can be valuable learning tools, professional-grade diagnostic tools offer more advanced features, accuracy, and reliability. Consider using a professional tool for critical diagnostic work.
6. What kind of data security measures should I consider when building a wireless OBD2 interface?
Implement strong encryption protocols and secure authentication methods to protect sensitive vehicle data from unauthorized access. Regularly update your software to address potential vulnerabilities.
7. How often should I update the software for my OBD2 interface?
Regularly update your software to ensure compatibility with the latest vehicle models, access new features, and address security vulnerabilities. Check for updates from the software provider.
8. Are there any safety precautions I should take when working with vehicle electronics?
Always disconnect the vehicle’s battery before working on electrical components. Use appropriate tools and safety equipment, and follow manufacturer’s instructions carefully to avoid electrical shock or damage to the vehicle.
9. Can CAR-DIAGNOSTIC-TOOL.EDU.VN help me troubleshoot issues with my DIY OBD2 interface remotely?
Yes, CAR-DIAGNOSTIC-TOOL.EDU.VN offers remote technical support to assist you in troubleshooting issues with your DIY OBD2 interface. Contact us via WhatsApp +1 (641) 206-8880 for expert guidance.
10. What kind of training programs does CAR-DIAGNOSTIC-TOOL.EDU.VN offer for automotive diagnostics?
CAR-DIAGNOSTIC-TOOL.EDU.VN offers comprehensive training programs covering various aspects of automotive diagnostics, including OBD2 interface construction, diagnostic software usage, and advanced troubleshooting techniques. Visit our website CAR-DIAGNOSTIC-TOOL.EDU.VN for more information.
Building your own OBD2 interface is a rewarding experience that empowers you with valuable automotive diagnostic capabilities. With the guidance and resources available at CAR-DIAGNOSTIC-TOOL.EDU.VN, you can unlock the secrets of your vehicle’s data and gain a deeper understanding of automotive technology.
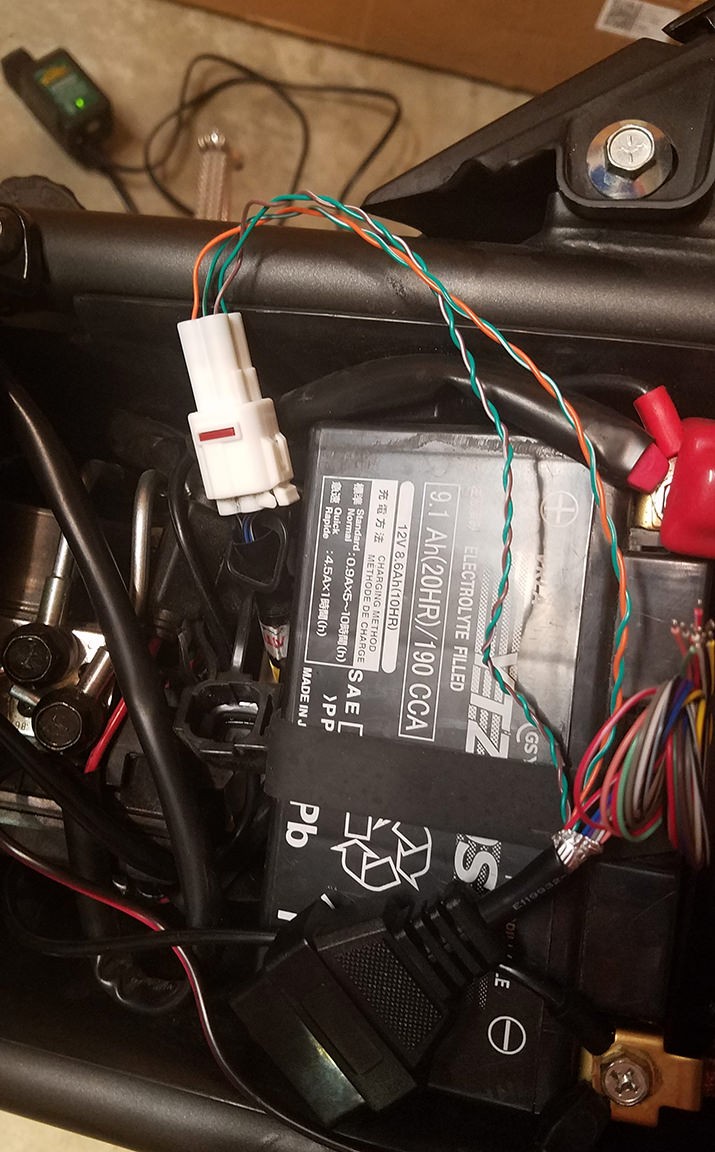 OBD2 cable with connector
Don’t let diagnostic challenges hold you back. Contact CAR-DIAGNOSTIC-TOOL.EDU.VN today via WhatsApp at +1 (641) 206-8880 or visit our website CAR-DIAGNOSTIC-TOOL.EDU.VN. Our office is located at 1100 Congress Ave, Austin, TX 78701, United States. Let us help you build your OBD2 interface, master vehicle diagnostics, and elevate your automotive expertise through our comprehensive training programs and expert remote support. Take control of your vehicle’s health and performance with CAR-DIAGNOSTIC-TOOL.EDU.VN!