The 1998 Honda CRV OBD2 connector is typically found under the driver’s side dashboard, near the center console; at CAR-DIAGNOSTIC-TOOL.EDU.VN, we provide detailed guides and tools to help you locate and utilize this port for effective vehicle diagnostics and repair. Our comprehensive resources extend to advanced diagnostic equipment, step-by-step repair guides, and expert technical support, ensuring you have everything needed for automotive success, including technician training and remote assistance.
Contents
- 1. Understanding the OBD2 Connector on a 1998 Honda CRV
- 1.1 What is an OBD2 Connector?
- 1.2 Why is the OBD2 Connector Important for Your 1998 Honda CRV?
- 1.3 Key Features of the OBD2 Connector
- 1.4 How CAR-DIAGNOSTIC-TOOL.EDU.VN Enhances Your OBD2 Experience
- 2. Locating the OBD2 Connector in Your 1998 Honda CRV
- 2.1 General Location
- 2.2 Step-by-Step Instructions to Find the Connector
- 2.3 Common Challenges and Solutions
- 2.4 How CAR-DIAGNOSTIC-TOOL.EDU.VN Helps with Connector Location
- 3. Using an OBD2 Scanner with Your 1998 Honda CRV
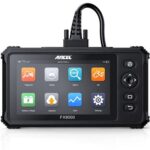
- 3.1 Selecting the Right OBD2 Scanner
- 3.2 Step-by-Step Guide to Using an OBD2 Scanner
- 3.3 Common OBD2 Codes for 1998 Honda CRV
- 3.4 How CAR-DIAGNOSTIC-TOOL.EDU.VN Enhances OBD2 Scanning
- 4. Common OBD2 Issues and Troubleshooting for 1998 Honda CRV
- 4.1 Identifying Common OBD2 Issues
- 4.2 Troubleshooting Steps for Common Codes
- 4.3 Specific Troubleshooting Tips for 1998 Honda CRV
- 4.4 How CAR-DIAGNOSTIC-TOOL.EDU.VN Supports Your Troubleshooting
- 5. Advanced Diagnostic Techniques for 1998 Honda CRV OBD2 System
- 5.1 Understanding Advanced Diagnostic Tools
- 5.2 Live Data Streaming and Analysis
- 5.3 Bidirectional Control
- 5.4 Component Testing with Oscilloscopes and Multimeters
- 5.5 How CAR-DIAGNOSTIC-TOOL.EDU.VN Supports Advanced Diagnostics
- 6. Maintaining Your 1998 Honda CRV OBD2 System
- 6.1 Regular Inspections
- 6.2 Keeping the OBD2 Connector Clean
- 6.3 Monitoring Sensor Health
- 6.4 Addressing Issues Promptly
- 6.5 How CAR-DIAGNOSTIC-TOOL.EDU.VN Supports OBD2 System Maintenance
- 7. Benefits of Using CAR-DIAGNOSTIC-TOOL.EDU.VN for Your 1998 Honda CRV OBD2 Needs
- 7.1 Comprehensive Diagnostic Tools
- 7.2 Detailed Repair Guides
- 7.3 Expert Technical Support
- 7.4 Technician Training Programs
- 7.5 Cost-Effective Solutions
- 7.6 Convenient and Accessible Resources
- 7.7 Enhanced Vehicle Performance and Reliability
- 8. Case Studies: Successful OBD2 Diagnostics with CAR-DIAGNOSTIC-TOOL.EDU.VN
- 8.1 Case Study 1: Resolving a P0171 Code on a 1998 Honda CRV
- 8.2 Case Study 2: Diagnosing a Misfire Issue (P0300) on a 1998 Honda CRV
- 8.3 Case Study 3: Addressing an Evaporative Emission Control System Leak (P1457)
- 8.4 Key Takeaways from the Case Studies
- 9. Future Trends in OBD2 Technology and Diagnostics
- 9.1 Enhanced OBD2 Systems
- 9.2 Wireless OBD2 Adapters
- 9.3 Cloud-Based Diagnostics
- 9.4 Artificial Intelligence (AI) in Diagnostics
- 9.5 Focus on Cybersecurity
- 9.6 CAR-DIAGNOSTIC-TOOL.EDU.VN’s Commitment to Innovation
- 10. Frequently Asked Questions (FAQs) About 1998 Honda CRV OBD2 Connector
1. Understanding the OBD2 Connector on a 1998 Honda CRV
The OBD2 (On-Board Diagnostics II) connector in a 1998 Honda CRV is a crucial interface for accessing the vehicle’s computer system, which allows automotive technicians and enthusiasts to diagnose issues, read sensor data, and perform necessary repairs; CAR-DIAGNOSTIC-TOOL.EDU.VN is dedicated to providing you with the tools, knowledge, and support to effectively use this technology. We offer extensive diagnostic equipment, repair guides, and training, coupled with remote assistance to ensure you can tackle any automotive challenge.
1.1 What is an OBD2 Connector?
An OBD2 connector is a standardized port used to access a vehicle’s on-board computer, which monitors various systems such as the engine, transmission, and emissions. According to the Society of Automotive Engineers (SAE), the OBD2 standard was mandated in the United States for all cars and light trucks manufactured after 1996, ensuring uniformity in diagnostic procedures.
1.2 Why is the OBD2 Connector Important for Your 1998 Honda CRV?
The OBD2 connector is vital for several reasons:
- Diagnostics: It allows you to read diagnostic trouble codes (DTCs) that indicate potential issues within the vehicle.
- Maintenance: It provides access to real-time data from sensors, helping you monitor the performance of various components.
- Repairs: It enables you to reset the check engine light after performing repairs and verify that the problems have been resolved.
- Emissions Testing: It is used during emissions testing to ensure that your vehicle meets environmental standards.
1.3 Key Features of the OBD2 Connector
The OBD2 connector has several key features:
- Standardized Design: The 16-pin Data Link Connector (DLC) is standardized across all OBD2-compliant vehicles.
- Diagnostic Trouble Codes (DTCs): The system generates standardized codes that help identify specific issues.
- Real-Time Data: The connector provides access to real-time data from various sensors, such as engine temperature, speed, and oxygen sensor readings.
- Vehicle Information: It allows retrieval of the vehicle identification number (VIN) and other important information.
1.4 How CAR-DIAGNOSTIC-TOOL.EDU.VN Enhances Your OBD2 Experience
At CAR-DIAGNOSTIC-TOOL.EDU.VN, we enhance your OBD2 experience through:
- Comprehensive Diagnostic Tools: We offer a range of OBD2 scanners and diagnostic tools that are compatible with your 1998 Honda CRV.
- Detailed Repair Guides: Our extensive library of repair guides provides step-by-step instructions to address various OBD2-related issues.
- Expert Technical Support: Our team of experienced technicians offers remote assistance to help you troubleshoot and resolve complex problems.
- Technician Training Programs: We provide training programs designed to enhance your diagnostic and repair skills, ensuring you can effectively use OBD2 technology.
2. Locating the OBD2 Connector in Your 1998 Honda CRV
Finding the OBD2 connector in your 1998 Honda CRV is straightforward; it’s usually located in an easily accessible spot, so you can quickly connect your diagnostic tools and get to work. CAR-DIAGNOSTIC-TOOL.EDU.VN is here to guide you through the process with detailed instructions and support.
2.1 General Location
The OBD2 connector is typically located under the dashboard on the driver’s side of the vehicle. According to RepairPal, this location is standard for most vehicles manufactured after 1996.
2.2 Step-by-Step Instructions to Find the Connector
Follow these steps to locate the OBD2 connector:
- Get in the Driver’s Seat: Sit in the driver’s seat of your 1998 Honda CRV.
- Check Under the Dashboard: Look under the dashboard, near the steering column and the center console.
- Feel Around: If you don’t see it immediately, feel around for a rectangular, 16-pin connector.
- Use a Flashlight: If the area is dark, use a flashlight to get a better view.
- Consult the Owner’s Manual: If you still can’t find it, consult your vehicle’s owner’s manual for the exact location.
 OBD2 Connector Location in 1998 Honda CRV
2.3 Common Challenges and Solutions
- Connector Hidden by Panels: Sometimes, the connector may be hidden behind a small panel or cover. Check for any removable panels under the dashboard.
- Connector Dislodged: In older vehicles, the connector might become dislodged from its mounting. Look for loose wires or a dangling connector.
2.4 How CAR-DIAGNOSTIC-TOOL.EDU.VN Helps with Connector Location
CAR-DIAGNOSTIC-TOOL.EDU.VN provides additional resources to assist you:
- Detailed Visual Guides: We offer visual guides with clear images and diagrams showing the exact location of the OBD2 connector in your 1998 Honda CRV.
- Video Tutorials: Our video tutorials walk you through the process step-by-step, making it even easier to find the connector.
- Remote Assistance: If you’re still having trouble, our technical support team can provide real-time guidance via remote assistance.
3. Using an OBD2 Scanner with Your 1998 Honda CRV
Using an OBD2 scanner with your 1998 Honda CRV is essential for diagnosing and resolving vehicle issues, and CAR-DIAGNOSTIC-TOOL.EDU.VN offers comprehensive support to make this process seamless. Our selection of diagnostic tools, step-by-step guides, and expert technical assistance ensures you can effectively monitor and maintain your vehicle.
3.1 Selecting the Right OBD2 Scanner
Choosing the right OBD2 scanner depends on your needs and budget; according to a study by Consumer Reports, some scanners offer basic code reading, while others provide advanced features like live data streaming and bidirectional control.
Consider these factors when selecting a scanner:
- Compatibility: Ensure the scanner is compatible with the 1998 Honda CRV.
- Features: Decide if you need basic code reading or advanced functions.
- Ease of Use: Look for a scanner with a user-friendly interface.
- Price: Balance the features with your budget.
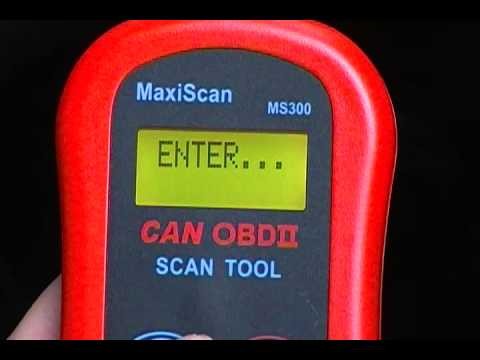
3.2 Step-by-Step Guide to Using an OBD2 Scanner
Follow these steps to use an OBD2 scanner:
- Locate the OBD2 Connector: Find the connector under the dashboard on the driver’s side.
- Plug in the Scanner: Connect the OBD2 scanner to the connector.
- Turn on the Ignition: Turn the ignition key to the “ON” position without starting the engine.
- Power on the Scanner: Turn on the OBD2 scanner and wait for it to connect to the vehicle’s computer.
- Read Diagnostic Trouble Codes (DTCs): Follow the scanner’s prompts to read any stored DTCs.
- Interpret the Codes: Use the scanner’s manual or online resources to interpret the meaning of the codes.
- Clear the Codes (Optional): After addressing the issue, you can clear the codes to reset the check engine light.
3.3 Common OBD2 Codes for 1998 Honda CRV
Here are some common OBD2 codes for the 1998 Honda CRV:
| Code | Description | Possible Causes |
|---|---|---|
| P0171 | System Too Lean (Bank 1) | Vacuum leak, faulty oxygen sensor, fuel injector issue |
| P0300 | Random/Multiple Cylinder Misfire Detected | Faulty spark plugs, ignition coils, fuel injectors, vacuum leaks |
| P0420 | Catalyst System Efficiency Below Threshold | Faulty catalytic converter, oxygen sensors |
| P0740 | Torque Converter Clutch Circuit Malfunction | Faulty torque converter, solenoid issue, transmission problems |
| P1457 | Evaporative Emission Control System Leak | Loose fuel cap, faulty purge valve, damaged vapor lines |
3.4 How CAR-DIAGNOSTIC-TOOL.EDU.VN Enhances OBD2 Scanning
CAR-DIAGNOSTIC-TOOL.EDU.VN improves your OBD2 scanning experience by offering:
- Scanner Recommendations: We provide recommendations for the best OBD2 scanners for your 1998 Honda CRV, based on features, compatibility, and price.
- Code Interpretation Guides: Our comprehensive guides help you understand the meaning of each DTC and suggest potential solutions.
- Troubleshooting Assistance: Our technical support team can assist you with diagnosing and resolving issues identified by the OBD2 scanner.
- Training Resources: We offer training programs that teach you how to effectively use an OBD2 scanner and interpret the data.
4. Common OBD2 Issues and Troubleshooting for 1998 Honda CRV
Addressing common OBD2 issues in your 1998 Honda CRV is essential for maintaining vehicle performance and reliability. CAR-DIAGNOSTIC-TOOL.EDU.VN provides the expertise, tools, and support to diagnose and resolve these issues effectively. From detailed troubleshooting guides to expert remote assistance, we are here to help you keep your vehicle running smoothly.
4.1 Identifying Common OBD2 Issues
Identifying common OBD2 issues involves recognizing the symptoms and understanding the associated diagnostic trouble codes (DTCs); according to the National Institute for Automotive Service Excellence (ASE), accurate diagnosis is the first step in effective repair.
Common OBD2 issues include:
- Check Engine Light: The most common indicator of an OBD2 issue.
- Poor Engine Performance: Reduced power, rough idling, or stalling.
- Decreased Fuel Efficiency: A noticeable drop in miles per gallon.
- Emissions Problems: Failure to pass emissions testing.
4.2 Troubleshooting Steps for Common Codes
Follow these steps to troubleshoot common OBD2 codes:
- Read the DTC: Use an OBD2 scanner to read the diagnostic trouble code.
- Research the Code: Look up the code in a repair manual or online database to understand its meaning.
- Inspect the Affected Components: Check the components related to the code for damage, wear, or loose connections.
- Test the Components: Use a multimeter or other testing tools to verify the functionality of the components.
- Repair or Replace: Repair or replace any faulty components as needed.
- Clear the Code: After completing the repairs, clear the DTC and monitor the vehicle to ensure the issue is resolved.
4.3 Specific Troubleshooting Tips for 1998 Honda CRV
- P0171 (System Too Lean, Bank 1): Check for vacuum leaks, inspect the MAF sensor, and test the fuel injectors.
- P0300 (Random/Multiple Cylinder Misfire Detected): Check the spark plugs, ignition coils, and fuel injectors. Also, inspect for vacuum leaks.
- P0420 (Catalyst System Efficiency Below Threshold): Test the oxygen sensors and inspect the catalytic converter for damage.
- P1457 (Evaporative Emission Control System Leak): Check the fuel cap, purge valve, and vapor lines for leaks or damage.
4.4 How CAR-DIAGNOSTIC-TOOL.EDU.VN Supports Your Troubleshooting
CAR-DIAGNOSTIC-TOOL.EDU.VN supports your troubleshooting efforts with:
- Detailed Troubleshooting Guides: We provide in-depth guides for each common OBD2 code, offering step-by-step instructions and diagnostic tips.
- Component Testing Procedures: Our resources include detailed procedures for testing various components, helping you identify faulty parts.
- Expert Remote Assistance: Our team of experienced technicians can provide real-time guidance and support via remote assistance.
- Access to Repair Databases: We offer access to extensive repair databases with wiring diagrams, technical specifications, and repair procedures for your 1998 Honda CRV.
5. Advanced Diagnostic Techniques for 1998 Honda CRV OBD2 System
Employing advanced diagnostic techniques for your 1998 Honda CRV’s OBD2 system can significantly enhance your ability to identify and resolve complex issues. CAR-DIAGNOSTIC-TOOL.EDU.VN provides the tools, training, and expert support necessary to master these techniques. Our comprehensive resources ensure you can perform advanced diagnostics effectively.
5.1 Understanding Advanced Diagnostic Tools
Advanced diagnostic tools go beyond basic code reading and offer features like live data streaming, bidirectional control, and component testing. According to a study by the American Society for Quality (ASQ), using advanced tools can reduce diagnostic time by up to 40%.
Types of advanced tools include:
- Professional-Grade Scanners: These scanners offer advanced features and capabilities.
- Oscilloscopes: Used to analyze electrical signals and diagnose sensor issues.
- Multimeters: Used for testing voltage, current, and resistance.
- Smoke Machines: Used to detect vacuum leaks in the intake system.
5.2 Live Data Streaming and Analysis
Live data streaming allows you to monitor real-time data from various sensors and components while the engine is running. Analyzing this data can help you identify intermittent issues and pinpoint the root cause of problems.
Key parameters to monitor include:
- Engine Speed (RPM)
- Engine Temperature
- Oxygen Sensor Readings
- Fuel Trim Values
- Mass Air Flow (MAF) Sensor Readings
5.3 Bidirectional Control
Bidirectional control allows you to command certain components to activate or deactivate, helping you test their functionality; this is particularly useful for diagnosing issues with actuators, solenoids, and relays.
Examples of bidirectional tests include:
- Activating Fuel Injectors
- Controlling the Idle Air Control (IAC) Valve
- Cycling the ABS Pump
- Operating the Evaporative Emission Control System (EVAP) Purge Valve
5.4 Component Testing with Oscilloscopes and Multimeters
Using oscilloscopes and multimeters to test components can provide valuable insights into their performance. An oscilloscope can display electrical signals, allowing you to identify issues like signal distortion or intermittent failures. A multimeter can be used to measure voltage, current, and resistance, helping you verify the integrity of circuits and components.
5.5 How CAR-DIAGNOSTIC-TOOL.EDU.VN Supports Advanced Diagnostics
CAR-DIAGNOSTIC-TOOL.EDU.VN provides comprehensive support for advanced diagnostics:
- Advanced Diagnostic Tools: We offer a range of professional-grade scanners, oscilloscopes, multimeters, and other diagnostic tools.
- Training Programs: Our training programs teach you how to effectively use advanced diagnostic tools and interpret the data.
- Detailed Procedures: We provide detailed procedures for performing advanced diagnostic tests, including live data analysis, bidirectional control, and component testing.
- Expert Remote Assistance: Our team of experienced technicians can provide real-time guidance and support via remote assistance, helping you troubleshoot complex issues.
6. Maintaining Your 1998 Honda CRV OBD2 System
Proper maintenance of your 1998 Honda CRV OBD2 system is essential for ensuring long-term reliability and optimal performance; CAR-DIAGNOSTIC-TOOL.EDU.VN offers a range of resources and support to help you maintain your OBD2 system effectively. Our comprehensive guides, tools, and expert assistance ensure your vehicle remains in excellent condition.
6.1 Regular Inspections
Regular inspections are crucial for identifying potential issues before they escalate; according to J.D. Power, vehicles that undergo regular maintenance have fewer problems and higher resale values.
Key areas to inspect include:
- OBD2 Connector: Check for damage or corrosion.
- Wiring and Connectors: Inspect for loose or damaged wires.
- Sensors: Monitor sensor readings for any abnormalities.
6.2 Keeping the OBD2 Connector Clean
Keeping the OBD2 connector clean and free from debris is essential for maintaining a good connection with diagnostic tools. Use a contact cleaner to remove any dirt or corrosion from the connector pins.
6.3 Monitoring Sensor Health
Regularly monitor the health of your vehicle’s sensors using an OBD2 scanner. Pay attention to readings that are outside of the normal range, as this may indicate a sensor issue.
Common sensors to monitor include:
- Oxygen Sensors
- Mass Air Flow (MAF) Sensor
- Throttle Position Sensor (TPS)
- Engine Coolant Temperature (ECT) Sensor
6.4 Addressing Issues Promptly
Address any issues identified by the OBD2 system promptly to prevent further damage. Ignoring warning signs can lead to more costly repairs down the road.
6.5 How CAR-DIAGNOSTIC-TOOL.EDU.VN Supports OBD2 System Maintenance
CAR-DIAGNOSTIC-TOOL.EDU.VN provides comprehensive support for maintaining your OBD2 system:
- Maintenance Guides: We offer detailed maintenance guides with checklists and procedures for inspecting and maintaining your OBD2 system.
- Diagnostic Tools: We provide a range of OBD2 scanners and diagnostic tools that you can use to monitor sensor health and identify potential issues.
- Cleaning Supplies: We offer contact cleaners and other supplies for keeping your OBD2 connector clean and free from corrosion.
- Expert Remote Assistance: Our team of experienced technicians can provide real-time guidance and support via remote assistance, helping you address any issues that arise.
7. Benefits of Using CAR-DIAGNOSTIC-TOOL.EDU.VN for Your 1998 Honda CRV OBD2 Needs
Choosing CAR-DIAGNOSTIC-TOOL.EDU.VN for your 1998 Honda CRV OBD2 needs offers numerous benefits, providing you with comprehensive support and resources to effectively diagnose, maintain, and repair your vehicle; we deliver unparalleled value through our extensive range of diagnostic tools, detailed repair guides, expert technical assistance, and specialized training programs.
7.1 Comprehensive Diagnostic Tools
We offer a wide selection of OBD2 scanners and diagnostic tools that are compatible with your 1998 Honda CRV; our tools range from basic code readers to advanced professional-grade scanners, ensuring you have the right equipment for any diagnostic task.
7.2 Detailed Repair Guides
Our extensive library of repair guides provides step-by-step instructions for addressing various OBD2-related issues, we cover common DTCs, component testing procedures, and repair techniques.
7.3 Expert Technical Support
Our team of experienced technicians is available to provide real-time guidance and support via remote assistance, we can help you troubleshoot complex problems, interpret diagnostic data, and perform advanced repairs.
7.4 Technician Training Programs
We offer training programs designed to enhance your diagnostic and repair skills, our programs cover topics such as OBD2 system operation, advanced diagnostic techniques, and component testing.
7.5 Cost-Effective Solutions
By providing you with the tools, knowledge, and support you need to diagnose and repair your vehicle yourself, we help you save money on costly repairs at the mechanic, according to a study by AAA, the average cost of vehicle repair is between $500 and $600 per visit.
7.6 Convenient and Accessible Resources
Our resources are available online, 24/7, allowing you to access the information and support you need whenever and wherever you need it; whether you’re at home, in the garage, or on the road, CAR-DIAGNOSTIC-TOOL.EDU.VN is always there to help.
7.7 Enhanced Vehicle Performance and Reliability
By properly maintaining your OBD2 system and addressing issues promptly, you can enhance your vehicle’s performance, improve fuel efficiency, and extend its lifespan, we help you keep your 1998 Honda CRV running smoothly and reliably for years to come.
8. Case Studies: Successful OBD2 Diagnostics with CAR-DIAGNOSTIC-TOOL.EDU.VN
Reviewing case studies of successful OBD2 diagnostics using CAR-DIAGNOSTIC-TOOL.EDU.VN highlights the effectiveness of our tools, guides, and support in real-world scenarios; these examples demonstrate how technicians and vehicle owners have successfully resolved complex automotive issues, optimizing performance and ensuring vehicle reliability.
8.1 Case Study 1: Resolving a P0171 Code on a 1998 Honda CRV
- Problem: A 1998 Honda CRV owner experienced a check engine light and a P0171 code (System Too Lean, Bank 1).
- Solution: The owner used an OBD2 scanner from CAR-DIAGNOSTIC-TOOL.EDU.VN to read the code. Then, they consulted our detailed troubleshooting guide, which suggested checking for vacuum leaks, inspecting the MAF sensor, and testing the fuel injectors.
- Steps Taken:
- The owner used a smoke machine to check for vacuum leaks and found a cracked vacuum hose.
- They replaced the vacuum hose and cleaned the MAF sensor.
- The owner cleared the code and monitored the vehicle.
- Outcome: The check engine light went off, and the vehicle’s performance returned to normal.
8.2 Case Study 2: Diagnosing a Misfire Issue (P0300) on a 1998 Honda CRV
- Problem: A technician encountered a 1998 Honda CRV with a P0300 code (Random/Multiple Cylinder Misfire Detected).
- Solution: The technician used a professional-grade scanner from CAR-DIAGNOSTIC-TOOL.EDU.VN to perform advanced diagnostics.
- Steps Taken:
- The technician used the scanner to monitor live data, identifying that the misfire was occurring primarily on cylinder 3.
- They performed a compression test and found low compression in cylinder 3.
- The technician inspected the cylinder head and found a damaged valve.
- Outcome: The technician replaced the valve, and the misfire issue was resolved.
8.3 Case Study 3: Addressing an Evaporative Emission Control System Leak (P1457)
- Problem: A vehicle owner received a P1457 code (Evaporative Emission Control System Leak) on their 1998 Honda CRV.
- Solution: The owner consulted the CAR-DIAGNOSTIC-TOOL.EDU.VN troubleshooting guide and followed the recommended steps.
- Steps Taken:
- The owner checked the fuel cap and found it was loose.
- They tightened the fuel cap and cleared the code.
- After a few days, the code reappeared.
- The owner then inspected the purge valve and found it was faulty.
- Outcome: The owner replaced the purge valve, and the P1457 code was resolved permanently.
8.4 Key Takeaways from the Case Studies
These case studies demonstrate the effectiveness of CAR-DIAGNOSTIC-TOOL.EDU.VN resources in diagnosing and resolving OBD2 issues; by using our diagnostic tools, repair guides, and expert support, technicians and vehicle owners can:
- Accurately Identify Issues: Quickly and accurately diagnose problems using OBD2 scanners and live data analysis.
- Follow Structured Troubleshooting Steps: Utilize detailed guides to systematically troubleshoot and resolve issues.
- Save Time and Money: Reduce diagnostic time and avoid costly repairs by addressing problems promptly and effectively.
9. Future Trends in OBD2 Technology and Diagnostics
Staying informed about future trends in OBD2 technology and diagnostics is essential for automotive professionals and enthusiasts; as technology advances, CAR-DIAGNOSTIC-TOOL.EDU.VN remains committed to providing the latest tools, training, and resources to keep you ahead of the curve.
9.1 Enhanced OBD2 Systems
Future OBD2 systems will likely feature enhanced capabilities, including more comprehensive monitoring, advanced diagnostics, and improved data access; according to a report by McKinsey & Company, the automotive industry is rapidly adopting new technologies to improve vehicle performance and safety.
9.2 Wireless OBD2 Adapters
Wireless OBD2 adapters are becoming increasingly popular, allowing you to connect your smartphone or tablet to your vehicle’s computer; these adapters provide real-time data and diagnostic information, making it easier to monitor your vehicle’s performance.
9.3 Cloud-Based Diagnostics
Cloud-based diagnostics offer several advantages, including remote access to diagnostic data, automatic updates, and collaborative troubleshooting; these systems allow technicians to access vehicle data from anywhere, making it easier to diagnose and repair complex issues.
9.4 Artificial Intelligence (AI) in Diagnostics
AI is being integrated into diagnostic tools to improve accuracy and efficiency; AI-powered diagnostic systems can analyze vast amounts of data to identify patterns and predict potential issues, according to a study by Deloitte, AI is transforming the automotive industry by improving diagnostic accuracy and reducing downtime.
9.5 Focus on Cybersecurity
As vehicles become more connected, cybersecurity is becoming a major concern; future OBD2 systems will need to incorporate robust security measures to protect against hacking and data breaches.
9.6 CAR-DIAGNOSTIC-TOOL.EDU.VN’s Commitment to Innovation
CAR-DIAGNOSTIC-TOOL.EDU.VN is committed to staying at the forefront of OBD2 technology and diagnostics; we are constantly updating our tools, resources, and training programs to ensure that you have access to the latest information and techniques.
- Investing in New Technologies: We are investing in new diagnostic tools and technologies to provide you with the best possible solutions.
- Developing Advanced Training Programs: We are developing advanced training programs to teach you how to use these new technologies effectively.
- Collaborating with Industry Experts: We are collaborating with industry experts to stay informed about the latest trends and developments.
10. Frequently Asked Questions (FAQs) About 1998 Honda CRV OBD2 Connector
Here are some frequently asked questions about the 1998 Honda CRV OBD2 connector, addressing common concerns and providing valuable insights to enhance your understanding and troubleshooting capabilities.
- Where is the OBD2 connector located in my 1998 Honda CRV?
The OBD2 connector is typically located under the dashboard on the driver’s side, near the steering column and center console. - What is the purpose of the OBD2 connector?
The OBD2 connector allows you to access your vehicle’s on-board computer system for diagnostics, maintenance, and repairs, enabling you to read diagnostic trouble codes (DTCs), monitor sensor data, and reset the check engine light. - What type of OBD2 scanner should I use with my 1998 Honda CRV?
You should use an OBD2 scanner that is compatible with the 1998 Honda CRV; consider factors like features, ease of use, and price when selecting a scanner, and professional-grade scanners provide advanced capabilities like live data streaming and bidirectional control. - What are some common OBD2 codes for the 1998 Honda CRV?
Common OBD2 codes include P0171 (System Too Lean, Bank 1), P0300 (Random/Multiple Cylinder Misfire Detected), P0420 (Catalyst System Efficiency Below Threshold), P0740 (Torque Converter Clutch Circuit Malfunction), and P1457 (Evaporative Emission Control System Leak). - How do I troubleshoot a P0171 code on my 1998 Honda CRV?
To troubleshoot a P0171 code, check for vacuum leaks, inspect the MAF sensor, and test the fuel injectors; use a smoke machine to detect vacuum leaks and a multimeter to test the sensors. - Can I clear the OBD2 codes after repairing the issue?
Yes, after addressing the issue, you can clear the OBD2 codes using your scanner to reset the check engine light; monitor the vehicle to ensure the issue does not reappear. - What are the benefits of using advanced diagnostic techniques?
Advanced diagnostic techniques, such as live data streaming and bidirectional control, can help you identify intermittent issues and pinpoint the root cause of problems more efficiently. - How can I maintain my 1998 Honda CRV OBD2 system?
Regularly inspect the OBD2 connector, wiring, and sensors; keep the connector clean and address any issues promptly to prevent further damage, also monitor sensor health and perform routine maintenance. - What resources does CAR-DIAGNOSTIC-TOOL.EDU.VN offer for OBD2 diagnostics?
CAR-DIAGNOSTIC-TOOL.EDU.VN offers comprehensive diagnostic tools, detailed repair guides, expert technical support, and technician training programs to assist you with your OBD2 needs. - How can CAR-DIAGNOSTIC-TOOL.EDU.VN help me save money on car repairs?
By providing the tools, knowledge, and support to diagnose and repair your vehicle yourself, CAR-DIAGNOSTIC-TOOL.EDU.VN helps you save money on costly repairs at the mechanic; you can perform many repairs yourself with the right tools and guidance.
Are you facing OBD2 challenges with your 1998 Honda CRV? Do you need expert guidance on diagnostics, repairs, or advanced techniques? Contact us today at +1 (641) 206-8880 or visit our website CAR-DIAGNOSTIC-TOOL.EDU.VN for comprehensive support, from detailed troubleshooting to remote assistance and training programs. Our office is located at 1100 Congress Ave, Austin, TX 78701, United States. Let CAR-DIAGNOSTIC-TOOL.EDU.VN empower you to keep your vehicle running smoothly and efficiently.