Using an OBD2 code reader can empower you to diagnose and address car issues efficiently. At CAR-DIAGNOSTIC-TOOL.EDU.VN, we provide comprehensive tools, step-by-step repair guides, and expert tech support to help you master automotive diagnostics. Explore our offerings for technician training and remote assistance to enhance your skills and provide top-notch service!
Contents
- 1. Understanding the OBD2 Code Reader
- 1.1. Key Benefits of Using an OBD2 Code Reader
- 1.2. Types of OBD2 Code Readers
- 2. Preparing to Use the OBD2 Code Reader
- 2.1. Gathering Necessary Tools
- 2.2. Locating the OBD2 Port
- 2.3. Ensuring Vehicle Readiness
- 3. Step-by-Step Guide: Connecting and Using the OBD2 Code Reader
- 3.1. Connecting the OBD2 Code Reader
- 3.2. Powering On and Navigating the Reader
- 3.3. Reading Diagnostic Trouble Codes (DTCs)
- 3.4. Understanding Freeze Frame Data
- 4. Decoding Diagnostic Trouble Codes (DTCs)
- 4.1. Structure of a DTC
- 4.2. Common DTC Categories and Examples
- 4.3. Using Online Resources for DTC Definitions
- 5. Advanced Functions: Live Data and I/M Readiness
- 5.1. Monitoring Live Data
- 5.2. Interpreting Live Data Parameters
- 5.3. Using I/M Readiness for Emission Testing
- 6. Clearing Diagnostic Trouble Codes (DTCs)
- 6.1. When to Clear Codes
- 6.2. Steps to Clear Codes
- 6.3. Potential Consequences of Clearing Codes Prematurely
- 7. Common Mistakes to Avoid When Using an OBD2 Code Reader
- 7.1. Incorrectly Connecting the Reader
- 7.2. Misinterpreting DTCs
- 7.3. Ignoring Freeze Frame Data
- 7.4. Clearing Codes Without Fixing the Problem
- 7.5. Neglecting Regular Updates
- 8. Advanced Troubleshooting and Diagnostics
- 8.1. When to Seek Professional Help
- 8.2. Using a Multimeter for Further Testing
- 8.3. Checking Sensors and Actuators
- 8.4. Performing a Compression Test
- 9. Maintaining Your OBD2 Code Reader
- 9.1. Cleaning and Storage
- 9.2. Updating Software and Firmware
- 9.3. Battery Care
- 9.4. Cable Inspection
- 10. The Future of OBD2 Technology and Automotive Diagnostics
- 10.1. Enhanced Connectivity and Integration
- 10.2. Artificial Intelligence (AI) and Machine Learning
- 10.3. Advanced Sensor Technology
- 10.4. The Role of CAR-DIAGNOSTIC-TOOL.EDU.VN
- FAQ: Frequently Asked Questions About Using OBD2 Code Readers
- 1. Can an OBD2 code reader diagnose all car problems?
- 2. Is it safe to drive with a check engine light on?
- 3. How often should I scan my car with an OBD2 code reader?
- 4. Can I use an OBD2 code reader on any car?
- 5. Will clearing the codes fix the problem?
- 6. What does “pending code” mean?
- 7. Are wireless OBD2 scanners as reliable as wired ones?
- 8. What is the difference between an OBD2 code reader and a professional scan tool?
- 9. Can an OBD2 code reader help with fuel efficiency?
- 10. Where can I get reliable training on using OBD2 code readers and automotive diagnostics?
1. Understanding the OBD2 Code Reader
What is an OBD2 code reader and how does it work? An OBD2 code reader is a diagnostic tool that accesses your vehicle’s On-Board Diagnostics system, helping you identify potential issues by reading diagnostic trouble codes (DTCs). This crucial tool allows both professional mechanics and DIY enthusiasts to pinpoint problems, saving time and money on repairs.
The OBD2 system, standardized in 1996 for all cars sold in the United States, monitors various vehicle systems, including engine, transmission, and emissions. When a problem arises, the system generates a DTC, which the OBD2 reader can retrieve. According to the Environmental Protection Agency (EPA), OBD2 systems ensure vehicles meet emission standards and provide valuable diagnostic information. Understanding how to use an OBD2 code reader is essential for efficient vehicle maintenance.
1.1. Key Benefits of Using an OBD2 Code Reader
An OBD2 code reader offers several advantages for vehicle diagnostics and maintenance:
- Cost Savings: Identify problems early to prevent expensive repairs.
- Time Efficiency: Quickly pinpoint issues without extensive manual checks.
- Informed Decisions: Understand your vehicle’s condition before visiting a mechanic.
- Preventive Maintenance: Regularly monitor your vehicle’s health to avoid breakdowns.
A study by the National Institute for Automotive Service Excellence (ASE) found that using diagnostic tools like OBD2 readers can reduce diagnostic time by up to 40%.
1.2. Types of OBD2 Code Readers
OBD2 code readers come in various forms, each catering to different needs and budgets:
- Basic Code Readers: These provide DTCs and definitions, ideal for simple diagnostics.
- Enhanced Code Readers: Offer additional features like live data streaming and freeze frame data.
- Professional Scan Tools: Used by mechanics, these tools provide advanced diagnostics, bidirectional control, and system resets.
Bluetooth OBD2 adapters, paired with smartphone apps, are also popular for their convenience and portability.
2. Preparing to Use the OBD2 Code Reader
How do you prepare your vehicle and the OBD2 code reader for a diagnostic scan? Before starting, ensure you have the correct tool and know where to locate the OBD2 port in your vehicle. This preparation is crucial for an accurate and efficient diagnostic process.
2.1. Gathering Necessary Tools
Ensure you have the following items before starting:
- OBD2 Code Reader: Select a reader that suits your needs and budget.
- Vehicle’s Manual: This will help you locate the OBD2 port and understand specific vehicle information.
- Trouble Code Definitions: Have a resource (online or physical) to look up the meaning of DTCs.
- Optional Tools: Consider having a notepad, pen, and basic repair tools handy.
2.2. Locating the OBD2 Port
The OBD2 port is typically located under the dashboard on the driver’s side. However, its exact location can vary:
- Standard Location: Under the dash, near the steering column.
- Alternative Locations: Inside the center console, under the passenger seat, or behind a panel.
Refer to your vehicle’s manual for the precise location if you’re unsure. The port is a 16-pin trapezoidal connector.
2.3. Ensuring Vehicle Readiness
Follow these steps to ensure your vehicle is ready for the scan:
- Turn off the Ignition: Ensure the engine is off before plugging in the reader.
- Check Battery Voltage: Make sure the battery is adequately charged to power the OBD2 system.
- Clear Obstructions: Ensure nothing is blocking access to the OBD2 port.
3. Step-by-Step Guide: Connecting and Using the OBD2 Code Reader
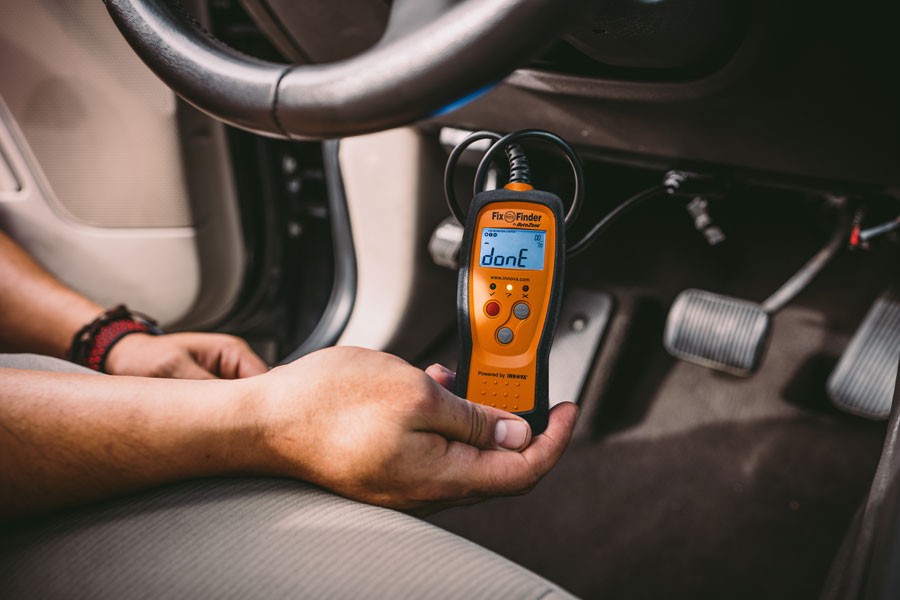
What are the exact steps for connecting and using an OBD2 code reader? Follow these steps to connect your OBD2 reader and retrieve diagnostic information from your vehicle’s computer. Proper connection and operation are vital for accurate results.
3.1. Connecting the OBD2 Code Reader
-
Ignition Off: Ensure the ignition is turned off.
-
Locate the OBD2 Port: Find the 16-pin diagnostic port in your vehicle.
-
Plug in the Reader: Align the OBD2 reader’s connector with the port and firmly push it in.
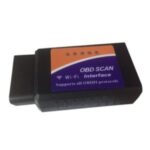
 Connecting an OBD2 scanner
3.2. Powering On and Navigating the Reader
- Turn Ignition to “On”: Turn the ignition to the “On” position without starting the engine.
- Power On the Reader: The OBD2 reader should power on automatically or require you to press a power button.
- Navigate the Menu: Use the reader’s buttons to navigate to the “Read Codes” or “Diagnostic Codes” option.
3.3. Reading Diagnostic Trouble Codes (DTCs)
- Select “Read Codes”: Choose the option to read diagnostic trouble codes.
- View DTCs: The reader will display any stored or pending codes.
- Record the Codes: Write down each code and its description for later analysis.
3.4. Understanding Freeze Frame Data
- Access Freeze Frame: Navigate to the “Freeze Frame” option in the menu.
- Review Data: This data provides a snapshot of the vehicle’s parameters when the DTC was triggered, such as engine speed, coolant temperature, and fuel trim.
- Analyze the Information: Use this data to better understand the conditions under which the fault occurred.
4. Decoding Diagnostic Trouble Codes (DTCs)
How do you interpret the diagnostic trouble codes provided by the OBD2 reader? Understanding the structure and meaning of DTCs is essential for accurate diagnosis. Each code provides specific information about the nature and location of the problem.
4.1. Structure of a DTC
DTCs consist of five characters: a letter followed by four numbers. The letter indicates the system, and the numbers provide specific fault information.
- First Character:
- P: Powertrain (engine, transmission)
- B: Body (airbags, interior)
- C: Chassis (suspension, brakes)
- U: Network (communication)
- Second Character:
- 0: Generic (SAE) code
- 1: Manufacturer-specific code
- Third Character: Indicates the subsystem
- Fourth and Fifth Characters: Specific fault within the subsystem
4.2. Common DTC Categories and Examples
| Category | Code Example | Description |
|---|---|---|
| Powertrain | P0300 | Random/Multiple Cylinder Misfire Detected |
| Emission System | P0420 | Catalyst System Efficiency Below Threshold (Bank 1) |
| Fuel System | P0171 | System Too Lean (Bank 1) |
| Transmission | P0700 | Transmission Control System Malfunction |
| Body | B1000 | ECU Internal Failure |
| Chassis | C0035 | Right Front Wheel Speed Sensor Circuit |
| Network Communication | U0100 | Lost Communication With ECM/PCM |
4.3. Using Online Resources for DTC Definitions
Several online databases provide detailed information on DTC definitions. Reputable sources include:
- CAR-DIAGNOSTIC-TOOL.EDU.VN: Offers comprehensive DTC guides and troubleshooting tips.
- National Highway Traffic Safety Administration (NHTSA): Provides safety information and technical specifications.
- OBD-Codes.com: A comprehensive resource for OBD2 codes and their meanings.
5. Advanced Functions: Live Data and I/M Readiness
What advanced functions do OBD2 code readers offer, such as live data streaming and I/M readiness checks? Advanced functions provide deeper insights into your vehicle’s performance and readiness for emission testing, enhancing your diagnostic capabilities.
5.1. Monitoring Live Data
Live data allows you to monitor real-time sensor readings from your vehicle’s engine and other systems. This can help identify intermittent issues or confirm the operation of specific components.
- Access Live Data: Navigate to the “Live Data” or “Data Stream” option on your OBD2 reader.
- Select Parameters: Choose the parameters you want to monitor, such as engine RPM, coolant temperature, and O2 sensor voltage.
- Analyze Data: Observe the data as you operate the vehicle, looking for anomalies or out-of-range values.
5.2. Interpreting Live Data Parameters
Common live data parameters and their typical ranges:
| Parameter | Unit | Normal Range |
|---|---|---|
| Engine RPM | RPM | 600-800 (idle), up to redline under acceleration |
| Coolant Temperature | °F | 180-220 (normal operating temperature) |
| O2 Sensor Voltage | V | 0.1-0.9 (fluctuating) |
| MAF Sensor | g/s | 2-10 (idle), increases with throttle |
| Fuel Trim | % | -10 to +10 (adjusts fuel mixture) |
5.3. Using I/M Readiness for Emission Testing
I/M Readiness (Inspection and Maintenance) checks indicate whether your vehicle is ready for an emissions test. This function confirms that all required diagnostic systems have run and passed their tests.
- Access I/M Readiness: Navigate to the “I/M Readiness” option on your reader.
- Check Status: The reader will display the status of various emission-related systems, such as:
- Misfire Monitor
- Fuel System Monitor
- Comprehensive Components Monitor
- Catalyst Monitor
- EVAP System Monitor
- O2 Sensor Monitor
- O2 Sensor Heater Monitor
- Interpret Results: Ensure all systems show as “Ready” or “Complete” to pass an emissions test. If any system shows as “Not Ready” or “Incomplete,” further diagnostics and driving may be required.
6. Clearing Diagnostic Trouble Codes (DTCs)
When and how should you clear DTCs after addressing the underlying issues? Clearing DTCs is an important step, but it should only be done after you’ve properly diagnosed and repaired the problem.
6.1. When to Clear Codes
- After Repair: Only clear codes after you have fixed the issue causing the DTC.
- Verification: Ensure the problem is resolved by test driving the vehicle and re-scanning for codes.
6.2. Steps to Clear Codes
- Access “Clear Codes”: Navigate to the “Clear Codes” or “Erase Codes” option on your OBD2 reader.
- Confirm Selection: The reader may ask you to confirm your selection.
- Clear Codes: Follow the prompts to clear the codes from the vehicle’s computer.
- Verify Clearance: Re-scan the vehicle to ensure the codes have been cleared and do not reappear.
6.3. Potential Consequences of Clearing Codes Prematurely
- Misleading Diagnostics: Clearing codes before fixing the problem can mask underlying issues.
- Failed Emission Tests: Clearing codes shortly before an emissions test can result in a “Not Ready” status.
- Recurring Problems: The issue will likely return if the underlying cause is not addressed.
7. Common Mistakes to Avoid When Using an OBD2 Code Reader
What are some common mistakes people make when using OBD2 code readers, and how can you avoid them? Avoiding common pitfalls ensures accurate diagnostics and prevents potential damage to your vehicle’s systems.
7.1. Incorrectly Connecting the Reader
- Mistake: Forcing the connector into the port or using excessive force.
- Solution: Ensure the connector is properly aligned and gently push it in.
- Consequence: Damaged pins in the OBD2 port or connector.
7.2. Misinterpreting DTCs
- Mistake: Assuming a DTC automatically identifies the faulty component.
- Solution: Use the DTC as a starting point for further diagnostics and testing.
- Consequence: Replacing the wrong parts and failing to fix the underlying issue.
7.3. Ignoring Freeze Frame Data
- Mistake: Only reading the DTC without analyzing the freeze frame data.
- Solution: Review the freeze frame data to understand the conditions when the DTC was triggered.
- Consequence: Missing valuable clues about the cause of the problem.
7.4. Clearing Codes Without Fixing the Problem
- Mistake: Clearing codes without addressing the underlying issue.
- Solution: Diagnose and repair the problem before clearing the codes.
- Consequence: The problem will return, and you may fail an emissions test.
7.5. Neglecting Regular Updates
- Mistake: Not updating the OBD2 reader’s software or firmware.
- Solution: Regularly check for and install updates to ensure accurate and current diagnostic information.
- Consequence: Inaccurate or incomplete DTC definitions.
8. Advanced Troubleshooting and Diagnostics
When should you seek professional help, and what advanced troubleshooting steps can you take? For complex issues, professional assistance is invaluable. However, advanced DIY diagnostics can help you narrow down the problem.
8.1. When to Seek Professional Help
- Complex DTCs: If you encounter DTCs that require specialized knowledge or tools.
- Intermittent Issues: If the problem is difficult to reproduce or diagnose.
- Lack of Experience: If you are uncomfortable performing certain diagnostic or repair procedures.
8.2. Using a Multimeter for Further Testing
A multimeter can be used to test the voltage, resistance, and continuity of electrical components, helping you pinpoint the source of a problem.
- Gather Information: Consult the vehicle’s service manual for wiring diagrams and component specifications.
- Set Up Multimeter: Select the appropriate setting (voltage, resistance, or continuity) on the multimeter.
- Perform Tests: Follow the service manual’s instructions to test the components and wiring.
- Interpret Results: Compare the readings to the specifications to identify faulty components or wiring issues.
8.3. Checking Sensors and Actuators
- Identify Components: Locate the sensors and actuators related to the DTC.
- Inspect Connections: Check for loose, corroded, or damaged connections.
- Test Components: Use a multimeter or scan tool to test the operation of the sensors and actuators.
- Replace Faulty Components: If a component fails the test, replace it with a new one.
8.4. Performing a Compression Test
A compression test can help diagnose engine problems such as worn piston rings or leaky valves.
- Disable Ignition and Fuel: Disconnect the ignition and fuel systems to prevent the engine from starting.
- Remove Spark Plugs: Remove all the spark plugs from the engine.
- Insert Compression Tester: Insert the compression tester into one of the spark plug holes.
- Crank Engine: Crank the engine for several seconds with the throttle wide open.
- Record Reading: Record the compression reading on the tester.
- Repeat for All Cylinders: Repeat the test for all cylinders and compare the readings.
9. Maintaining Your OBD2 Code Reader
How should you properly maintain your OBD2 code reader to ensure its longevity and accuracy? Proper maintenance ensures your tool remains reliable and effective for years to come.
9.1. Cleaning and Storage
- Cleaning: Wipe the reader with a soft, dry cloth to remove dirt and grime.
- Storage: Store the reader in a clean, dry place away from extreme temperatures and moisture.
9.2. Updating Software and Firmware
- Check for Updates: Regularly check the manufacturer’s website for software and firmware updates.
- Install Updates: Follow the instructions to install the updates, which can improve performance and add new features.
9.3. Battery Care
- Replace Batteries: If your reader uses batteries, replace them as needed to ensure reliable operation.
- Charging: If your reader has a rechargeable battery, follow the charging instructions to maximize battery life.
9.4. Cable Inspection
- Check Cables: Inspect the cables for damage such as cuts, frayed wires, or loose connections.
- Replace Cables: Replace damaged cables to prevent communication issues.
10. The Future of OBD2 Technology and Automotive Diagnostics
What advancements are on the horizon for OBD2 technology and automotive diagnostics? The future holds exciting developments that will make diagnostics even more accessible and efficient.
10.1. Enhanced Connectivity and Integration
- Cloud-Based Diagnostics: Future OBD2 systems will likely integrate with cloud-based platforms, providing access to vast databases of diagnostic information and repair procedures.
- Smartphone Integration: Enhanced smartphone apps will offer more advanced diagnostic features and real-time data analysis.
- Wireless Communication: Improved wireless communication will allow for remote diagnostics and over-the-air updates.
10.2. Artificial Intelligence (AI) and Machine Learning
- Predictive Maintenance: AI and machine learning algorithms will analyze vehicle data to predict potential problems before they occur.
- Automated Diagnostics: AI-powered diagnostic tools will provide step-by-step troubleshooting instructions and automated repair recommendations.
10.3. Advanced Sensor Technology
- More Comprehensive Monitoring: Future vehicles will incorporate more sophisticated sensors to monitor a wider range of parameters.
- Early Detection: Advanced sensors will detect subtle changes in vehicle performance, allowing for early detection of potential problems.
10.4. The Role of CAR-DIAGNOSTIC-TOOL.EDU.VN
CAR-DIAGNOSTIC-TOOL.EDU.VN is committed to staying at the forefront of automotive diagnostic technology. We offer:
- Up-to-Date Training: Comprehensive training programs to help technicians master the latest diagnostic techniques.
- Advanced Tools: Access to cutting-edge OBD2 tools and diagnostic equipment.
- Expert Support: Expert technical support to assist with complex diagnostic challenges.
By embracing these advancements, CAR-DIAGNOSTIC-TOOL.EDU.VN aims to empower technicians and DIY enthusiasts to diagnose and repair vehicles more efficiently and effectively.
FAQ: Frequently Asked Questions About Using OBD2 Code Readers
1. Can an OBD2 code reader diagnose all car problems?
While an OBD2 code reader is a valuable tool, it can’t diagnose every car problem. It primarily reads codes related to the engine, transmission, emissions, and basic electrical systems. For issues like suspension, brakes, or specific body control functions, additional diagnostic tools may be necessary. However, it’s an excellent starting point for identifying potential problems.
2. Is it safe to drive with a check engine light on?
Driving with a check engine light on depends on the severity of the issue. If the light is flashing, it indicates a serious problem, such as an engine misfire, which can cause significant damage if ignored. In this case, it’s best to stop driving and seek immediate professional help. If the light is solid, it’s generally safe to drive, but you should still diagnose and address the issue as soon as possible to prevent further damage.
3. How often should I scan my car with an OBD2 code reader?
You should scan your car with an OBD2 code reader whenever the check engine light comes on or if you notice any unusual symptoms such as rough idling, decreased fuel efficiency, or strange noises. Regular scans, even without noticeable issues, can help catch minor problems before they escalate into major repairs.
4. Can I use an OBD2 code reader on any car?
OBD2 code readers are compatible with all cars and light trucks sold in the United States since 1996, as mandated by the EPA. However, older vehicles may require an OBD1 reader, which is different from OBD2. Also, some advanced features may not be supported on all vehicles, depending on the vehicle’s make, model, and year.
5. Will clearing the codes fix the problem?
Clearing the codes will not fix the underlying problem. It only erases the diagnostic trouble codes from the vehicle’s computer. The check engine light will likely reappear if the issue is not properly diagnosed and repaired. Always address the root cause of the problem before clearing the codes.
6. What does “pending code” mean?
A “pending code” indicates that the OBD2 system has detected a potential problem, but it hasn’t yet met the criteria to trigger the check engine light. These codes can provide an early warning of an issue that may need attention. Monitoring pending codes can help you address problems before they become more serious.
7. Are wireless OBD2 scanners as reliable as wired ones?
Wireless OBD2 scanners, especially those using Bluetooth or Wi-Fi, can be as reliable as wired ones, provided they are from reputable brands and properly maintained. They offer the advantage of convenience, allowing you to monitor data on your smartphone or tablet. However, ensure that the wireless connection is stable to avoid interruptions during diagnostics.
8. What is the difference between an OBD2 code reader and a professional scan tool?
An OBD2 code reader is a basic tool that reads and clears diagnostic trouble codes. A professional scan tool, on the other hand, offers advanced features such as bidirectional control, live data streaming, component testing, and access to manufacturer-specific codes. Professional scan tools are typically used by mechanics and technicians for more in-depth diagnostics and repairs.
9. Can an OBD2 code reader help with fuel efficiency?
Yes, an OBD2 code reader can help with fuel efficiency by identifying issues that may be affecting your car’s performance, such as a faulty oxygen sensor or a malfunctioning mass airflow sensor. By addressing these problems, you can improve your car’s fuel efficiency and reduce emissions. Monitoring live data can also help you identify driving habits that may be contributing to poor fuel economy.
10. Where can I get reliable training on using OBD2 code readers and automotive diagnostics?
CAR-DIAGNOSTIC-TOOL.EDU.VN offers comprehensive training programs on using OBD2 code readers and advanced automotive diagnostics. Our courses are designed for both beginners and experienced technicians, providing hands-on training and expert instruction to enhance your skills and knowledge. Contact us today to learn more about our training programs and how we can help you advance your career.
Understanding how to use an OBD2 code reader is the first step in taking control of your vehicle’s maintenance. With the right tools and knowledge, you can diagnose and address many common car problems, saving time and money. For advanced diagnostics, training, and expert support, turn to CAR-DIAGNOSTIC-TOOL.EDU.VN.
Ready to take control of your vehicle’s diagnostics and repairs? Contact CAR-DIAGNOSTIC-TOOL.EDU.VN today for expert guidance, advanced tools, and comprehensive training programs. Our team is here to help you enhance your skills, improve your diagnostic accuracy, and save on costly repairs. Reach out now for a consultation and discover how our services can transform your approach to automotive maintenance.
Contact us today!
Address (U.S. Support Office): 1100 Congress Ave, Austin, TX 78701, United States
WhatsApp: +1 (641) 206-8880
Website: CAR-DIAGNOSTIC-TOOL.EDU.VN